Difference between revisions of "The Adventurers"
(→Adventurers in the Media) |
(→Story Arcs) |
||
| (248 intermediate revisions by 9 users not shown) | |||
| Line 4: | Line 4: | ||
| motto = | | motto = | ||
| image = AdventurersCollage1.png | | image = AdventurersCollage1.png | ||
| − | | caption = | + | | caption = The Adventurers team as of February 2024 |
| − | | leaders = | + | | leaders = Webcrawler |
| − | | base = | + | | base = Hidden inner-city HQ complex |
| concept = Classic costumed heroes & street fighters fighting gangs & organized crime. | | concept = Classic costumed heroes & street fighters fighting gangs & organized crime. | ||
| − | | founded = | + | | founded = 13 February 2014 |
| − | | members = | + | | members = |
| footnotes = | | footnotes = | ||
|}} | |}} | ||
| Line 15: | Line 15: | ||
'''The Adventurers''' is a team of costumed heroes from Millennium City. Small in number, but strong in determination and skill, they work together to keep the city safe. | '''The Adventurers''' is a team of costumed heroes from Millennium City. Small in number, but strong in determination and skill, they work together to keep the city safe. | ||
| + | <BR><BR><BR><BR><BR><BR><BR><BR><BR><BR><BR><BR><BR><BR><BR><BR> | ||
=Adventurers Team Roster= | =Adventurers Team Roster= | ||
| − | |||
<center>'''Primary Adventurers''' | <center>'''Primary Adventurers''' | ||
<gallery mode=packed-overlay heights=400px> | <gallery mode=packed-overlay heights=400px> | ||
| − | |||
File:Adventurer_BlueFox.png|[[Blue Fox|<span style="color:#C69D21">Blue Fox</span>]] | File:Adventurer_BlueFox.png|[[Blue Fox|<span style="color:#C69D21">Blue Fox</span>]] | ||
File:Adventurer_Catfight.png|[[Catfight|<span style="color:#C69D21">Catfight</span>]] | File:Adventurer_Catfight.png|[[Catfight|<span style="color:#C69D21">Catfight</span>]] | ||
| − | File: | + | File:Adventurer_Firewalker.png|[[Firewalker|<span style="color:#C69D21">Firewalker</span>]] |
| − | File: | + | File:Adventurer_Stretcher.png|[[Rubber Bullette|<span style="color:#C69D21">Rubber Bullette</span>]] |
| − | File: | + | File:Adventurer Mantle.png|[[Mantle|<span style="color:#C69D21">Mantle</span>]] |
| + | File:Adventurer Osprey.png|[[Osprey_(@RobinVI)|<span style="color:#C69D21">Osprey</span>]] | ||
| + | File:Adventurer PowerChord.png|[[Power-Chord|<span style="color:#C69D21">Power-Chord</span>]] | ||
| + | File:Adventurer_Scath5.png|[[Scatha 5|<span style="color:#C69D21">Scatha 5</span>]] | ||
File:Adventurer_Sombra.png|[[Sombra|<span style="color:#C69D21">Sombra</span>]] | File:Adventurer_Sombra.png|[[Sombra|<span style="color:#C69D21">Sombra</span>]] | ||
| − | File: | + | File:Adventurer_Spectrum.png|[[Spectrum_(@Skyrimhogwarts)|<span style="color:#C69D21">Spectrum</span>]] |
| − | File: | + | File:Adventurer Stinger.png|[[Stinger|<span style="color:#C69D21">Stinger</span>]] |
| + | File:Histo_Webcrawler.png|[[Webcrawler|<span style="color:#C69D21">Webcrawler</span>]] | ||
| + | File:Adventurer Windchill.png|[[Windchill|<span style="color:#C69D21">Windchill</span>]] | ||
</gallery> | </gallery> | ||
| − | '''Not pictured:''' | + | '''Not pictured:''' Martyr, Pathfinder, Red Wren</center> |
| − | + | ||
| − | + | ||
<center> | <center> | ||
| − | + | <HR width="60%"> | |
| − | '''Recruits''' | + | <br>'''Recruits''' |
<gallery mode=packed-overlay heights=400px> | <gallery mode=packed-overlay heights=400px> | ||
| + | File:Adventurer Jet Star.png|[[Jet Star|<span style="color:#C69D21">Jet Star</span>]] | ||
| + | |||
</gallery> | </gallery> | ||
| + | |||
| + | '''Not pictured:''' N/A | ||
</center> | </center> | ||
| − | + | <center> | |
| − | <center> | + | |
| − | + | ||
| − | + | ||
<HR width="60%"> | <HR width="60%"> | ||
<br>'''Adventurers Reserve''' | <br>'''Adventurers Reserve''' | ||
These heroes turn up to help once in a while. | These heroes turn up to help once in a while. | ||
| + | |||
<gallery> | <gallery> | ||
| − | File: | + | File:Adventurer Azure Hawk.png|[[Azure Hawk|<span style="color:#C69D21">Azure Hawk</span>]] |
| − | File: | + | File:Adventurer Courser.png|[[Courser|<span style="color:#C69D21">Courser</span>]] |
| − | + | File:Histo replica.png|[[Replica|<span style="color:#C69D21">Replica</span>]] | |
| − | + | File:Adventurer Silver Hare.png|[[Silver Hare|<span style="color:#C69D21">Silver Hare</span>]] | |
| − | + | File:Adventurer Trespasser.png|[[Trespasser|<span style="color:#C69D21">Trespasser</span>]] | |
| − | File:Adventurer | + | File:Adventurer_Tungstan.png|[[Tungstan|<span style="color:#C69D21">Tungstan</span>]] |
| − | File: | + | |
| − | + | ||
</gallery> | </gallery> | ||
</center> | </center> | ||
| + | |||
| + | <center>'''Not pictured:''' Oni</center> | ||
<center><HR width="60%"></center> | <center><HR width="60%"></center> | ||
| Line 74: | Line 79: | ||
<gallery> | <gallery> | ||
| + | File:Adventurer Meltdowner.png|[[Meltdowner|<span style="color:#C69D21">Meltdowner</span>]] | ||
| + | File:Adventurer_Blitz.png|[[Blitz|<span style="color:#C69D21">Blitz</span>]] | ||
| + | File:Adventurer_Doormaker.PNG|[[Doormaker|<span style="color:#C69D21">Doormaker</span>]] | ||
File:Artisan_New.PNG|[[Artisan (Female)|<span style="color:#C69D21">Artisan</span>]] | File:Artisan_New.PNG|[[Artisan (Female)|<span style="color:#C69D21">Artisan</span>]] | ||
| + | File:Adventurer_Black_Bird.png|[[Black Bird|<span style="color:#C69D21">Black Bird</span>]] | ||
image:dreamnew.png|[[Dreamweaver|<span style="color:#C69D21">Dreamweaver</span>]] | image:dreamnew.png|[[Dreamweaver|<span style="color:#C69D21">Dreamweaver</span>]] | ||
| + | image:Adventurer Hornett.jpg|[[Hornett|<span style="color:#C69D21">Hornett</span>]] | ||
File:Adventurer-InfinityZero.png|[[Infinity-Zero|<span style="color:#C69D21">Infinity-Zero</span>]] | File:Adventurer-InfinityZero.png|[[Infinity-Zero|<span style="color:#C69D21">Infinity-Zero</span>]] | ||
| + | File:Joule1.jpg|[[Vortex|<span style="color:#C69D21">Joule</span>]] | ||
| + | image:Adventurer LadyJ.jpg|[[Lady Justice|<span style="color:#C69D21">Lady Justice</span>]] | ||
image:AdventurerJuggernette.png|[[Juggernette|<span style="color:#C69D21">Juggernette</span>]] | image:AdventurerJuggernette.png|[[Juggernette|<span style="color:#C69D21">Juggernette</span>]] | ||
File:Adventurer Stormherald.png|[[Stormherald|<span style="color:#C69D21">Stormherald</span>]] | File:Adventurer Stormherald.png|[[Stormherald|<span style="color:#C69D21">Stormherald</span>]] | ||
File:Knightshadow.jpg|[[Knightshadow|<span style="color:#C69D21">Knightshadow</span>]] | File:Knightshadow.jpg|[[Knightshadow|<span style="color:#C69D21">Knightshadow</span>]] | ||
File:Adventurer_Phantasm.png|[[Phantasm|<span style="color:#C69D21">Phantasm</span>]] | File:Adventurer_Phantasm.png|[[Phantasm|<span style="color:#C69D21">Phantasm</span>]] | ||
| + | File:Adventurer_ScarletShield.png|[[Scarlet Shield|<span style="color:#C69D21">Scarlet Shield</span>]] | ||
| + | File:Adventurer_Screech_Owl.png|[[Screech Owl|<span style="color:#C69D21">Screech Owl</span>]] | ||
| + | File:Adventurer_SparrowHawk.png|[[Sparrow Hawk|<span style="color:#C69D21">Sparrow Hawk</span>]] | ||
| + | File:Adventurer_Steel_Dragon.png|[[Steel Dragon|<span style="color:#C69D21">Steel Dragon</span>]] | ||
| + | file:Adventurer Fox.jpg|[[Fox|<span style="color:#C69D21">Fox</span>]] | ||
| + | File:Adventurer Vortex.png|[[Vortex|<span style="color:#C69D21">Vortex</span>]] | ||
| + | File:Adventurer_Voltage.png|[[Voltage|<span style="color:#C69D21">Voltage</span>]] | ||
</gallery> | </gallery> | ||
</center> | </center> | ||
| − | = | + | =Squads= |
| − | + | Starting in fall of 2022, the team was subdivided into two sub-groups, each with a captain, called squads. The squad leaders (first on the left of each below) chose their teams for whatever mission types they felt they could best specialize in, and were invested with authority to make decisions as needed for their squad. | |
| − | + | It was the hope of Webcrawler that each squad could, with their unique make-ups and leader styles, excel on adventures and missions suited to them. | |
| + | ==Current Squads== | ||
| − | = | + | {| class="wikitable" |
| + | |- | ||
| + | |- style="background-color:#032D9D;" | ||
| + | | <span style="color:#FFFFFF">ADVENTURERS BLUE</span> | ||
| + | | <center>[[File:Adventurer_BlueFox.png|x200px]]<br>[[Blue Fox|<span style="color:#C69D21">Blue Fox</span>]]</center> || <center>[[File:Adventurer Courser.png|x200px]]<br>[[Courser|<span style="color:#C69D21">Courser</span>]]</center> || [[File:Adventurer_Sombra.png|x200px]]<br><center>[[Sombra|<span style="color:#C69D21">Sombra</span></center>]] || <center>[[File:Adventurer Windchill.png|x200px]]<BR>[[Windchill|<span style="color:#C69D21">Windchill</span>]]</center> || <center>[[File:Adventurer Scath5.png|x200px]]<BR>[[Scatha 5|<span style="color:#C69D21">Scatha 5</span>]]</center> || <center>[[File:Adventurer_Tungstan.png|x200px]]<BR>[[Tungstan|<span style="color:#C69D21">Tungstan</span>]]</center> || <center><BR>[[Pathfinder|<span style="color:#C69D21">Pathfinder</span>]]</center> | ||
| + | |- style="background-color:#9F3318;" | ||
| + | | <span style="color:#FFFFFF">ADVENTURERS RED</span> | ||
| + | | <center>[[File:Bullettefist.jpg|x200px]]<br>[[Rubber Bullette|<span style="color:#5083F7">Rubber Bullette</span>]]</center> || [[File:FirewalkerPRIMUS.png|x200px]]<BR><CENTER>[[Firewalker|<span style="color:#5083F7">Firewalker</span>]]</center> || <center>[[File:Adventurer Osprey.png|x200px]]<BR>[[Osprey_(@RobinVI)|<span style="color:#5083F7">Osprey</span>]]</center> || [[File:Adventurer Mantle.png|x200px]]<br><center>[[Mantle|<span style="color:#5083F7">Mantle</span>]]</center> || <center><BR>[[Red Wren|<span style="color:#5083F7">Red Wren</span>]]</center> || <center>[[File:Adventurer Stinger.png|x200px]]<BR>[[Stinger|<span style="color:#5083F7">Stinger</span>]]</center> || <center>[[File:Adventurer Azure Hawk.png|x200px]]<BR>[[Azure Hawk|<span style="color:#5083F7">Azure Hawk</span>]]</center> || <center>[[File:Adventurer PowerChord.png|x200px]]<BR>[[Power-Chord|<span style="color:#5083F7">Power-Chord</span>]]</center> | ||
| + | |} | ||
| − | + | ==Previous Squads== | |
| + | '''March '23 - Sept. '23''' | ||
| − | + | {| class="wikitable" | |
| + | |- | ||
| + | |- style="background-color:#281B83;" | ||
| + | | <span style="color:#FFFFFF">ADVENTURERS MIDNIGHT</span> | ||
| + | | <center>[[File:Adventurer Catfight.png|x200px]]<br>[[Catfight|<span style="color:#C69D21">Catfight</span>]]</center> || [[File:Adventurer_Sombra.png|x200px]]<br><center>[[Sombra|<span style="color:#C69D21">Sombra</span></center>]] || [[File:Adventurer Mantle.png|x200px]]<br><center>[[Mantle|<span style="color:#C69D21">Mantle</span>]]</center> || [[File:Adventurer_BlueFox.png|x200px]]<br><center>[[Blue Fox|<span style="color:#C69D21">Blue Fox</span>]]</center> || [[File:Bullettefist.jpg|x200px]]<br><center>[[Rubber Bullette|<span style="color:#C69D21">Rubber Bullette</span>]]</center> | ||
| + | |- style="background-color:#B81E0B;" | ||
| + | | <span style="color:#FFFFFF">ADVENTURERS CRIMSON</span> | ||
| + | | [[File:FirewalkerPRIMUS.png|x200px]]<BR><CENTER>[[Firewalker|<span style="color:#5083F7">Firewalker</span>]]</center> || <center>[[File:Adventurer Osprey.png|x200px]]<BR>[[Osprey_(@RobinVI)|<span style="color:#5083F7">Osprey</span>]]</center> || <center>[[File:Adventurer PowerChord.png|x200px]]<BR>[[Power-Chord|<span style="color:#5083F7">Power-Chord</span>]]</center> || <center>[[File:Adventurer Scath5.png|x200px]]<BR>[[Scatha 5|<span style="color:#5083F7">Scatha 5</span>]]</center> || <center>[[File:Adventurer Windchill.png|x200px]]<BR>[[Windchill|<span style="color:#5083F7">Windchill</span>]]</center> | ||
| + | |} | ||
| − | + | '''Sept. '22 - March '23''' | |
| − | === | + | {| class="wikitable" |
| − | + | |- | |
| + | |- style="background-color:#D5D5D5;" | ||
| + | | <span style="color:#FFFFFF">ADVENTURERS SILVER</span> | ||
| + | | [[File:Adventurer Courser.png|x200px]]<br><center>[[Courser|<span style="color:#C69D21">Courser</span>]]</center> || [[File:Adventurer_Sombra.png|x200px]]<br><center>[[Sombra|<span style="color:#C69D21">Sombra</span></center>]] || [[File:Adventurer_Voltage.png|x200px]]<br><center>[[Voltage|<span style="color:#C69D21">Voltage</span>]]</center> || [[File:Adventurer_BlueFox.png|x200px]]<br><center>[[Blue Fox|<span style="color:#C69D21">Blue Fox</span>]]</center> || [[File:Adventurer_Osprey.png|x200px]]<br><center>[[Osprey_(@RobinVI)|<span style="color:#C69D21">Osprey</span>]]</center> | ||
| + | |- style="background-color:#C8C342;" | ||
| + | | <span style="color:#FFFFFF">ADVENTURERS GOLD</span> | ||
| + | | [[File:Adventurer_Tungstan.png|x200px]]<BR><CENTER>[[Tungstan|<span style="color:#5083F7">Tungstan</span>]]</center> || <center>[[File:Adventurer Stinger.png|x200px]]<BR>[[Stinger|<span style="color:#5083F7">Stinger</span>]]</center> || <center>[[File:Adventurer Scath5.png|x200px]]<BR>[[Scatha 5|<span style="color:#5083F7">Scatha 5</span>]]</center> || [[File:Adventurer-Firewalker.png|x200px]]<br><center>[[Firewalker|<span style="color:#5083F7">Firewalker</span>]]</center> | ||
| + | |} | ||
| − | + | ==OOC notes on squads== | |
| + | Squads might change up to twice per year. For their first run, they tended to run for six month periods between equinoxes (September and March), but may be suspended occasionally as leadership may deem necessary. | ||
| − | + | New captains will be chosen weeks prior to each squadding. Captains can select at least 4 other heroes to serve on their squad, with the assent of those members and the final approval by the team leader. | |
| − | + | ||
| − | + | The purpose of squads is not to be exclusive; anyone can help out. The team as a whole may be called together regardless of squad as needed. Squads might also work together OOC to make RP stories for other team members to play in. | |
| − | + | =Story Arcs= | |
| − | The | + | The following is presented as summaries of the Adventurers as if it were based on an actual comic book. |
| − | === | + | <div align="center"; style="height:25em; width:1250px; overflow:auto; border: 2px solid #088"> |
| − | + | {| class="wikitable" | |
| + | ! style="width:10em;" | Arc | ||
| + | ! style="width:5em;" | Issue | ||
| + | ! style="width:3em;" | Title | ||
| + | ! style="width:50em;" | Story | ||
| + | ! style="width:3em;" | Villain(s) | ||
| + | |- | ||
| + | | Vorpal's Dozen | ||
| + | | '''Blue Squad #18 (Finale)''' | ||
| + | | "Four Leaf Clover" | ||
| + | | Abruptly, Vorpal manages to find the hideout being used by Biker's Dozen. It's a derelict bar in the seediest part of Westside. She calls Blue Squad, after having made herself known in their group text chat, and Wizard is also alerted. When asked how she managed to find it, Vorpal dodges the inquiry and keeps the details vague. | ||
| − | + | Sombra stealthily infiltrates the building and finds an unconscious and badly injured Vyle restrained and connected to many IV's. The Bakers are harvesting his blood to manufacture a new, powerful drug, combining it with a strain of street level draysha gas, supplied to them by Grey Raccoon. The so-called 'Four Leaf Clover' drastically improves durability and strength, on top of being extremely addictive. Additionally, it turns is users red and hulking, not unlike Vyle in appearance. | |
| − | + | ||
| − | + | ||
| − | + | ||
| − | + | ||
| − | + | As planned, Wizard busts in through a window. Vorpal takes the front door, followed by Windchill. Blue Fox sneaks in to get a read on the situation. Chaos erupts, and many of the Bakers partake of Four Leaf Clover to gain an edge on the Adventurers and friends. The heroes are gradually overwhelmed and overpowered by Baker and this newly gotten power when Vorpal goes into a rage, and loses control. She sends out a powerful telekinetic, area of effect shockwave and forcibly causes a reaction in the Baker's replicator devices to 'desummon' them. | |
| − | + | One tries to slip away, but is ultimately caught by Windchill. Sombra frees Vyle, and Wizard eliminates vast traces of this new drug, and prepares the rest for evidence. After all is said and done, the police arrive, and Detective Knight meets Vorpal. They have an uneasy conversation, but manage to come to peace with one another. | |
| − | + | Vorpal leaves on good terms with Blue Squad, and insists that they call upon her should they ever need the help, but her origins and background remain an utter mystery to the team. | |
| − | + | ||
| − | + | | Baker's Dozen, Grey Raccoon [not seen] | |
| − | + | |- | |
| + | | Vorpal's Dozen | ||
| + | | '''Blue Squad #17''' | ||
| + | | "Raving Mad" | ||
| + | | Blue Squad is summoned by Detective Knight to talk about a brewing gang war. "One Man Biker Gang", Baker's Dozen, is making aggressive and successful power plays for territory, striking out in particular at the Cobra Lords Biker Gang among many others. Knight explains that Baker is also searching for new drugs to manufacture in order to financially outperform his competitors. | ||
| − | + | Intel suggests that a Purple Gang, or associate thereof, has access to a new designer drug that has caught Baker's interest. Knight explains that a rave being put on by the Scrappers gang of cyberpunks will likely have Purple Gangsters in attendance, and that Baker is also suspected to attend in order to make a deal for this mysterious new drug, or most likely, violently claim it. | |
| − | + | To complicate matters further, the MCPD has been on the tail of a mysterious new vigilante. They have taken to calling her 'Vorpal,' more living weapon than person. Vorpal has been feverishly harassing and delaying Baker's Dozen's progress, and their confrontations have led to excessive collateral damage, civilian injuries, and even the deaths of some Baker variants. Knight implores the team to look into the matter and see if Vorpal can be reined in, or if she needs to be apprehended. | |
| − | + | ||
| − | + | Blue Squad decides to attend the rave to try and stop this new drug from circulating, to capture Baker's Dozen, and to make contact with Vorpal. At the rave, Blue Fox and Martyr go undercover as ravers. Sombra and Windchill post up outside to try and spot Vorpal or to contain the potentially volatile situation. | |
| − | + | Vorpal arrives, and is quickly met by Windchill. He greets her diplomatically, and tries to get her to settle and join Blue Squad's efforts, at least temporarily, but she stubbornly presses on inside. Meanwhile, the club inside is riddled with Purple Gangsters, Scrappers, and eventually Baker's Dozen. An undercover Martyr makes contact with a supposedly demonic Purple Gang member during the investigation named 'Vyle Lyle,' an old foe of the Adventurers | |
| − | + | During a quiet moment, an inebriated Vyle announces that BZB, the sought-after new street drug, is manufactured using his blood, to the great disgust of all ravers, everwhere. Baker moves in to try an apprehend Vyle, and the confrontation is taken to a backroom where a number of Scrappers take offense at Baker's meddling. Despite Blue Squad's best efforts, a fight breaks out, just as Vorpal storms inside, followed by Windchill. | |
| − | + | ||
| − | ! | + | Martyr finds himself in a three way fight between the Scrappers, Bakers, and the super strong and durable Vyle. Martyr is overloaded with painergy at the brutal onslaught. Blue Fox stays on the dance floor, battling Bakers with members of the Scrappers gang as reluctant allies. While monitoring Vorpal, Windchill is gravely injured by a shotgun blast from one of the many Bakers. |
| − | ! | + | |
| − | ! | + | In the end, Baker manages to escape with Vyle as a hostage, having overwhelmed and overpowered both Blue Squad, and the Purple Gang and Scrappers. Blue Squad makes meets with Vorpal, and they trade contact information. Later in the week, Blue Squad approaches Vorpal and agrees to work with her to take Baker down if she'll adjust her methods to being non-lethal and cooperates with the Adventurers. She agrees, and explains that she is a new vigilante and is still 'learning the ropes,' but has a great desire to take the violent criminal Baker's Dozen down for noble reasons. Or so she claims. |
| − | ! | + | |
| − | ! | + | Later, solo superhero and known gangland contender and contact of Blue Fox, Wizard, reaches out and offers to join in on the effort to bring Baker Down. Blue Squad proceeds to search the city with Vorpal and Wizard's help. |
| + | |||
| + | | Baker's Dozen, Scrappers, Vyle Lyle | ||
| + | |- | ||
| + | | Doom and Gloom | ||
| + | | '''Blue Squad #16''' | ||
| + | | "Cast a Shadow" | ||
| + | | Blue Squad, along with help from Webcrawler, Mantle, and Spectrum work together to prepare the warehouse for the trap. Isabela, now donning the Sombra costume, boldly teleports and turns invisible to lure Gloom towards the prepared trap. | ||
| + | |||
| + | At first, nothing happens, until while invisible Sombra spots Gloom leaning in for a lethal strike at Webcrawler. Then, the fight begins. Gloom, with the shadow gem, is empowered with tremendous strength, reflexes, stamina, and even additional arms. It echoes its previous intentions of ruling the world after claiming Isabela's soul, promising the team quick, painless deaths if they surrender now. They decline the offer. | ||
| + | |||
| + | Initially, the team suffers brutal resistance, and every time they are about to overwhelm Gloom, the villain simply teleports away to gain space before rejoining the fight. | ||
| + | |||
| + | The team coordinates and spreads out around the warehouse as Sombra lures Gloom to them. With Windchill being the lookout and early warning, Mantle, Courser, Webcrawler, Blue Fox, Spectrum, and Scatha 5 all get in substantial hits, one after the other, weakening Gloom. Enraged, the shadow demon incapacitates the others, damaging the lights, before it rushes Isabela as Sombra. | ||
| + | |||
| + | Sombra rises to the challenge and strikes Gloom with the enchanted sword, ripping Maya free and recombining the 'twins.' Gloom, without a host, but stuck in their dimension, transforms into a giant, transparent floating skull with burning purple eyes. | ||
| + | |||
| + | It blasts the others back before swooping in to literally consume Sombra, but she she musters the last of her strength and utilizes her shadow projections to beat Gloom back and force it into the 'Ark' created by Stinger. Though ominously, even when contained and defeated, the container rattles nonstop. | ||
| + | |||
| + | Captain Finnegan is relieved to have the shadow gem back in his possession and a new prisoner in the form of Gloom. The team welcomes Sombra back. | ||
| + | | Gloom | ||
| + | |- | ||
| + | | Doom and Gloom | ||
| + | | '''Blue Squad #15''' | ||
| + | | "Sword and Sorcery" | ||
| + | | Bela proposes a way to lure Gloom out into the daylight by removing the cracked shadow gem (see: Ruin Gate) from the Athena Compound. Blue Fox contacts Captain Finnegan and proposes to have the Shadow Gem moved, as if it were being transferred elsewhere, and Captain Finnegan reluctantly agrees. | ||
| + | |||
| + | Additionally, there is a strong chance that Foresight, the wizard who originally split Sombra into two parts of her personality and person, will be lured by the opportunity to steal the vaunted shadow gem. | ||
| + | |||
| + | The plan goes off. Initially accosted by Foresight's illusions, Blue Squad manages to make contact with him. Windchill provides the villain with cash in exchange for his assistance in defeating Gloom and saving Maya. | ||
| + | |||
| + | Gloom arrives, and summons a massive shadow army. The team is beaten badly, and is unable to prevent Gloom from taking the Shadow Gem for itself, more than tripling its size and power, before it disappears to continue the hunt for the last puzzle piece, Maya. Captain Finnegan is unamused. | ||
| + | |||
| + | Foresight provides the team with an enchanted sword to reverse the 'split' done to Sombra in order to yank her free from Gloom's grasp before leaving Blue Squad with his actual business card. Blue Fox contacts ADA Duane Steel and arranges to have an empty, seize warehouse freed, the same warehouse once used as a temporary home for Creature (see: Overseer). | ||
| + | |||
| + | Stinger helps the team fabricate lights to prevent shadows within the warehouse to deny Gloom use of its shadow army, and Blue Squad plans to lure the supervillain there by using Isabela to forcefully combine the twins and trap Gloom's raw, untethered essence in a highly advanced box also generated by Stinger. | ||
| + | | Gloom, Foresight | ||
| + | |- | ||
| + | | Doom and Gloom | ||
| + | | '''Blue Squad #14''' | ||
| + | | "Shadow Over, In Mouth" | ||
| + | | A boom rings out in City Center as one of TNT's many hidden weapon caches detonates. (see: Afterburn) | ||
| + | |||
| + | While responding to the fire, Sombra is attacked and waylaid by Gloom, her nemesis. The interdimensional shadow monster was lured to her by the utilization of the shadow gem (see: Ruin Gate) and regenerated from the peripheral power generated by it. | ||
| + | |||
| + | Despite initially defeating the villain and dispersing its essence in the mysterious shadow realm she utilizes when ever she uses her powers, Sombra is overwhelmed by its power due to her being split into two. | ||
| + | |||
| + | While Sombra's exhausted from resisting, it climbs into her mouth and takes possession of her body just in time for Blue Squad, including Osprey, Firewalker, and Webcrawler to witness the event. | ||
| + | |||
| + | They attempt to intervene, but possessed Sombra, or Gloom, thrashes the entire accompaniment without breaking a sweat and makes an escape to reportedly look for Isabela, or the 'other,' Maya's other half. The villain also proclaims to be a queen and desires to plunge the world into a lightless void to rule over it unimpeded by any bonds or shackles. | ||
| + | |||
| + | Distraught, the team agrees to spread out and search for Gloom while forbidding Isabela from using her powers, as they suspect it will lure the strange foe straight towards her. | ||
| + | | Gloom | ||
| + | |- | ||
| + | | Ruin Gate | ||
| + | | '''Blue Squad #13''' | ||
| + | | "Banishment" | ||
| + | | After days of fruitless searching, the team is contacted by Chirper. Reporting another invasion of a potential hideout, Chirper leads the team to a strange mausoleum magically imposed over a section of the city's sewer system, exaplaining the the strange subterranean rumblings (see: Blue Squad #10). Blue Fox, Martyr, Sombra, Courser, and Windchill arrive on the scene, unexpectedly joined by Scatha 5! His mysterious project is revealed to have been a repurposed, previously hostile combat robot with heavy weapons, a welcome addition to the fight. | ||
| + | |||
| + | Together, they find War Boar in the midst of summoning and maintaining his Ruin Gate underneath the city. Following Woodsman's advice, Blue Squad utilizes War Boar's artifacts laid out around them while Scatha 5 and Martyr take the brunt of the villain's attacks and attentions. Blue Fox takes up a potion, Sombra grabs the shadow gem, Courser takes up the stolen viking gauntlets, and Windchill places the crown atop his head. | ||
| + | |||
| + | Combining their efforts, they manage to defeat War Boar and shatter the spell binding the Ruin Gate to Earth, saving it from porcine invasion. As a result, the potion shatters, an entity exits Windchill's crown and disappears with it, the shadow gem cracks (though it retains its power), and the viking gauntlets fall silent while also similarly retaining their innate magical powers. | ||
| + | |||
| + | The day is saved. | ||
| + | | War Boar | ||
| + | |- | ||
| + | | Ruin Gate | ||
| + | | '''Blue Squad #12''' | ||
| + | | "Pig Escapes Pen" | ||
| + | | In containment, War Boar generates an unidentified magical force moments before he hacks up a swallowed object: the Shadow Gem. War Boar uses the innate magic held within the device to escape his containment, after which he goes on a rampage and storms into Athena artifact containment. Utilizing his re-acquired staff, and the crown artifact the team previously managed to keep from acquiring during one of his first appearances. War Boar then freezes the entrance of the Athena Compound shut before summoning minions and monsters to aid his assault. | ||
| + | |||
| + | War Boar wreaks as much damage as possible as members of both Blue Squad and Red Squad are called in to respond by Captain Finnegan. Aided by PRIMUS, MARS, and the MCPD, the heroes storm inside only to find a veritable army awaiting them. War Boar surprises the team by giving them a threat in his newly mastered English. He escapes, and seems to have all he needs for his master plan. In the chaos, Absolver manages to cling to Firewalker, and a mysterious gem being called 'Guardian' is also set free, but he's negotiated with by Blue Fox. | ||
| + | |||
| + | Later that week, Detective Knight arranges a meeting between the Adventurers and Woodsman on the Westside precinct roof. 'Woodsman' itself is a title from his home world, similar to being a superhero. He has stepped forward to become the de facto leader of his people, now rendered refugees by War Boar's invasion of their world. | ||
| + | |||
| + | Woodsman explains that War Boar invaded it with his pig army as he is now doing to earth. Similarly, War Boar gathered artifacts on Woodsman's world, and eventually generated enough power to bring the entirety of his forces through, conducting genocide against Woodsman's people. The team, invigorated with new motivation, agree to track down War Boar and plan to trap the villain on Woodsman's ruined world to spare Earth from suffering the same fate. Woodsman advises Blue Squad that to deactivate War Boar's 'Ruin Gate' portal, they will need to utilize the artifacts the super villain has stolen. | ||
| + | As for the finale... | ||
| + | |||
| + | | War Boar; Absolver; Guardian | ||
| + | |- | ||
| + | | Blue Squad vs Red Squad | ||
| + | | '''Dodgeball #1''' | ||
| + | | "The Shootout" | ||
| + | | With War Boar and TNT imprisoned, Sombra acts on an idea she's had to run a grand, competitive dodgeball event for charity. She gets in touch with the Northside Children's hospital and organizes a dodgeball cage match at a local arena with Blue Squad facing off against Red Squad. | ||
| + | |||
| + | Fans buy blue or red tickets to enter the raffle and place a bet on the victors with copious amounts of refreshments provided for by sponsors, with all proceeds going to the hospital's foundation. Scatha 5 manages to participate due to the low impact nature of the sport. | ||
| + | |||
| + | Red Squad defeats Blue Squad during the first round, but Blue Squad rallies and gets a victory in round two. Round three is an intense display of superheroic powers, but it comes down to Stinger and Sombra facing off, both of whom simultaneously eliminate the other. | ||
| + | |||
| + | In a surprise twist, two members of each raffle were selected, one of whom was a young superfan of the Adventurers named TJ Haws. Later, Blue Fox, Webcrawler, Sombra, Courser, and Spectrum meet with TJ Haws near city hall to spend a day with him. Upon learning about his somewhat troubled homelife, the Adventurers provide TJ with good examples to look up to, and demonstrate their powers with him. Inspired by the meeting, TJ returns home with Sombra. She personally meets his mother and younger daughter, having dinner with the family, spreading hope and morale. | ||
| + | | [None] | ||
| + | |- | ||
| + | | Ruin Gate | ||
| + | | '''Blue Squad #11''' | ||
| + | | "Detainment and Visitation" | ||
| + | | War Boar suddenly resurfaces and launches a bloody attack on the MCU's campus, aided by an army of smaller humanoid pig men, killing twenty four people and injuring dozens. He specifically targets an artifact on the grounds in the custody of a seemingly harmless off-campus cult called "The Calamity Wake" and massacres them, though the cultists were not aware of how powerful the object in their possession was. | ||
| + | |||
| + | Martyr, Blue Fox, Courser, Sombra, and Windchill intervene, and after another desperate battle manage to subdue the War Boar, though the artifacts the villain stole thus far remain unaccounted for. Scatha 5 has second thoughts about letting his squadmates rush into danger while he stays behind, despite his damaged state, and Martyr suspects that War Boar went down too easily with some hidden purpose. | ||
| + | |||
| + | War Boar is taken to the "Athena Compound," a PRIMUS facility for the containment of mysterious objects and personages, such as the symbiote 'Absolver' (see: Overseer), run by one Captain Finnegan. Members of the entire team visit War Boar and perform an interrogation, but get little more than spiteful taunts and threats from the supervillain before War Boar seemingly attempts to escape, testing the strengths of his bindings within his cell before the team leaves. The team theorizes that War Boar may or may not be from the same dimension as the mysterious 'medieval refugees' led by Woodsman. | ||
| + | |||
| + | Meanwhile, Scatha 5 notices that his auto repair function is more sluggish than usual, and asks Blue Fox to deliver him copious amounts of scrap and metal to hasten the 'healing' progress and to continue a hidden project the robot companion has taken on. | ||
| + | | War Boar; Absolver | ||
| + | |- | ||
| + | | Ruin Gate | ||
| + | | '''Blue Squad #10''' | ||
| + | | "War Boar Returns" | ||
| + | | The indomitable and unexplained otherworldy invader War Boar returns to Millennium City and attacks the Clauswitz Museum of Artifacts, his target this time being a pair of gauntlets owned by 'Ragnar Lodbrok,' an ancient king of viking legend. The gauntlets are confirmed to have electrical capabilities in the hands of those who know how to use them. Additionally, War Boar carries a mysterious black 'shadow gem.' | ||
| + | |||
| + | Blue Squad members Blue Fox, Courser, Sombra, Martyr, and new team member Spectrum rush to the museum and do battle with the porcine pillager. War Boar notably uses the shadow gem to wrestle against Sombra's shadow projections, and gives a substantial beating to Blue Squad members before he makes his escape via portal. Scatha 5, still tremendously damaged from the final fight with TNT, stays at the base to keep records and perform investigation and theorization on War Boar's next move. | ||
| + | |||
| + | Later that week, Detective Knight Blue Squad and informs them that sightings of the supervillain 'Creature' have been called in from an apartment in Westside above one of Creature's old, abandoned lairs. Blue Squad is joined by Webcrawler and Firewalker as they investigate. | ||
| + | |||
| + | As it happens, the sighting is incorrect, and the Adventurers stumble upon a known contact named Chirper, a sentient creature of unknown origin that has a friendly if overly-curious demeanor. Chirper informs the team, and Detective Knight, that his home was flooded, and notably reports strange subterranean tremors in his wandering throughout the city, subtle enough to avoid detection on the surface. Afterward, Chirper agrees to follow Detective Knight to the precinct to organize formal citizenship and registration in a dumpster converted into a vehicle. | ||
| + | | War Boar; Chirper | ||
| + | |- | ||
| + | | Imaginata Vindicta | ||
| + | | '''Adventurers #400''' | ||
| + | | "West Texas Showdown" | ||
| + | | With the Adventurers Squads attending to other important matters, a strike team of Blue Fox, Sombra, Firewalker, Courser, Scatha 5, and Osprey sets out to rural West Texas to confront Facet and rescue Webcrawler. | ||
| + | |||
| + | At the server farm, they battle Facet who, becoming desperate, turns ''big'' using the MRM suit, and also shapes his limbs into spikes or flails at times. | ||
| + | |||
| + | Blue Fox infiltrates the building and tries to persuade Daemon that it is being used, and could be repurposed to a ''good'' purpose. He is unsuccessful at persuading Daemon, and it corrupts the entire server farm, overcoming the restrictions Facet had placed on it. While Daemon then takes over the MRM suit and presents its "real world" appearance with Facet trapped inside, Blue Fox enters cyberspace and sets Webcrawler free - much easier with Daemon having vacated its cyber domain to inhabit the MRM suit. Then, rather than exit with Webcrawler, Blue Fox tries to follow a cyber trail into the MRM suit as Daemon did, and confront it there. As the team faces off against a five storey tall version of Daemon, Sombra agonizes over whether it is time to apply Kyra's insta-kill solution on the MRM suit. | ||
| + | |||
| + | In the real world, Webcrawler joins the fight as Firewalker roasts Daemon, and Osprey and Courser cooperate to pull him to the ground. Inside the MRM suit's cyberspace, Daemon - facing defeat - indicates it will not surrender, but attempt to take its enemies with it. It sets the MRM suit to overload. Firewalker senses the building heat. Scatha 5 moves in close to bulwark against further limb attacks from Daemon, while Courser tries to use her new electrical powers to try to regulate the electrical flow. Scatha 5 pierces the MRM suit's energy cell. Inside cyberspace, Blue Fox realizes he has no way out, but then Webcrawler pops in using her Web-blink device, and retrieves him before the system wipes, and Daemon is no more. Sombra is relieved she didn't have to use the solution, but it is unclear if the MRM suit can be repaired after the battle damage it sustained. | ||
| + | |||
| + | With Webcrawler rescued, Daemon destroyed, and a living but wounded Templeton inside the disabled MRM suit, the team has a victory. | ||
| + | | Facet; Daemon | ||
| + | |- | ||
| + | | Imaginata Vindicta | ||
| + | | '''Adventurers #399''' | ||
| + | | "Villain Night" | ||
| + | | Blue Fox, Osprey, and Martyr investigate just who built Webcrawler's gear, in hopes he might have some insight into what happened to her. They track down retired aerospace engineer '''Ray DeCosta''', who welcomes them into his garage workshop in the suburbs when they arrive. He confirms that he had been trying to help Webcrawler pin down the troubles with the Web-blink device, which he built for her. He was able to provide insight into the device's workings - and where to look for her: Web-blink encryption wasn't meant to have her linger in one place, and it would take a server farm or supercomputer setup to contain her in that state. They should seek a place drawing a great deal of electricity. Unable to narrow it down in a world with an increasing number of server farms, Ray suggests they use human intelligence to find the answer - to which Osprey already has a plan. | ||
| + | |||
| + | Osprey attends a secret pub 'villain night', and tracks Ms. Direction from it. Confronting her, Osprey offers info on a score against a rich, evil company, in exchange for information on Templeton's whereabouts. Templeton is running a server farm in West Texas. | ||
| + | |||
| + | Courser finds she has at least some of Webcrawler's powers in the real world now, but also an additional power for electrical control that neither she nor Webcrwaler have previously had! | ||
| + | |||
| + | In preparation for a confrontation, Kyra Sparks (Replica) reveals she was hiding that USB drive that used to be housed in the MRM suit, which is probably what Facet (Templeton) was looking for when he tossed her place. Using that, she finds instructions for a chemical compound that, splashed on the MRM suit, will permanently destroy the nanomachines that allow it to change shape and self-repair. The team nevertheless hopes to somehow retrieve the MRM suit intact so that Kyra can continue being Replica. | ||
| + | | Facet [not seen]; Daemon [not seen]; Ms. Direction | ||
| + | |- | ||
| + | | Imaginata Vindicta | ||
| + | | '''Adventurers #398''' | ||
| + | | "Courser Correction" | ||
| + | | Daemon extracts code from an apparently static and un-reacting Webcrawler, and experiments by seeing if it can be added to Courser. Courser gains at least some of Webcrawler's powers, and is made to demonstrate them in simulations designed by Daemon. With Courser's success, Daemon reveals this is part of a plan it has developed on its own to see if modification in cyberspace can effect the real world, in hopes that it may expand its dominion. It strips the Webcrawler code from Courser after she completes the tests. | ||
| + | |||
| + | In the real world, the team follows other leads. Osprey's ruse of a major museum donation incoming draws the attention of a variety of suspicious characters, meaning to hopefully attract Ms. Direction: the super crook who apparently deployed the logic bomb that corrupted Webcrawler's gear and allowed her to be abducted. But it's the Webcrawler enemy '''Envy''' attempting to steal something from an unfinished exhibit who provides a clue to Ms. Direction's whereabouts: she likes to attend a secret get-together with other local supercrooks. Osprey checks other sources to find the location of the next get-together. | ||
| + | |||
| + | Courser manages to argue logic with Daemon enough to have the AI contemplate its place in the world, and how it was ultimately just Facet's servant, hoping to turn the AI against him. Daemon is caught in a logic loop that it pauses to try to resolve. She uses the distraction to free herself of the cyberspace restrictions upon her, and communicate with Webcrawler. Webcrawler - who can be spoken to while there is direct contact with another entity in cyberspace - tells Courser to copy the code representing Web's powers into herself, and use it flee. Daemon eventually concludes due to Courser's reasoning that as both cyberspace and real world are a threat to it, it must have dominion over both - not the outcome she intended! | ||
| + | |||
| + | Courser emerges from cyberspace into Facet's basement lab just as the Adventurers are following up on Kyra's call for help. Daemon starts to wipe the computers and fries the portal machine. Blue Fox is able to secure a hard drive before it is totally erased. | ||
| + | | Facet [not seen]; Daemon | ||
| + | |- | ||
| + | | Imaginata Vindicta | ||
| + | | '''Adventurers #397''' | ||
| + | | "Daemon's Domain" | ||
| + | | Once is has become clear that Webcrawler and Replica are missing, Adventurers Blue - distracted by matters of mass destruction - mostly continues on TNT's trail while individual Adventurers pursue leads. Sarah Ellison and Courser check the Olsen home for evidence, and later consult with the Adventurers Computer, personified by '''Mr. Adventure''''s hologram, to learn more about how the Websights systems may have been compromised. Sombra - who also was helping at the Olsen home while Cassandra was missing - also visited Kyra's home, and found the place had been tossed, the computer had a hard drive removed, and someone had been searching the computer for things like 'SBE,' 'Facet,' and 'Templeton.' | ||
| + | |||
| + | Sarah Ellison and Courser learn that Webcrawler's newer devices - the Websights eyewear and her Web-blink short range teleporter - have been corrupted by malicious code. Checking the logs, they realize that it was in a confrontation with '''Ms. Direction''', when a '''logic bomb''' was deployed against Webcrawler to aid the super thief's escape, that Webcrawler started having problems with her devices that culminated in her apparent abduction. | ||
| + | |||
| + | Using an address on Reggie Templeton, known to be the mad scientist and criminal who had designed Replica's MRM suit while working for Source Biotech Enterprises, Courser goes to a dank basement in Jersey City where she finds Kyra, tied to a chair and wasting away. Kyra is told to run for her life and get help, while Courser uses a portal machine built by Templeton to enter cyberspace in hopes of rescuing Webcrawler from Templeton's insidious AI named '''Daemon'''. Daemon is far too powerful in his own domain, however, and traps Courser there along with Webcrawler. | ||
| + | | Facet [not seen]; Daemon | ||
| + | |- | ||
| + | | Afterburn | ||
| + | | '''Blue Squad #9'" | ||
| + | | "Why they call me Mr. Fahrenheit" | ||
| + | | Blue Squad spends days scouring Black Badger's tunnel system looking for TNT to no avail, only to have TNT send a video in to the news, showcasing his improvised nuclear bomb, threatening to detonate it within the hour to spread chaos and fear. Blue Squad finally narrows his down his location and rush in to intervene. TNT is held up in a cavern dug so deep that there's active magma flowing through it, and here they find TNT's chief hideout. | ||
| + | |||
| + | TNT has spliced technology provided by Reisen (see: Red Squad) onto his body to further stall Blue Squad's attempt to foil him. After fighting through his last henchmen, Blue Squad enters the cave and engages TNT in an intense battle. Scatha 5 sacrifices his body to take out TNT's plasmagun. Martyr put himself at great risk to take on as much painergy as possible to counter TNT, making the villain laugh, stunning him with the overwhelming sensation and distracting him. The rest of Blue Squad keeps the villain busy as Courser hacks into the computerized bomb and stops it four seconds before detonation. | ||
| + | |||
| + | TNT gloats, even while seemingly defeated, and produces a last minute hair trigger switch to detonate the bomb before Sombra hastily stops him with a shadow projection. With the threat over, Blue Squad takes TNT to the surface, where Martyr hands him over to Detective Knight and the MCPD. A deal is struck between Landon and Detective Knight, representing the MCPD, to have TNT serve out his time at the Joseph and Florence Rehabilitation Center, a decision the public finds controversial. There are protests outside of the premises. | ||
| + | |||
| + | Later on, Detective Knight summons all of the Adventurers, both Red Squad and Blue Squad to the Westside precinct rooftop. She informs them of a group of refugees dressed like medieval people, led by the mysterious Woodsman. Though seemingly friendly, she asks Blue Squad to keep an eye on these strangers. | ||
| + | | TNT, Dr. Friedrich von Reisen [not seen] | ||
| + | |- | ||
| + | | Imaginata Vindicta/Afterburn | ||
| + | | '''Adventurers #396/ Blue Squad #8''' | ||
| + | | "Dick Dwight Face-Off" | ||
| + | | Adventurers cross-over! In a bid to draw out the Black Badger, who may have a lead to the villainous TNT who has been troubling the Adventurers Blue Squad of late, the team comes up with a plan to use one of their harshest critics - blowhard TV editorialist Dick Dwight - in a ruse. Blue Fox promises to attend the program and debate Dwight live, and even unmask before the cameras, to which Dick Dwight agrees. However, after a spirited debate, the face under the mask turns out to be... Dick Dwight's! It was Replica all along. But Black Badger, who hates Blue Fox, turns up at the well-publicized debate location to exact his revenge. A battle begins that involves all of the bad guys! | ||
| + | |||
| + | While the team battles Black Badger, Webcrawler - who uses her web-blink power to try to quickly extract Replica - vanishes with Replica in tow. | ||
| + | |||
| + | Courser plays an instrumental role, hacking into a periodically deactivating Black Badger's suit. After defeating Black Badger, AKA Raphael Moltisanti, he is sent to prison and refuses to talk. | ||
| + | |||
| + | Landon Bellerose, AKA Windchill, meets with "Big Ralph" in prison and proposes that if Ralph offers up any information he has about TNT's whereabouts, he would be transferred to the Joseph and Florence Rehabilitation Center. At last, Raphael agrees and tells Landon and the MCPD to access his suit's hidden tunnel records to have a subterranean map of where TNT and his minions might be hiding. | ||
| + | | Black Badger; Dick Dwight; Facet [not seen]; Daemon [not seen]; TNT [not seen] | ||
| + | |- | ||
| + | | Afterburn | ||
| + | | '''Blue Squad #7''' | ||
| + | | "Bank Busting" | ||
| + | | TNT and his minions break into a bank. They take hostages and open the vaults merely to torch the money in an act to generate terror and spread fear, and for the sake of the fun in it. | ||
| + | |||
| + | Blue Squad arrives on the scene, composed of Sombra, Courser, Scatha 5, Windchill, and Blue Fox. They are also joined by long-time team member, Tungsten, and newcomer, Martyr. Martyr rises to the occasion given the extreme circumstances. | ||
| + | |||
| + | The team coordinates and surrounds the bank under Windchill’s storm cover, getting into position to draw the fire of TNT’s as Sombra sneaks inside to begin rescuing hostages. The team whittles away at TNT’s substantial forces, and manages to make it inside of the bank after Sombra finishes freeing the hostages. | ||
| + | |||
| + | TNT reveals that he is covered in actual T-n-T, the explosive, and taunts the team before he severs his hand with a gunshot and lets it drop into a water main pipe to facilitate his escape and regeneration elsewhere. | ||
| + | |||
| + | He detonates the bombs strapped to himself, and buries Tungstan, Scatha 5, Martyr, and Blue Fox alive, while also punishing them with extreme and grievous injuries with a combination of the explosive and the plasma weapons utilized thanks to von Reisen [see Red Squad], in addition to killing a number of his own men. The burid Blue Squad members are swiftly rescued by members of Red Squad, and other non-squad team members. | ||
| + | |||
| + | Blue Fox proposes luring Black Badger out of hiding, as the villain’s tunnel archives may reveal where TNT’s HQ could be within the city, as TNT is working from his inside knowledge relating to the Overseer era. | ||
| + | |||
| + | The plan is to have team friend Replica disguise herself as Blue Fox, and go on to Dick Twight Tonight under the premise of a live, on-air debate concluded with an unmasking on live television, to draw the elusive Black Badger out of hiding. | ||
| + | | TNT, Overseer [Not Seen], Black Badger [Not Seen] | ||
| + | |- | ||
| + | | Afterburn | ||
| + | | '''Blue Squad #6''' | ||
| + | | "School’s In Session" | ||
| + | | TNT's forces resurface after a small bout of alarming silence, especially given Blue Squad’s success in foiling him lately. TNT’s minions launch a violent and destructive assault on MCU’s campus, targeting the gymnasium complex where a number of the collegiate athletes are training in the early evening. The building is nearly leveled and the surrounding property is all but demolished. | ||
| + | |||
| + | Blue Squad responds, with Blue Fox, Sombra, Courser, Scatha 5, and Windchill rushing in to aid the students. Inexplicably, TNT’s minions start taking hostages from nearly every sport, regardless of speciality. At the end of the battle, despite Blue Squad’s best efforts, TNT’s minions get away with twenty-three minions in total. Additionally, the minion’s arsenal remains composed of custom-made TNT explosives and stolen weapons, but they also feature advanced and sleek plasma weaponry in the form of rifles and grenades. Members of Adventurers Red Squad confirm that TNT might have struck a deal with their current foe, Dr. Freidrich von Reisen in order to get his hands on the powerful weaponry. | ||
| + | | TNT [not seen] | ||
| + | |- | ||
| + | | Afterburn | ||
| + | | '''Blue Squad #5''' | ||
| + | | "Ghosts of the Past" | ||
| + | | Detective Knight allows for Blue Squad to visit Dr. Howard Romrell after he has been taken to an MCPD safehouse in downtown Millennium City. There, they confirm with Romrell that TNT had been hunting him, but that his purpose goes deeper than mere utility to have his nuclear bomb made. | ||
| + | |||
| + | Dr. Romrell had been a senior administrator in Compass Labs, one of the many businesses secretly owned by the Overseer, AKA Congressman Clayton Ewing, before his dramatic downfall at the hands of the Adventurers. | ||
| + | |||
| + | Dr. Romrell explains to Blue Squad that TNT was once a man named Thomas Nathaniel Tullett. He had been a member of the British SAS, serving as a part of a joint-mission with UNTIL that was tasked with disarming alien explosives. While disarming a Gadroon device, Tullett unknowingly triggered a leak of radiation, before the bomb itself detonated once the invisible radiation had completely enveloped Tullett and filled his lungs. | ||
| + | |||
| + | A mutation took place, where Tullett was frozen in a perpetual state of agony. Third degree burns covered every inch of his body, yet they remained fresh and unhealing, and any other damage done to him would see his body rapidly return to the same charred, burnt state, something Courser was able to identify by personally analyzing his blood. | ||
| + | |||
| + | Overseer went out of his way to secretly arrange to buy the ‘rights’ to Tullett’s life for the sole purpose of experimentation. Tullett was transferred to a secretive Compass Labs site in the U.K. where he was used for target practice and other weapons testing. Officially, Tullett was designated as KIA, but unofficially he was tortured nearly non-stop for twenty years. Once Overseer was taken down, the scientists running the lab Tullett was housed in fled in fear of repercussion, and Tullett was able to escape and make his way to America, fixated only on feeling and spreading pain. Romrell quietly taunted the team, stating that this was all their fault, as if the Overseer were never taken down, TNT wouldn’t have been freed to terrorize the city. | ||
| + | |||
| + | Soon after the explanation, TNT attacks the building. Courser, Blue Fox, Sombra, Windchill, and Scatha 5 are able to fight off TNT’s gunmen, who were disguised as window cleaners. Sombra gets Romrell to the safety of U.S. Marshals, and when bombs that TNT had placed on the building’s foundation detonate, Windchill overexerts himself, freezing the building solid in a giant block of ice before it can fall apart. TNT escapes by simply dropping out of a window in the middle of the fight. | ||
| + | |||
| + | A followup visit with Detective Knight confirms Romrell’s story about TNT, and Blue Squad wonders if Tullett, who was by all accounts, a well regarded and valorous soldier, can be saved from his own madness. | ||
| + | | TNT, Overseer [Not Seen] | ||
| + | |- | ||
| + | | Afterburn | ||
| + | | '''Blue Squad #4''' | ||
| + | | "Material Girl" | ||
| + | | Adventurer Courser is on site at the lab when Grey Raccoon makes her move. She strategically sneaks into the facility and makes a play for the uranium stored there while Courser summons Blue Fox, Sombra, Scatha 5, and Windchill to the scene. | ||
| + | |||
| + | Despite fostering a reputation as a non-powered thief, it is revealed during the confrontation that Grey Raccoon has control over her own molecular density, and can phase through solid objects at will. | ||
| + | |||
| + | The combined effort of Blue Squad subdues the thief, and together they convince her to speak as to why she would aid someone like TNT in the first place. Windchill and Sombra successfully appeal to her humanity, and Grey Raccoon reluctantly agrees that she had struck a deal with TNT to help him get his bomb, with the idea that while the MCPD and the Adventurers were distracted hunting him, she would be free to rob the city blind in the mean time to take care of her mysterious ‘debts.’ | ||
| + | |||
| + | After handing over the Uranium, Grey Raccoon disappears, but she left a secretive message to the Adventurers indicating that former Compass Labs scientist, Dr. Howard Romrell, was specifically sought after by the supervillain to help build the makeshift nuclear bomb. | ||
| + | |||
| + | The team notifies Detective Knight, and she begins to search for Dr. Romrell in order to place him in protective custody so Blue Squad can figure out why hein particular has been singled out by the supervillain. | ||
| + | | Grey Raccoon, TNT [Not seen] | ||
| + | |- | ||
| + | | Afterburn | ||
| + | | '''Blue Squad #3''' | ||
| + | | "The Firetruck" | ||
| + | | TNT, after going quiet, suddenly reappears. He and his newfound minions are driving the stolen fire truck, and an additional stolen garbage truck, both with ramshackle welded on armor and ramming equipment. The firetruck has been converted into a giant flamethrower. | ||
| + | |||
| + | Both vehicles are on a rampage, smashing through traffic in a seemingly pointless display of carnage and destruction. Blue Squad responds. A police car is pierced by the garbage truck’s prongs, but officers inside are saved by Scatha 5, with Blue Fox’s help. | ||
| + | |||
| + | Sombra attacks the firetruck, and ends up hanging onto its napalm-spewing hose. Courser moves in to assist, as Windchill uses his powers over ice and wind to make the vehicle drivers struggle for control. At one point, he even raises ice walls to keep the vehicles from veering off of the road. | ||
| + | |||
| + | TNT himself is driving the firetruck, firing rockets at Windchill. Windchill’s enhanced durability preserve his life. Sombra daringly teleports inside of the fire truck, but she is held down by TNT and his minions. TNT holds a grenade to her head. | ||
| + | |||
| + | Windchill eventually ices over the street, and both vehicles lose traction and tumblee over. Taking a mostly unconscious Sombra captive, TNT holds a grenade to her head as Blue Squad witnesses his true form. Covered in head to toe in fresh, third degree burns, TNT laughs and simultaneously laments that the worst things in life aren’t pain, or fear, but “endless boredom,” before he rips off his own face, only for the burned flesh to heal back in an instant. | ||
| + | |||
| + | Before Blue Squad can capture him, he shoves Sombra free and dives underneath the firetruck and detonates the grenade, blowing himself up for a second time. Nonetheless, Blue Squad manages to capture a number of his minions and take out his repurposed demolition vehicles. | ||
| + | |||
| + | Blue Squad meets with Detective Knight once again, where it is revealed that known international thief, Grey Raccoon, stole plutonium from a Compass Labs facility. The heist happened at the same time as TNT’s firetruck rampage. Knight proposes that Grey Raccoon and TNT may be in coordination, and the team agrees. | ||
| + | |||
| + | Pointing out another Compass Labs satellite location in Millennium City, one that may contain uranium, Blue Squad agrees to place a guard on the location to see if they can prevent the theft of the material and thwart TNT’s attempt to make a dirty bomb. | ||
| + | | TNT | ||
| + | |- | ||
| + | | Afterburn | ||
| + | | '''Blue Squad #2''' | ||
| + | | "The Breakout" | ||
| + | | While Blue Squad member Windchill is guarding the prison, the mysterious TNT launches his attack. He breaks onto the prison grounds, dual wielding rocket launchers, driving a dump truck filled with weapons and explosives. He blasts a hole into the wall and deposits the weapons into a massive heap in the prison yard as escaping inmates run out in a stampede. Additionally, TNT detonates explosives on all the major roadways leading to and from the prison, delaying first responders and harming civilians. | ||
| + | |||
| + | Sending a quick alarm, Windchill summons Scatha 5, Blue Fox, Sombra, Courser, and Pathfinder to the prison. The Adventurers strenuously balance saving civilians with preventing as many of the violent, manic inmates escaping as they can. Pathfinder notably uses her powers to create a large trench that caught escaping inmates. | ||
| + | |||
| + | After the battle subsides, Windchill freeze TNT to a wall, demonstrating the latter's heightened durability, and Blue Squad speaks with him. TNT gloats, saying that “It’s time this town had chaotic evil.” He thanks the Adventurers for taking down Overseer, so “we can play without rules.” Before Blue Squad can inquire further, TNT uses his own explosives to blow himself up. The team spends the rest of the night scouring the nearby neighborhoods to locate and return what violent fugitives they can find. | ||
| + | | TNT | ||
| + | |- | ||
| + | | Afterburn | ||
| + | | '''Blue Squad #1''' | ||
| + | | "The Spark Ignites" | ||
| + | | Members of the newly formed Blue Squad, consisting of Blue Fox, Sombra, Courser, Pathfinder, Windchill, Scatha 5, and Reclaimer gather at Blue Bird’s (Congresswoman Olivia Ellison’s) hidden training center to give demonstrations of their powers. Reclaimer develops extensive charts and graphs to give visual representations of member strengths and weaknesses. | ||
| + | |||
| + | Blue Fox reports that his source in prison, his brother Kyle, revealed that a number of prisoners were simultaneously transferred to the infirmary wing after an inexplicable string of self-inflicted burns. Many of the perpetrators of the self harm were incarcerated for arson and other violent pyromaniacal behavior. Kyle’s own bunkmate did it, and ominously told Kyle that “It’s your way in.” | ||
| + | |||
| + | Blue Fox contacts Detective Laura Knight, of MCPD’s superhuman crime investigation unit, or SCIU. At a rooftop meeting on the Westside MCPD precinct, she ttells Blue Squad about a violent fire truck heist. The perpetrator was shot multiple times but wouldn’t go down. He left a message written in blood on the firehouse ground, asking “Are you in?” | ||
| + | |||
| + | Sometime afterward, the Mysterious Hooded Figure robbed an MCPD evidence warehouse, containing weapons of Baker’s Dozen from the Overseer takedown. He left a similar bloody message at the ground of the warehouse that merely said “In,” with a check mark. Upon a follow up visit, Sombra learned that the mysterious, would-be leader of the imprisoned pyromaniacs is someone named 'TNT.' | ||
| + | |||
| + | The Adventurers and Knight conclude that the prison events and this violent newcomer to the city are linked, and agree to take round the clock guard overlooking the prison just in case. | ||
| + | | TNT [not seen] | ||
| + | |- | ||
| + | | With A Silver Spoon | ||
| + | | '''Adventurers #383''' | ||
| + | | "Rise of the Silver Sentries" | ||
| + | | With the city still feeling the effects of the Overseer's downfall, Silverline Industries holds a press showcase where company president Selene Silver (wife of company founder Raymond Silver) proudly presents their newest robotic innovation: gleaming silver battle droids called the Silver Sentries, powerful and non-lethal defenders of the peace with a noble "winged knight" aesthetic. While the company is making these defense bots available to companies for a steep price, they're also graciously donating and stationing a dozen of them across the city, ready to respond to emergencies and threats. The showcase also features a spectacle for the audience; a gladiatorial fight between a Silver Sentry and one of the Silverline "Rollbot" security units, which the Sentry handily wins. | ||
| + | |||
| + | A week later, one of the Silver Sentries makes its debut as onlookers film the scene of it arriving at and attacking a Scrappers hideout. When Catfight, Sombra, Blue Fox, and Stretcher arrive to assist - and keep a wary eye on the Sentry - they team up and easily defeat the cybernetic gang who protest being targeted by the automaton! The Scrappers at the scene are collected by the police, but the Adventurers don't leave empty-handed: during the fight, among many other stolen and salvaged bits of tech, the wrecked Rollbot from the showcase is discovered, and the heroes sneak it away in the hopes it has some kind of helpful data on Silverline's plans.... | ||
| + | | The Scrappers | ||
| + | |- | ||
| + | | Avenging Avery | ||
| + | | '''Adventurers Midnight #8 (vol. 2)''' | ||
| + | | "Adieu to Darién" | ||
| + | | Montes is persuaded after a couple of pistolwhips, and under wooden Mantle's restraint, to cooperate. He says Bastos has anchored his yacht off of Aguanosa. Avery gets a knockout blow, then the team climbs a ladder from Montes's room to the fortress roof as they prepare for a very dangerous escape from Montes's headquarters, surrounded as it is by his troops. | ||
| + | |||
| + | Upon the roof, they unexpectedly find an aged helicopter. But as Catfight removes the camo netting, and Blue Fox finds the kerosene fuel, Avery surmizes that it may still be flight-worthy. They load the unconscious Montes in, board themselves, and prepare for an expedient escape. Ramon is only able to siphon enough fuel from the cannisters to get them a short distance; Stretcher uses herself as a shield to protect the group from gunfire as the helicopter picks up speed and heads west to rendezvous with Sombra. | ||
| + | |||
| + | Sombra receives the radio transmission and speeds down the river in her stolen boat in a hurry. The team lands the helicopter in a farm field adjacent to the river, and gets in with Sombra. | ||
| + | |||
| + | Hours later, Agent Avery - with fresh gear - asks the team to join her in apprehending Samuel Paz Bastos. Once secured. Bastos admits he helped Lord Aurum escape Darién and dropped him off near Galveston, TX. Avery promises that Montes and Bastos will be prosecuted for their crimes against humanity. With the clan's regional leader gone, as well as their chief weapon supplier, It's the best chance at establishing a freer society that the region has had in a long time. | ||
| + | | Colonel Montes; Clan del Darien | ||
| + | |- | ||
| + | | Avenging Avery | ||
| + | | '''Adventurers Midnight #7 (vol. 2)''' | ||
| + | | "The Pathway to Danger" | ||
| + | | At Ramon's urging, the team abandons Ramon's boat, and Blue Fox uses his powers to break a hole in the hull so it sinks in the Rio Serpiente. They are told of the plight of slave-like farmers on the cartel's farms nearby. | ||
| + | |||
| + | The party proceeds on foot with Dr. Anderson guiding them. They ambush a ranger patrol at unawares, and Mantle, Blue Fox, and Ramon pretend to escort Catfight and Rubber Bullette as captured tourists to the fortress, while Sombra and Dr. Anderson leave to try to steal a ranger boat for the escape. | ||
| + | |||
| + | Sombra uses her powers of invisibility and teleportation to aid the return to the river, but Dr. Anderson has so many questions about how it works biologically. Sombra turns down an offer by him to study her and her powers. When they arrive at the ranger station, Sombra finds the perfect ranger boat for the size of the team, stows Dr. Anderson in a claustrophobic compartment in it, and sets about using sugar stolen from the ranger station to sabotage the outboard motors of the rest of the ranger boats. | ||
| + | |||
| + | Meanwhile, in the fortress, the disguised rangers are admitted through the gates and told to drop their prisoners off in the cell. There, Catfight and Stretcher meet Agent Avery. Though weakened by her captivity, Avery imparts that she wants to complete her mission - she has ascertained that Samual Paz Bastos, the weapons dealer she was trying to apprehend when she was captured, is coming back to Darien with another shipment of munitions. She implores the team to help her confront, question, and capture Colonel Montes, who would know where Bastos is parking his yacht. | ||
| + | |||
| + | Sombra completes her task of sabotaging the boats, and lays low with Dr. Anderson, waiting for the signal on her radio. | ||
| + | |||
| + | The team storms the upper level of the fortress and questions '''Colonel Montes''' in his private room. Blue Fox beelines to the Colonel's laptop, while Avery gets help from Catfight and Mantle in a rough interrogation... | ||
| + | | Colonel Montes; Clan del Darien | ||
| + | |- | ||
| + | | Avenging Avery | ||
| + | | '''Adventurers Midnight #6 (vol. 2)''' | ||
| + | | "Treehouse" | ||
| + | | The team persuades Ramon to give them one more ride in his boat, but his conditions this time are that they have to help him evacuate to the United States - it's become too dangerous in Colombia for him. They agree, and Ramon commits himself as a party member. | ||
| + | |||
| + | Blue Fox gets more than he bargained for when he asks Ramon to tell them a ghost story. Several of them cannot sleep easily afterward as they lay on the deck of Ramon's boat, anchored near where Julio said they could find Dr. Derek Anderson, hearing all of the sounds of the jungle. | ||
| + | |||
| + | The next day, they enter the jungle and at Catfight's direction, wisely watch for booby traps. Sure enough, '''Dr. Anderson''' has set some near his treehouse to alert him if any Clan approach his hidden home. | ||
| + | |||
| + | The team quickly establishes to Anderson that they are no threat. He is more than willing to help inform them about Montes fortress, recounting how he accidentally found it. He provides the team precise coordinates on a topographical map he created. But he pleads with them to take him along - like Ramon, he is ready to flee the area. He wishes to return to Canada and publish his work studying the ecology of the Darien region. The team accepts Dr. Anderson as their guide and scout. | ||
| + | | Clan del Darien | ||
| + | |- | ||
| + | | Avenging Avery | ||
| + | | '''Adventurers Midnight #5 (vol. 2)''' | ||
| + | | "Ambush" | ||
| + | | En route to San Quintin, Ramon is giving a lesson to Maya on how to navigate the Rio Aguja's hazards when Ramon's boat is suddenly pursued by speedboats with Clan del Darien rangers. They are ordered to cut the motor and prepare to be boarded. Sombra persaudes Ramon to stay at the wheel, while the Adventurers fight back. Stretcher and Blue Fox each leap into one of the two pursuing boats and disrupts the rangers up close, while Sombra teleports to the boat with Stretcher and, invisible, turns the key on their motor. Catfight takes a machine gun given to her by Ramon and damages the engine on the other boat. Stretcher grabs a gun and disables the other boat's engine. Ramon's boat is able to leave the rangers behind. | ||
| + | |||
| + | Back in San Quintin, matters have apparently become more tense. The Clan knows there are foreign agents about, and has increased its presence in the village. The team stays on the docks. The UNTIL contact, Sergio, says he's about to flee to Panama for fear of being found and killed by the Clan. But he directs Catfight to seek out Dr. Anderson, the Canadian biologist - he may be the only non-Clan person who knows how to find Montes fortress. | ||
| + | |||
| + | The team has to help fix a broken gas pump at the riverside gas station before the owner and Dr. Anderson's sometimes-employer, Julio, will give them a lead on the doctor's whereabouts. Derek Anderson has been hiding in a treehouse in a remote jungle area. Julio provides coordinates. | ||
| + | | Clan del Darien; Clan ranger patrol | ||
| + | |- | ||
| + | | Avenging Avery | ||
| + | | '''Adventurers Midnight #4 (vol. 2)''' | ||
| + | | "Deep in Clan Territory" | ||
| + | | The team lands clandestinely at Arreti in the early hours and sneak around. | ||
| + | |||
| + | Blue Fox and Sombra sneak into a drug factory and search through binders and an offline laptop for clues, finding an alert sent to all points about Samuel Paz Bastos being necessary, but no longer trusted, and seeming to have some ties to the VIPER cadre who the Clan wiped out. Bastos, it seems, also took on a personal consignment of cocaine before departing the area. Unfortunately, they cannot find information about Montes stronghold. | ||
| + | |||
| + | Catfight and Mantle are nearly discovered while hiding near a residence at daybreak, but escape and get back to the boat in time. | ||
| + | |||
| + | The team goes further down the lake from Arreti and finds the remains of the VIPER cadre, their gear stripped, their bodies left to decompose. Some of them have been slain by bullets, others by a laser sword consistent with Lord Aurum's. Following a trail, Catfight and Sombra discover a hidden cavern where, deep underground, they find a mysterious rock formation suspended floor to ceiling like a column. At once, it calls back the mysterious dream they all shared some weeks ago, but for Marshall, it also reminds him of the Terraformer from 2019, calling to him and tempting him. | ||
| + | |||
| + | The team improvises an explosive and collapses the cavern out of abundant caution. After a night encamped by the lakeside, they depart again with Ramon, headed back to San Quintin. | ||
| + | | Clan del Darien; the mysterious cave | ||
| + | |- | ||
| + | | Avenging Avery | ||
| + | | '''Adventurers Midnight #3 (vol. 2)''' | ||
| + | | "Trouble in San Quintin" | ||
| + | | '''Catfight''', '''Mantle''', and '''Stretcher''' arrive, prepared for a trek into Colombia, arriving at the border village of San Quintin. There, they learn at the tavern that a biologist named Dr. Derek Anderson may have found Montes hidden fortress, but he has since fled into the jungle. Following up on a lead from the tavern's cook, Stretcher and Sombra find photo negatives in a room Anderson had been renting, and upon developing them, confirm Anderson's discovery - but no one they show the photos to can say for sure where the landmarks are. Catfight finds an UNTIL asset named Sergio who discloses in secrecy to her that a VIPER cadre had come through around the time Agent Avery was captured, but they were not allies of the Clan del Darien - the Clan reportedly killed them and left their bodies on the northeast shore of Lago Claridad. Rumor has it that Avery was seen in the company of a man dressed in golden armor from head to toe - '''Lord Aurum'''. | ||
| + | |||
| + | Mantle gets into a boxing match with the local Clan point man, '''Eugenio Martinez''', and defeats him; this earns them the services of '''Ramon Munoz''', a mercenary and boatman from the region, who agrees to take them deeper into Colombia, and the Clan-run village of Arreti at Catfight's insistence. | ||
| + | | Clan del Darien; Eugenio | ||
| + | |- | ||
| + | | Avenging Avery | ||
| + | | '''Adventurers Midnight #2 (vol. 2)''' | ||
| + | | "Mission de la Mision" | ||
| + | | Tomas tells the pair about Agent Avery, an UNTIL agent who was captured by the Clan and is being held for ransom somewhere at the hidden jungle stronghold of "Colonel" Tobias Montes - a militant revolutionary who joined the clan when most other revolutionaries took a peace deal with the Colombian government, and disarmed. Tomas is unaware of the mission Avery was on, but Marshall and Maya feel compelled to help. Visiting the mission, they learn more of the danger of the Clan, and while there is much gratitude to them for securing the medical supply delivery, Father Valero urges the heroes to leave before the Clan retalliates against the mission. Marshall calls home to Millennium City and bids Midnight Squad to come. | ||
| + | | Clan del Darien | ||
| + | |- | ||
| + | | Avenging Avery | ||
| + | | '''Adventurers Midnight #1 (vol.2)''' | ||
| + | | "A Vacation Like No Other" | ||
| + | | Marshall and Maya are on a cruise through the Panama Canal! But when they stop in the remote port of Las Mercedes near the border with Colombia, they are drawn in to help Father Pascal Valero and his helper Tomas get needed medical supplies to their mission deep in the jungle. As Tomas feared, the dreaded Clan del Darien - a drug cartel from Colombia - attacks the boat to try to steal the supplies. Marshall and Maya use their super powers to help Tomas's boat get past the ambush safely. | ||
| + | | Clan del Darien | ||
| + | |- | ||
| + | | | ||
| + | | '''Adventurers Crimson #14''' | ||
| + | | "Crimson Cat-astrophe" | ||
| + | | Power-Chord encountered a fiery feline foe in the City Center and put out a distress call as she was unable to combat them alone. Firewalker, Windchill, and Scatha 5 answered the call and helped Power-Chord face off against Anar-Kitty. She claimed to be genetically perfected by some mysterious figure, and showcased her raw power and skill. It took Firewalker absorbing her heat, Windchill cooling her down, and Power-Chord blaring sick guitar riffs into her eats to take her down. | ||
| + | | Anar-Kitty | ||
| + | |- | ||
| + | | | ||
| + | | '''Adventurers Crimson #13''' | ||
| + | | "Ignorance is Bliss" | ||
| + | | Months ago, BPE Executive Chairman Landon Bellerose requested to run a brain scan on local punk rocker Devona Bliss. She agreed to do so on the condition that he would buy her two couches, which he happily complied. Gathering at a NeuroTech facility, the brain scan commenced with their mutual friends Blake and AJ also in attendance. Results showed that Devona Bliss had a rare genetic disease known as Urbach-Wiethe disease, which impaired Devona’s long-term emotional memory, making her incapable of experiencing fear. | ||
| + | | -- | ||
| + | |- | ||
| + | | | ||
| + | | '''Adventurers Crimson #12''' | ||
| + | | "Back to Zero" | ||
| + | | Acting in Windchill’s aversion, Firewalker traveled to a BPE facility where '''Delilah Young''', previously known as Project Zero-Point, was receiving treatment. Though still apprehensive and aggressive, Firewalker managed to quell Delilah’s raging emotions and relate to her situation, and learned more about her shared history with the Bellerose Family. Before leaving, Firewalker was able to instill a sense of hope in her. | ||
| + | | Delilah Young | ||
| + | |- | ||
| + | | | ||
| + | | '''Adventurers Crimson #11''' | ||
| + | | "A Solution to Genesis" | ||
| + | | Face of Medicine Landon Bellerose returned to GeoCorp following a lead provided by some friendly Adventurers. However, once he was there, he discovered '''Dr. Elijah Young''' hiding in plain sight. Calling forth the Crimson Squad, Landon ran into a power siphoning chamber and waited for backup. As Firewalker, Osprey, Power-Chord, and Scatha 5 arrived at GeoCorp, they were lured through the winding halls of the facility until they were forced to confront Dr. Genesis. The Crimson Squad kept Dr. Genesis’s attention while Landon powered up the siphons, draining the transformed being of energy back to a mere man. | ||
| + | | Dr. Genesis | ||
| + | |- | ||
| + | | | ||
| + | | '''Adventurers Crimson #10''' | ||
| + | | "Winds of Chains" | ||
| + | | Firewalker called together his Crimson Squad allies Osprey, Power-Chord, and Windchill to confront and capture the escaped '''Blood Bat'''. Once the heroes engaged with the hemophilic villain, they found Blood Bat distressed and desperate. While attempting to detain her, they encountered the hero '''Torrent''', who was soon recognized by the team as Firewalker’s father. | ||
| + | |||
| + | A conflict quickly unfolded between the Crimson Squad and Torrent. Firewalker was quickly removed from the battle, leaving Osprey to try to get Power-Chord and Windchill to retreat, which they both ignored. Working together, they laid down considerable offense on Torrent, but were eventually bested by the more experienced hero. Torrent claimed a rune of unknown origin or purpose from Blood Bat before departing and leaving the Crimson Squad to tend to their wounds. | ||
| + | | Torrent | ||
| + | |- | ||
| + | | | ||
| + | | '''Adventurers Crimson #9''' | ||
| + | | "Zeroes and Heroes" | ||
| + | | After numerous BPE research labs were raided by '''Project Zero-Point''', Windchill called together his allies Mantle, Firewalker, and Power-Chord to confront the assailant by luring her into a trap he set at a hollowed-out lab. Once in position, the heroes confronted Project Zero-Point, but found themselves overwhelmed by the sheer power she could output. Mantle was able to remove her suppressor mask, which freed her from cybernetic mind-control, but also forced her powers to spike. The fight was now a countdown of surviving Zero-Point until her powers exhausted her. Soon the Adventurers discovered the attacker was none other than Delilah Young, daughter of Genesis Solutions’ head researcher Dr. Elijah Young. | ||
| + | | Project Zero-Point | ||
| + | |- | ||
| + | | | ||
| + | | '''Adventurers Crimson #8''' | ||
| + | | "Necrology 101: Ghosts and Stuff" | ||
| + | | While on patrol, Firewalker encountered a paranormal phenomenon in the form of a ghost reaching out to contact him about a MCU student Julia Royce who had been abducted by a villain known as '''the Necrologist'''. Rallying with Windchill, Blue Fox, Osprey, and special guest hero '''Moon Stalker''', the group of heroes traveled to the location provided by the spectral guide Leo Capello. Once they found the secret entrance the heroes encountered Meat Bag, who Firewalker and Osprey immediately confronted. Meanwhile, Blue Fox and Moon Stalker moved further to confront Necrologist, who summoned another lackey known as Ectovore, a robot that eats ghosts. The Necrologist put the heroes in a tough spot by holding Julia Royce hostage. Luckily, Moon Stalker cloaked and got in close, forcing the Necrologist to retreat and the heroes to escape as the base was filled with ecto-plasma. | ||
| + | | The Necrologist | ||
| + | |- | ||
| + | | | ||
| + | | '''Adventurers Crimson #7''' | ||
| + | | "Hollow Earth" | ||
| + | | Tracking strange energies after the sudden resurgence of '''Genesis Solutions''', Windchill gathered Power-Chord, Osprey, and Firewalker in Westside. There they discovered an unethical experiment come to life known as '''Project Quake'''. A collection of inanimate matter injected with sentience that could only feel pain, Osprey attempted to reason with it, but its existence was too unbearably agonizing that the Crimson Squad needed to use force. Tearing away the earthy exterior, Project Quake replaced its armor with a combination of Windchill and Firewalker’s powers before vanishing to parts unknown. | ||
| + | | Project Quake | ||
| + | |- | ||
| + | | | ||
| + | | '''Adventurers Crimson #6''' | ||
| + | | "Museum Mayhem" | ||
| + | | A break-in at local art museum was carried out by assailants wearing black clothes and raven-beaked masks. They group was armed with toxins similar to those used by Wendigo. Power-Chord, Blue Fox, Jet-Star, Sombra, and Osprey showed up in forced to confront this faction soon to be known as the '''Cult of Nyx''', who had a cult-like fascination around the primordial goddess of the night, Nyx. | ||
| + | | Cult of Nyx | ||
| + | |- | ||
| + | | | ||
| + | | '''Adventurers Crimson #5''' | ||
| + | | "Bite Out of Crime" | ||
| + | | Receiving a distress call from the billionaire Landon Bellerose, the Crimson Squad was alerted his life was in immediate danger after being attacked by a crazed scientist. Firewalker, Power-Chord, and Osprey quickly arrived at '''GeoCorp''' and encountered '''Dr. Devour''', a mutated energy-eating mad scientist. It seemed the monstrosity could counter everything the heroes threw at him, until Power-Chord’s ‘pyro-tech’ showed what it was really capable of, siphoning energy from the doctor and making it easier for Firewalker and Osprey to overwhelm and detain him. | ||
| + | | Dr. Devour | ||
| + | |- | ||
| + | | | ||
| + | | '''Adventurers Crimson #4''' | ||
| + | | "Wendigo’s End" | ||
| + | | Alerted by Windchill of an Air Pod on the move, the Crimson Squad capitalize on a previous laid trap. They rally at Mercy Hospital where Firewalker, Scatha 5, and Power-Chord encounter Wendigo on the interior, while Osprey and Windchill engage with a mysterious figure on the rooftop who Windchill dubs '''‘Wendigal.’''' Fighting valiantly, and causing a snowstorm that devoured blocks of the City Center, it was Power-Chord’s unbridled rage that put Wendigo out of commission with a flurry of punk rock punches. | ||
| + | | Wendigo | ||
| + | |- | ||
| + | | | ||
| + | | '''Adventurers Crimson #3''' | ||
| + | | "And New..." | ||
| + | | Claiming himself a perfect genetic specimen, Glarthok targeted rockstar superhero '''Power-Chord''' as a challenge, and snapped her guitar claiming her unworthy. Firewalker helped her track down the guitar-smashing menace as he was in the midst of attacking someone. '''Power-Chord''', '''Firewalker''', and '''Osprey''' directly engaged with '''Glarthok''' by grappling, blasting, and redirecting his attacks. Slowing wearing down the strong and durable foe, the heroes managed to knock him out and redeemed Power-Chord’s glory. | ||
| + | | Glarthok the Destroyer | ||
| + | |- | ||
| + | | | ||
| + | | '''Adventurers Crimson #2''' | ||
| + | | "Westside Investigations" | ||
| + | | While '''Firewalker''' and '''Windchill''' traveled to Westside to settle a beef between Windchill and local luchador '''Scorch''', they learned '''Wendigo''' had been spotted at the docks. Assembling the Crimson Squad, the heroes discovered one of Wendigo’s toxic contraptions. Low on trackers, but rich in creativity, the Crimson Squad decided to lay a trap by placing one of Windchill’s Air Pods in the device to later follow Wendigo’s movements. | ||
| + | | Wendigo | ||
| + | |- | ||
| + | | | ||
| + | | '''Adventurers Crimson #1''' | ||
| + | | "Trouble at the Chem Lab" | ||
| + | | Following the fallout from Overseer, the Crimson Squad set their sights on the villain '''Wendigo''', a chemist with an addiction to spewing fear and chaos. The heroes were called to action at a chem lab in Westside, which was attacked and raided by Wendigo. Working together to quell the rampaging civilians, the team was unable to detain Wendigo as he had already fled the scene. | ||
| + | | Wendigo | ||
| + | |- | ||
| + | | | ||
| + | | '''Adventurers 2038 #4''' | ||
| + | | "Out with the Trash" | ||
| + | | While pursuing the clairvoyant bad guy Scryer through a waste facility, the Adventurers Enenra, Blast-Beat, Kingfisher, Brazen, and Spyder end up tumbling into an industrial vessel that seals its hatch, trapping them. The team has to work through increasing heat and an odious garbage smell when Scryer sets them on a course to the incinerator. Using teamwork, the heroes manage to escape the vessel, though Scryer flees the scene while they are occupied. | ||
| + | | Scryer | ||
| + | |- | ||
| + | | The Skulls | ||
| + | | '''Adventurers Midnight #7''' | ||
| + | | "Anarchy in MC" | ||
| + | | Several days after Iron Skull gave his ultimatum people gather at city hall to demand the domestic terrorist and his gang receive justice, while others arrive to show their support of Skull's declaration of anarchy. | ||
| + | |||
| + | Midnight Squad arrive alongside Firewalker and Osprey to try and calm the people down so a riot doesn't break out. It doesn't take long for Iron Skull to arrive alongside a group of exo-clad gangers, Skull himself now piloting the very same hulking power armor suit he forced Dr. Tamagawa to make. After a brief exchange of words Skull fired the first "shot", hurling an energy buzzsaw towards innocents as they fled, only to have his efforts thwarted via Amita driving her car between the civilians and buzzsaw, saving them, but losing her prized vehicle in the process. Seeing his former protoge still alive enraged Skull, and a battle ensued! Blue Fox (with support from Sombra) fought alongside Catfight to defeat the exo-gangers. | ||
| + | |||
| + | '''Firewalker''', '''Mantle''', and eventually Amita herself battled against Iron Skull. The powerful heavy-duty armor was a lot to handle for them, eventually requiring Blue Fox to step in and attack Skull's flank while Catfight recovered from nearly being taken out by a micro-missile barrage that almost got the rest of the team as well. Eventually they were able to restrain the power armor in place, but not without cost as Amita took a brutal focused rail shot through the shoulder that nearly killed her. But a final corkscrew dropkick from Catfight floored Skull, and with the armor overheating and shutting down the villain was finally defeated. | ||
| + | |||
| + | There is one last crisis to deal with however as Amita's body went into shock from the railgun shot, but with Osprey's medical aid and quick thinking from Sombra, the P.I. is teleported to an oncoming ambulance, and save her life! With Iron Skull bested alongside his gang, Midnight Squad and friends were able to take a breath of relief. Later discovering the supposed bombs Skull threatened the city with were just a ruse, a bluff to try and turn the city against itself and introduce the anarchy he so craved. Midnight squad were free to take a breather, but more adventures loom over the horizon! | ||
| + | |||
| + | |||
| + | | Super Skull (Iron Skull), the Skulls gang | ||
| + | |- | ||
| + | | The Skulls | ||
| + | | '''Adventurers Midnight #6''' | ||
| + | | "No More Heroes" | ||
| + | | Amita Prasad contacts Midnight Squad, informing them she's spoken with the power armor expert that the Skulls gang kidnapped, Dr. Taka Tamagawa. With the recent efforts conducted against the gang, Iron Skull has decided it's time to change Tamagawa's location, a late night prisoner transport being the best chance to rescue him. While Catfight and Prasad were engaged in a seperate mission the squad (Blue Fox, Sombra, Mantle, and Stretcher) were joined by friend of the team, '''Wizard'''! | ||
| + | |||
| + | Gathering on the highway ahead of the transport, Stretcher was turned into a makeshift slingshot used to launch Mantle into the convoy. A high speed chase on the highway results! The Skulls gang are not without new surprises however, unveiling combat exo-frames built by Dr. Tamagawa. With Wizard's help Midnight squad were able to defeat the gangers while Sombra extracted the doctor from the transport truck. | ||
| + | |||
| + | Their victory was short-lived however as Iron Skull held a livestream where he went on a lengthy anti-establishment rant. Demanding the people stand up against their real oppressors, heroes. Activating a detonator he destroyed an abandoned building in City Center, declaring he's had his gang install bombs in occupied buildings as well. And will detonate them if his demands aren't met. | ||
| + | |||
| + | Chaos erupts in the streets while Midnight rushes to the scene of the explosion... | ||
| + | | Iron Skull, the Skulls gang | ||
| + | |- | ||
| + | | The Skulls | ||
| + | | '''Adventurers Midnight #5''' | ||
| + | | "Corrosion Catastrophe" | ||
| + | | Catfight gathers the rest of Midnight squad, Blue Fox, Stretcher, Mantle, and Sombra to the location of Corrosion's hideout in the northeastern section of City Center. They find an abandoned building overtaken by plant life. After a brief investigation of the exterior the squad decided to move in, finding the interior floor completely caved in with a tunnel leading into the sewers. | ||
| + | |||
| + | Deeper within they found the borderline feral villain, who used stolen biochem medication, along with an armored suit equipped with a venomous tail to bolster his abilities. Injecting himself with the stolen medication to gain temporary control over the nearby vegetation. The villain used vines along with poison spitting plants to keep Midnight squad at bay, but was eventually bested by the heroes superior numbers. The police arrive shortly after to arrest the maniac! | ||
| + | |||
| + | With the brief diversion out of the way Midnight squad were free to pursue their campaign against Iron Skull, eager for Prasad's next bit of intel... | ||
| + | | Corrosion; mutated plants | ||
| + | |- | ||
| + | | The Skulls | ||
| + | | '''Adventurers Midnight #4''' | ||
| + | | "The Truth is Revealed" | ||
| + | | Midnight Squad gather at the secluded Westside docks to meet with Private Investigator Prasad, wary of the enigmatic gung-ho woman at first. They approach her openly as a team, discovering that she worked alongside Iron Skull (real name Richard Barret) in the early 2000's with a fellow vigilante who went by the name of 'Nomad'. The band of mercenaries conducting a brutal, lethal crusade against criminals and corrupt leaders alike during the time period where Detroit was still recovering and progressively turning into the Millennium City of today. | ||
| + | |||
| + | In 2010 the group were demolished during a botched takedown of the Overseer. Nomad was fatally shot during the escape, dying moments later in the back seat of their getaway vehicle. While Amita was launched from the car after it was rammed by an SUV belonging to Overseer's goons, losing half of her right arm in the process. Richard Barret was still in the drivers seat of the wreck, seemingly burning to death when Overseer's goons lit it on fire. | ||
| + | |||
| + | Amita begged Midnight squad to let her join in their efforts to take down Iron Skull, desperate for redemption after being manipulated by the overglorified anarchist that is Richard Barret which resulted in her taking so many lives, as well as being forced to clean up various assassinations Overseer conducted after the mercenary band was defeated. After a brief debate Midnight agreed to team with the P.I., who promised she would dig up more intel on the Skulls' current plan while uncovering a dangerous unaffiliated super villain she discovered named, "Corrosion", and where to find him. Midnight squad decides it best to take Corrosion down while Prasad continued her investigation for the time being... | ||
| + | | Iron Skull (mentioned); Overseer (flashback) | ||
| + | |- | ||
| + | | The Skulls | ||
| + | | '''Adventurers Midnight #3''' | ||
| + | | "Skulls Race" | ||
| + | | Sombra and Stretcher use Blue Fox's phone tracking app to investigate the power armor dealer the Skulls are after. Finding the dealer, named Freddy's apartment building. They're able to easily sneak in and discover Freddy runs an entire counterfeit power armor operation using scrap from the junk yard cleaned and touched up to look legit on first glance! Sombra and Stretch eventually choose to interrogate the man, learning he's using the money gained from these counterfeit deals to try and get his way out of the city, while also screwing over any potential psychopath looking to build an illegal suit of power armor. | ||
| + | |||
| + | Their questioning is cut-short when the Skulls arrive eager for revenge. The heroines trying their best to diffuse the situation peacefully, but Freddy had other plans. Causing a brief distraction to make a run for it, what followed was an intense, action-packed chase through the apartment complex that eventually spilled out into the streets! The Skulls chasing Freddy in his junky old car through the streets of westside. Stretcher was able to disable the Skulls' vehicle with the help of Sombra while the same mysterious woman from before flew onto the scene in her sports car, forcing Freddy to crash onto the docks before knocking the fraudulant dealer out with a punch from her cybernetic forearm. Introducing herself as Amita Prasad, a private investigator. Proclaiming she knows who Iron Skull is, and offers to share everything she knows after the rest of Midnight squad gather at a secret location an hour later... | ||
| + | | The Skulls gang | ||
| + | |- | ||
| + | | The Skulls | ||
| + | | '''Adventurers Midnight #2''' | ||
| + | | "Warehouse Mayhem" | ||
| + | | Following up on the tracking device planted in the power armor parts Iron Skull purchesed, Blue Fox and Mantle find themselves on the northern outskirts of the city at a large maintenance warehouse. Blue was able to test out his newly created camera jamming app on his phone to allow the heroes to sneak into the warehouse. | ||
| + | |||
| + | Discovering the warehouse's primary use is to repair the gang's various vehicles consisting primarily of armored SUVs and transport trucks, with the most dangerous of all being a refurbished VTOL chopper with mounted miniguns! Eavesdropping on the scene revealed that Iron Skull ordered the kidnapping of a power armor expert to build a heavy-duty suit for the villain to use, in addition the parts they bought were fakes, Iron Skull himself demanding the power armor dealer pay for trying to ripping him off. Skull himself wasn't on the scene, making it much easier for Blue and Mantle to take the operation down! One panicky Skull ganger in particular jumping into the tethered VTOL and attempting to take the heroes out with the miniguns, resulting in the vehicle crashing indoors and adding to the chaos! | ||
| + | |||
| + | With new information in hand, and the gang's strength slightly diminished, Blue and Mantle fled the scene. Unknowningly being watched by a mysterious woman with a flashy sports car in the distance... | ||
| + | | The Skulls gang | ||
| + | |- | ||
| + | | The Skulls | ||
| + | | '''Adventurers Midnight #1''' | ||
| + | | "Skullduggery" | ||
| + | | While out on a early nighttime patrol Catfight comes across a nefarious arms deal going on in Westside, calling the newly formed Midnight Squad to aid in breaking up the operation! Watching over the scene revealed a new gang to Millennium City, the Skulls, and their leader, Iron Skull. A heavily scarred man obscuring his face with a polished metal mask in the shape of a skull. | ||
| + | |||
| + | With the help of Blue Fox, Sombra, Mantle, and Stretcher. Midnight squad intervened in the power armor deal, and though Iron Skull and the dealer got away Blue Fox was able to track the phone of the dealer, while Sombra planted a tracking device in the purchesed goods! Midnight were able to defeat several gangers. But the mystery as to who this insidious new threat really is was just getting started... | ||
| + | | Iron Skull; the Skulls gang | ||
| + | |- | ||
| + | | Under the Overseer's Gaze | ||
| + | | '''Adventurers #382''' | ||
| + | | "Return to Grace" | ||
| + | | The team moves on the high rise where Overseer is holed up with a number of mercenary defenders using firearms and rockets to keep law enforcement at bay. The Compendium is now in the hands of the justice system and the press, and everyone knows, in astonishing detail, the depth of Clayton Ewing's crimes. The Adventurers arrive to break through the outer defenses. Before they can challenge the Overseer directly in his secret basement facility, they have to defeat an armored-up Titanic (enemy of Blue Fox) and the villain Faceless, who has taken on a form identical to Titanic. | ||
| + | |||
| + | Once inside the Overseer's command center, Kyle McAllister turns on Clayton and tried to shoot him, but Clayton gets the draw and takes Kyle down, first. Then Ewing tries to goad Blue Fox, whom he knows to be Marshall McAllister, his god son, into lashing out and killing Ewing so that Blue Fox will be seduced into the same cycle of lawful evil as Clayton had fallen into. But Kyle, barely alive, manages to draw strength enough to put a fatal bullet in Ewing, and spare his brother from any rash decision. | ||
| + | |||
| + | The Adventurers actions are seen to have been necessary in light of the extent of the Overseer's corruption, and they are lauded as heroes. But there remains the threat of a vacuum to be filled... | ||
| + | | Overseer | ||
| + | |- | ||
| + | | Under the Overseer's Gaze | ||
| + | | '''Adventurers #381''' | ||
| + | | "The Compendium" | ||
| + | | The Adventurers move on Compass Labs only to get ambushed by the supervillain Mantis, on Overseer's payroll, and suffer an untimely betrayal at the hands of Scatha 5. While the robo-team member was visiting Kyle McAllister, and Dark Web, both incarcerated in the Adventurers HQ, the latter managed to 'possess' Scatha 5 and prime him for the backstabbing at the opportune moment, before both McAllister and Dark Web make their escape. Scatha 5 nearly breaks Blue Fox's leg during the startling backstabbing. Nevertheless, the Adventurers persist and manage to extract the Compendium from the Compass Labs archive, until he entire team is then ambushed by Typhoon, yet one more villain amongst an army that serve the Overseer. They manage to temporarily trap Typhoon and arrange a deal in where Typhoon goes free in exchange for the Compendium. | ||
| + | | Overseer | ||
| + | |- | ||
| + | | Under the Overseer's Gaze | ||
| + | | '''Adventurers #380''' | ||
| + | | "Mr. X Revealed" | ||
| + | | Later the same night as the bank heist, Scatha, Windchill, Webcrawler and Tungstan fight to save the life of Mr. X against an attack by Wendigo, Lechuza, Sinister, and Blue Scorpion. Affected by Wendigo's fear toxin, Windchill blanketing a city block with a frigid blizzard to defeat the illusory Wendigoes. It is effective in leading to the defeat of the other villains, but Windchill has to be ordered out of the area because the blizzard is proving deadly. | ||
| + | |||
| + | After the fight, Mr. X is revealed to be Steven Roundy, who worked for Ewing Estates - owned by Ewing - reveals that he had access to Ewing's inner circle, and knows that Ewing has a ''compendium'' of all of his crimes, arrangements, and holdings. This compendium would prove crucial in prosecuting members of Ewing's criminal organization, all the way up to Ewing himself. | ||
| + | | Wendigo, Lechuza, Sinister, Blue Scorpion, Overseer (indirectly) | ||
| + | |- | ||
| + | | Under the Overseer's Gaze | ||
| + | | '''Adventurers #379''' | ||
| + | | "The Bank Job" | ||
| + | | Several Adventurers, including Blue Fox, Sombra, Joule, Firewalker, Osprey, Mantle, and Skyline take part in robbing a bank! They are met with resistance by a group of hastily assembled vigilantes including Safeguard, Delta, Horseshoe, Quetzal, and Wizard within the bank, but fight to escape with barely a scratch while routing the vigilantes handily. | ||
| + | |||
| + | The sudden turn of the Adventurers to crime momentarily puts Clayton Ewing in a PR stalemate, having recently praised the team for saving his rally from an attack by supervillains - just as Webcrawler predicted. But it also puts the team in the law's crosshairs, as Duane Steel had warned. | ||
| + | | Safeguard, Delta, Horseshoe, Quetzal, the Wizard, and the Overseer (indirectly) | ||
| + | |- | ||
| + | | Under the Overseer's Gaze | ||
| + | | '''Adventurers #378''' | ||
| + | | "Ethics" | ||
| + | | The Adventurers have a clandestine meeting with Mr. Koheler, formerly of NLUS, to strike an agreement to have him hold their prisoners. In exchange, the team agrees to do a favor for Koheler down the line, though are quite clear that it must meet not cross any red lines for them. | ||
| + | |||
| + | The team also meets with Duane Steel and advise him of a plan some members have concocted to attack the S&H Bank, which is connected to Clayton Ewing, the Overseer. The daring plan would both leave Overseer without capital, but also, would force Federal investigators to look into their books. The team is not united on the plan, however, with a number of heroes refusing to stoop to criminality to defeat crime. Steel agrees, urging the team to do the plan under the auspices of a prosecutorial-led sting, or else take their chances with being absolved after the fact if they go ahead with it alone. | ||
| + | |||
| + | King Kestrel meets with the team and offers his services. He believes Ewing has a list of enemies, which if found, could prove to be vital to Ewing's arrest and prosecution as hard evidence. The team agrees; there is a sense that Kestrel has changed, though the Adventurers remain wary. | ||
| + | | The Overseer (indirectly); One's own conscience | ||
| + | |- | ||
| + | | Under the Gaze of the Overseer | ||
| + | | '''Adventurers #377''' | ||
| + | | "Baker's Hideout" | ||
| + | | The Adventurers involve law enforcement on an action to capture Baker's Dozens in the Michigan woodlands, but agree to be the tip of the spear. Numerous duplicates of Baker's Dozen are present at some kind of shanty village outside of an abandoned mine - his drug manufactory. The position is far from any major highways and protected by a gun emplacement on high ground, as well as a guard tower at the entrance to the camp. | ||
| + | |||
| + | The Adventurers cooperate to try to take the Bakers by surprise, and obtain the state-of-the-art plasma weaponry in crates around the site. | ||
| + | |||
| + | The team takes a few injuries. The purpose of the Overseer revealing this site to Blue Fox appears to be two-fold: one, in hopes that Marshall will take Baker's Dozen's life to avenge the attack on his father and home, but Blue Fox resists that temptation with the aid of his team mates. Two, to wipe out Baker's Dozen as a drug producer and dealer, to suit the Overseer's goals in finally cleaning up the city. | ||
| + | | Baker's Dozen | ||
| + | |- | ||
| + | | Under the Overseer's Gaze | ||
| + | | '''Adventurers #376''' | ||
| + | | "Long Arm of the Law" | ||
| + | | Overseer calls Marshall when a number of Adventurers were present to offer another chance to surrender. He specifically asked for his people (Kyle, and Darkweb) back, but the Adventurers refuse to yield. The Overseer threatens consequences to follow. | ||
| + | |||
| + | Overseer reveals the supposed hideout of Baker's Dozen, a criminal biker with replication technology who recently torched the McAllister home and tried to kill Marshall's father, Marcus. Overseer’s intentions for doing so remain unspoken. | ||
| + | |||
| + | Later that night, a breakout occurs at the municipal prison! The crime-fighter Osprey is seen violently disabling a number of prison guards and breaks into the maximum security prison to release King Kestrel and his dangerous associate, Cuckoo. Osprey is last seen by witnesses and CCTV escaping the scene with the escaped inmates in tow. | ||
| + | |||
| + | MCPD and PRIMUS are both placing pressure on the Adventurers for the whereabouts of Osprey. | ||
| + | | Overseer; Osprey?; Cuckoo; King Kestrel | ||
| + | |- | ||
| + | | Under the Overseer's Gaze | ||
| + | | '''Adventurers #375''' | ||
| + | | "Tit-for-Tat" | ||
| + | | The Adventurers put themselves in position, anticipating an attack upon the Ewing rally. They must listen to an impassioned 'tough on crime' speech from Ewing (the Overseer) and the roar of a supportive audience, before explosions take out the fountains at the outdoor venue, and a green toxic fear gas starts to spread out. As panicked ralliers stampede away, the supervillains secretly hired by Overseer begin their attack. The Adventurers move in to go toe-to-toe with the baddies, including Absolver, Blue Scorpion, Wendigo, and Lechuza. | ||
| + | |||
| + | When Webcrawler arrives and joins the battle, the fear toxin triggers the spider monster transformation, adding another complication to the battle - though the creature does manage to drive off Blue Scorpion. | ||
| + | |||
| + | Ewing, for his part, cleverly plays up his meaningless shooting toward the armored Blue Scorpion as a heroic deed, while his agents capture unflattering footage of the Adventurers and pump that out to media outlets who portray the team with denigrating narratives. Skyline is shown to be trigger-happy; Blue Fox is shown destroying a police cruiser; Tungstan is shown accidentally injuring a civilian during the stampede as he ran toward the danger; Stinger is shown 'recklessly' attacking Blue Scorpion in a barrage when civilians were seemingly close by; Mantle is shown to clumsily stumble into panicked civilians, when in truth, the fear toxin caused the civilians to attack him; and Webcrawler is shockingly shown to turn into a mutant monster spider, becoming widely known to do this for the very first time. | ||
| + | | Overseer; Lechuza; Absolver; Wendigo; Lechuza Spider Monster | ||
| + | |- | ||
| + | | Under the Overseer's Gaze | ||
| + | | '''Adventurers #374''' | ||
| + | | "Backlash" | ||
| + | | Blue Fox is ambushed by Lechuza, Absolver, Titanic, Black Badger, and Creature in swift retribution for betraying the Overseer. Intervention of Osprey, Courser, Firewalker, Sombra, and Tungstan leads only to more team members being caught in the trap and brutalized by the array of tough villains. In a display of his power, the Overseer ''calls off'' the villains before any team member is slain, but the Adventurers - even Tungstan - carry injuries. | ||
| + | |||
| + | Elsewhere, Webcrawler, Mantle, Azure Hawk, and non-Adventurer Mr. Obvious respond to an attack by the Baker's Dozen at the apartment block of Marcus McAllister - Blue Fox's father. Dozen, an Irish bike gangster who can duplicate himself, is an old foe of Marcus's from his MARS days. The attempt at a very personal strike toward Blue Fox is disrupted by the team's timely intervention, preventing Marcus and other residents' deaths. The apartment block is destroyed in a fire. | ||
| + | | Overseer; Lechuza; Absolver; Titanic; Black Badger; Creature; Baker's Dozen | ||
| + | |- | ||
| + | | Under the Overseer's Gaze | ||
| + | | '''Adventurers #373''' | ||
| + | | "Taking the Power Pieces" | ||
| + | | Some Adventurers plan to accept the Overseer's offer, at least in the short term, to buy time in working against him. | ||
| + | |||
| + | While Blue Fox draws '''Darkweb''' out of hiding and captures him, Osprey goes undercover to infiltrate Overseer's operation which is vanishing homeless people and destroys it - driving off '''Creature''', to whom homeless were being fed. Sombra, Replica, and Courser enacted a plan to capture Kyle McAllister, Blue Fox's brother and advisor to Overseer, and temporarily replace him with Replica so that they could hold and question the real one. | ||
| + | |||
| + | Replica learns that Ewing plans to have supervillains attack an upcoming rally of his own supporters to stifle Olivia Ellison's gains and try to gain the same sympathy. | ||
| + | | The Overseer | ||
| + | |- | ||
| + | | Bluebird for Congress II | ||
| + | | '''Adventurers #372''' | ||
| + | | "Will the Real Overseer Please Stand Up?" | ||
| + | | Discussing the preponderance of evidence gathered over the last several months - from Casey Trent, to the harassment and attempted murders of Olivia Ellison, to the mysterious Mister X, to data obtained by Adventurers Silver - the team comes to believe that Congressman Clayton Ewing, godparent to Blue Fox, is actually the Overseer! | ||
| + | |||
| + | The team confronts Ewing in numbers at his office, and is escorted in by none other than Marshall's (Blue Fox) brother Kyle, who is in service to Ewing. After a brief, tense exchange, Ewing freely admits that he is the Overseer, and also reveals that he knows Blue Fox and Sombra's secret identities. He also knows that Olivia Ellison, his rival for election, is the alter ego of former Adventurer Blue Bird. The team variously reacts to the Overseer with promises of justice, and even some threats, but leaves peaceably. The Overseer gives them 24 hours to agree to work with him on achieving his vision for true order... or face his wrath as his enemy. With recording devices interfered with preventing hard evidence of Ewing's 'confession,' the team scrambles to figure out how to respond to Overseer's offer. | ||
| + | |||
| + | '''Featuring:''' Blue Fox, Sombra, Firewalker, Courser, Scatha 5, Osprey, Azure Hawk and Webcrawler. | ||
| + | |||
| + | | The Overseer - Congressman Clayton Ewing | ||
| + | |- | ||
| + | | Bluebird for Congress II | ||
| + | | '''Adventurers #371''' | ||
| + | | "Rack and Break" | ||
| + | | Directed to help protect Congressional candidate (and secretly, the former Adventurer named Bluebird) during an open air rally at which she will be at great risk, the Adventurers meet with her. Yet despite the history of attempts on her life and threats from the Overseer, Olivia is immediately more interested in the hit to her image - her opponents' PACs keep attacking her for being too soft on crime, and a danger to be around because of all the bad things that happen to her. | ||
| + | |||
| + | The team agrees to be subtle, but when rocket fire and wide-area smoke bombs disrupt the rally, the team swoops into action to face the perpetrators: a billiard ball-styled gang called '''the Ballers'''! Each Baller seems to have a different skill set and themed costume. The team captures some, and forces others to retreat. But the stage collapse caused during Osprey's battle with 4-Ball, and the various rocket-blasted areas, leave Bluebird rattled. Was it the Overseer again, or someone else with an agenda to eliminate Ellison - or just her chances at high office? | ||
| + | |||
| + | '''Featuring:''' Blue Fox, Firewalker, Scatha 5, Osprey, Sombra | ||
| + | |||
| + | | The Overseer?; the Ballers | ||
| + | |- | ||
| + | | Dealing with Devastator | ||
| + | | '''Adventurers Gold #3''' | ||
| + | | "Ghost Town" | ||
| + | | Adventurers Gold reaches the ghost town where Devastator lives. The old mining community seems abandoned, but when they get closer, half-finished, haphazardly reconstructed robots dig themselves out of the sand and beset the team in great numbers. Trespasser is injured in the fight. The team then survives an aerial bombardment of missiles launched by Devastator, with help from Stinger who arrives late to the battle. Finally, all of his defenses laid bare, Devastator takes flight over the battlefield himself where after a pronounced battle, he is brought to ground and defeated. | ||
| + | | Devastator | ||
| + | |- | ||
| + | | Dealing with Devastator | ||
| + | | '''Adventurers Gold #2''' | ||
| + | | "The Jail Gambit" | ||
| + | | Tasked with capturing Devastator, the team learns that he is adept at laying low, and probably has a base of operations in the USA. One of Devastator's known associates, Jay Nordhoff AKA '''Marauder''', is being held in the county jail awaiting an arraignment. The team devises a plan to sneak Firewalker in, disguised as a gangster cellmate, to try to quickly earn Nordhoff's confidence and figure out where Devastator is, while other team members keep the court and jail officials busy undercover. | ||
| + | |||
| + | Devastator is discovered to be hiding out in a remote part of eastern Nevada. | ||
| + | | Jay Nordhoff (the Marauder) | ||
| + | |- | ||
| + | | Dealing with Devastator | ||
| + | | '''Adventurers Gold #1''' | ||
| + | | "Supreme Devastation" | ||
| + | | Webcrawler calls out for help! Having escaped capture by her old enemy, the '''Devastator''', she alerts the team that she is being pursued by his Oppressor robot - nearly two storeys tall. It takes numerous Adventurers to fell the thing, and rescue its power source: a young hero named '''Battery''' whom Devastator had recently captured and enslaved within the robot. Webcrawler taps the newly-formed Adventurers Gold to begin the hunt for Devastator, and bring him to justice. | ||
| + | | Devastator; Devastator's Oppressor Robot | ||
| + | |- | ||
| + | | The Soul of the Nation | ||
| + | | '''#370''' | ||
| + | | "Return of Mr. X" | ||
| + | | The mysterious Mr. X unexpectedly reaches out to Blue Fox, causing several Adventurers [Blue Fox, Osprey, Sombra, Mantle, Scatha 5, Courser] to attend a clandestine meeting with him in a city center underground car park. His new revelation: Casey Trent was ''not'' the Overseer, but probably a patsy, a fall guy. Mr. X says that the criminal web of which he is part slowed for a bit upon Trent's capture by the Adventurers months ago, but recently has renewed its activities, and is working hard toward some looming goal. Furthermore, the Overseer seems quite aware of the Adventurers and is making plans for them. | ||
| + | |||
| + | As before, Mr. X can answer few of their questions in full or direct ways, for fear that the compartmentalization of information in the cabal will make it easy to trace back to him. But he does profess to be an ally to the Adventurers and opposed to the illegal activity he sees. | ||
| + | | The Overseer | ||
| + | |- | ||
| + | | (none) | ||
| + | | '''#366-#369''' | ||
| + | | "Sins of the Past, Sins of the Present" | ||
| + | | The Adventurers encounter Skyline, and help battle his opponent Tectonic, leading them into intrigues with the Hawthorne Foundation who manufacture a potent but dangerous substance called Polymorphite - which currently powers Skyline. | ||
| + | |||
| + | More: [[Skyline:_Sins_of_the_past,_sins_of_the_present|Skyline: Sins of the Past, Sins of the Present]] | ||
| + | | Hawthorne Foundation; Tectonic | ||
| + | |- | ||
| + | | (none) | ||
| + | | '''#359-365''' | ||
| + | | "Broken Mirror" | ||
| + | | (Description to come) | ||
| + | | Kestrel | ||
| + | |- | ||
| + | | (none) | ||
| + | | '''#358''' | ||
| + | | "Dino Rampage" | ||
| + | | The team responds to a genuine t-rex rampage in downtown Millennium City! The combined efforts of Firewalker, Blue Fox, Replica, Courser, Stinger, and Sombra(?) drive the creature toward a large city park where they leave it open to be sedated and subdued. PRIMUS, meanwhile, follows the path of destruction back to its source and locates a bio-lab in a state of carnage. | ||
| + | | Dinosaur | ||
| + | |- | ||
| + | | Going Home | ||
| + | | '''#356-357''' | ||
| + | | "Going Home, Parts 1 & 2" | ||
| + | | Maya (Sombra) and Riley (Courser) join Kyra (Replica) on a bus trip to her home town of Athens. There, Kyra has been asked to give a speech to an assembly at her old high school about her unorthodox path to success and overcoming her more rowdy past. Kyra has to face the real reason her parents refused to pay for her university, something which has been a sore point in their relationship for years. Also, a swamp monster turns up at Kyra's dad's workplace - an alligator sanctuary - requiring the Adventurers in Athens to take action! ... and afterwards, Kyra spills the beans about her secret identity to her antagonized father, leading at last to a cathartic reconciliation. | ||
| + | | Swamp Monster | ||
| + | |- | ||
| + | | The Cabal | ||
| + | | '''#355''' | ||
| + | | "Foxing Them Out" | ||
| + | | Red Spider recovers enough to go home, but has memory loss covering about the last 10 years of her life. The team agrees to take turns watching her in case her secret identity became known by villains. Firewalker, Replica, Courser, and others start attending fitness classes at Red Spider's home studio to keep tabs on her, while Sombra and Dreamweaver do what they can to help her at home. | ||
| + | |||
| + | The enigmatic Mr. X tells the team a month later that Liddell's arrest seems to have changed nothing for the mysterious cabal he previously warned the Adventurers about. Blue Fox is selected to lead in Red Spider's stead, and he announces he is determined to probe the identities and true intentions of who framed Liddell. | ||
| + | | Liddell; Mystery Cabal | ||
| + | |- | ||
| + | | With a Silver Spoon | ||
| + | | '''#354''' | ||
| + | | "Straight From the Source" | ||
| + | | The team is alerted to a break-in at Silverline Industries, discovering a few of the Scrappers gang inside, ransacking the place for new parts to maintain and grow their cyborg posse. Raymond Silver, founder and CEO of the company, investigates matters himself via video screen, expressing his annoyance and sealing both groups inside while he summons his security. During the fight between the teams, this security arrives: a trio of formidable rolling robots ordered to take down everyone! The three-way melee ends, of course, with the Adventurers victorious, the lockdown lifting as they threaten to trash the damaged robots completely. | ||
| + | | The Scrappers, Silverline Industries | ||
| + | |- | ||
| + | | A Murder Most Foul | ||
| + | | '''#353''' | ||
| + | | "Ground Zero" | ||
| + | | After the battle in the casino, the team confronts and arrests Cosmo Liddell in his penthouse. Liddell protests that it's all a frame, accusing the team of having manufactured the crisis as an excuse to grab him. The police investigation begins, with Detective Sheffield helping the team realize that Red Spider probably wasn't beaten in the holding room where she was found, but brought there after. Blue Fox tracks the scent of her to the loading dock. Upon personally verifying the Red Spider's medical status at the team's HQ, the Detective is willing to conclude that the Adventurers had probable cause to enter the casino to rescue her - but warns that destructive vigilante behavior will not be tolerated any further. The team provides the detective with recordings and data they pulled from the casino; though technically admissible, the detective warns that they may not be lawyer-proof. | ||
| + | |||
| + | The team has a frank discussion about it, with members like Tungstan, Stinger, and Sombra showing disappointment in how the casino battle unfolded, ones like Blue Fox and Vortex feeling things could be better but they acted as best they could, and ones like Catfight feeling that the ends justified the means. | ||
| + | |||
| + | Red Spider remains unconscious and recovering under the care of the team's surgical droid. | ||
| + | | Cosmo Liddell | ||
| + | |- | ||
| + | | A Murder Most Foul | ||
| + | | '''#352''' | ||
| + | | "Ground Zero" | ||
| + | | The mysterious Mr. X arranges a meeting with the team through Blue Fox's website. In a parking garage, he tells Sombra, Blue Fox, and Firewalker that the attempt on Olivia Ellison's life, and the death of Sarah, was just part of a much vaster conspiracy. While he knows that Cosmo Liddell is part of the web, Mr. X does not believe Liddell is at its center. He urges the team to find out who gave the order, and find a path to the center of the web. | ||
| + | |||
| + | Later, Red Spider goes missing! On a hunch that Cosmo Liddell has captured her, the team arranges for ally '''Replica''' to sneak into Liddell's Horizon Casino, disguised as a Liddell gangster. Inside, she finds Red Spider badly beaten in one of Liddell's casino holding rooms. With danger closing in and Sombra's powers suddenly inactive, the team springs into action. | ||
| + | |||
| + | A pitched battle sees the casino wrecked. Much collateral damage is caused by the Liddell gang and their weapons, but the Adventurers are wanton in their destruction. Catfight in particular drives her car into the slots floor, with potentially lethal consequences. | ||
| + | |||
| + | Afterward, the team confronts and arrests Cosmo Liddell. Liddell protests that it's all a frame, accusing the team of having manufactured the crisis. The police investigation begins, with Detective Sheffield helping the team realize that Red Spider probably wasn't beaten in the holding room where she was found, but brought there after. Blue Fox tracks the scent of her to the loading dock. Verifying that Red Spider was injured, the Detective is willing to conclude that the Adventurers had probable cause to enter the casino - but warns that destructive vigilante behavior will not be tolerated any further. | ||
| + | |||
| + | The team has a frank discussion about it, with members like Tungstan, Stinger and Sombra showing disappointment in how the casino battle unfolded, ones like Blue Fox and Vortex feeling things could be better but they acted as best they could, and ones like Catfight feeling that the ends fully justified the means. | ||
| + | |||
| + | Red Spider remains unconscious and recovering under the care of the team's surgical droid. | ||
| + | | Cosmo Liddell; Mr. X | ||
| + | |- | ||
| + | | A Murder Most Foul | ||
| + | | '''#351''' | ||
| + | | "In the Dragon's Den" | ||
| + | | The Adventurers begin to strike back at Liddell to let him know he's gone too far in murdering celebrity Sarah Ellison! Blue Fox does some cyber attacks and reveals some embarrassing info about the Liddell organization. Catfight hits a money-laundering operation within a laundromat. Red Spider exposes a shipping container full of contraband on the Liddell Shipping lot. | ||
| + | |||
| + | The team track down the gunman who escaped from the Ellison penthouse. He gives up under questioning that someone else recruited him for the hit and the money came by dead drop, but he was under the impression it was a Liddell operation. The team keeps the gunman in protective custody for fear that Liddell will try to eliminate him. | ||
| + | |||
| + | A full force of Catfight, Blue Fox, Red Spider, Stinger, Sombra, and Vortex go to Liddell's casino. Though security tries to tell them to leave initially, Cosmo Liddell relents and has them escorted to his office. There the team tries to extract a confession out of him. Liddell remains cagey and trades barbs with the team. The crime boss contends he had no involvement in the death of Sarah Ellison - though he'd congratulate whoever did it. He's not troubled by the hearsay the team has gathered, saying he's constantly the target of hearsay for things he both did and did not do, and it hasn't sunk him yet. Liddell warns the team if they keep trying to weaken his organization and the control it exerts over his territory, it will give rise to more violent crime - a risk some team members seem willing to accept. | ||
| + | | Cosmo Liddell | ||
| + | |- | ||
| + | | A Murder Most Foul | ||
| + | | '''#350''' | ||
| + | | "The Death of Night Star" | ||
| + | | Two gunmen make their way through the layers of security at Ellison Hotel and Suites to open fire on Olivia (Bluebird) and Sarah (Night Star) in the former's private penthouse suite, declaring they are there on behalf of Cosmo - notorious crime boss Cosmo Liddell. Sarah goes down in the initial salvo, while Olivia manages to resourcefully fend off the attack. Sarah uses the last of her strength to ward off one gunman, while Olivia kills one in her own defense. | ||
| + | |||
| + | Later in hospital, Sarah succumbs to her wounds. Dr. Erin Bailey surgically removes a data device from Night Star and gives it to Cassandra Olsen's (Red Spider) safe keeping. Rubber Bullette, Sombra, Blue Fox, Stinger, and Catfight are all present out of costume at the hospital to join Olivia and Rayna Ellison, and they begin to discuss responses to Liddell. | ||
| + | | 2 Gunmen; Cosmo Liddell? | ||
| + | |- | ||
| + | | | ||
| + | | '''#349''' | ||
| + | | "Sinking of the Titanic" | ||
| + | | On her own, Sombra encounters the villain Titanic, seemingly hired to trash a construction site belonging to Congressman Clayton Ewing. She is forced to play a game of cat and mouse, unable to match the giant in combat, but eventually outthinks him, though finds no satisfying motivation for the attack.... | ||
| + | | Titanic | ||
| + | |- | ||
| + | | The Juliana Nova Incident | ||
| + | | '''#348''' | ||
| + | | "Vengeance of Verdugo" | ||
| + | | With evidence to clear Olivia's name, the team heads to Juliana Nova to retrieve their extradited teammate. Verdugo's compound is well-defended, but the team smashes through, finding Olivia beaten and bruised in a cell. Verdugo himself reveals his metahuman powers, and faces them! | ||
| + | | Salvador Verdugo | ||
| + | |- | ||
| + | | The Juliana Nova Incident | ||
| + | | '''#347''' | ||
| + | | "Joule, Grounded" | ||
| + | | The team is shocked to discover the morning news declaring that their teammate Joule, Olivia Kowalczyk, has been arrested for an apparent political assassination from her time in the US Army. Fledgling South American nation Juliana Nova and its Grand Marshal, Salvador Verdugo, accuse Olivia's unit of the murder of several rebels, including his own brother Pedro, during their bid to depose the previous rulers of the country. The team splits up to investigate, visiting the Juliana Novan embassy, and Joule's own records from the past. It's soon discovered that Nero Corp, the creator of the Invictus serum that previous villain RoidRage made use of, was involved in Juliana Nova. Salvador and his men killed their own men while "high" on the drug, and framed the US soldiers later! And now, they have a new, improved Invictus II serum in storage.... | ||
| + | | Salvador Verdugo, Nero Corp | ||
| + | |- | ||
| + | | Catfight Arc | ||
| + | | '''#344-346''' | ||
| + | | "The Kriedler Feud" | ||
| + | | The team contends with Winston Kriedler, who has a grudge against the Reinhardt family and a giant wolf robot to help. Markus Reinhardt, believed dead since Adventurers #307, turns up alive and well and offers to help the team. His agenda isn't clear, but Markus does make a play for his own redemption. (Please expand). | ||
| + | | Kriedler, giant wolf robot | ||
| + | |- | ||
| + | | Hellfire, Dark Fire | ||
| + | | '''#341-343''' | ||
| + | | The Path of the Righteous Man | ||
| + | | Firewalker, affected by the hellfire he absorbed in his contest with Satan like a deadly toxin leeching into his mind, starts rampaging through the city, causing havoc and terror. The Adventurers, after numerous attempts to reach him, finally confront him once and for all when he becomes a giant, fiery demon. Fox, now known as Oni, is able to use a new energy-draining sword to stab Firewalker and suck the hellfire out, leaving the hero injured and apologetic, but okay. | ||
| + | | Firewalker | ||
| + | |- | ||
| + | | The Golden Man | ||
| + | | '''#340''' | ||
| + | | "Not a Forever Goodbye" | ||
| + | | Lord Aurum's remaining Golden Men try to save him, and drag him against his will into the waiting transport. Firewalker blasts it off course, while Silver Hare trashes its engine assembly. The resulting pressure build-up causes an explosion that makes the transport crash to the street. Aurum emerges from the wreck to be assailed by Blue Fox; his helmet is smashed, his life support fluid drained, and he is brought within an inch of his life. The team brings Aurum back to HQ in a bid to keep him alive. | ||
| + | |||
| + | The Surgical Droid captured in Adventurers #284 is brought in to stabilize Aurum and attempt to fashion a makeshift repair to his life support suit. The team orders the droid to awaken Aurum, then they ask if he can save Spyder. Aurum indicates that he ''probably'' can, but that he would need to return home to consult his texts to find the way. He bargains for his release, promising he will fulfill his end, and help both Spyder and Abaza Menderes return to life. The team is reluctant, but agrees that letting Aurum go is their best chance to save Spyder. | ||
| + | |||
| + | Two weeks later... | ||
| + | |||
| + | Spyder wakes up at the Olsen suite, surrounded by Blue Fox, Catfight, and Firewalker. She needs a few days to recover. | ||
| + | |||
| + | Future Adrynne visits Spyder late at night to let her know that she has fulfilled her purpose for being in the past, and she will soon be brought home to her proper time. Spyder takes time to say goodbye to the younger version of her father, whom she got to know during her stay in 2021, and farewells her team mates with a party. As she waits for the portal to open to return home, she says goodbye to everyone over team comms - and they respond by showing up in person to see her off. Sombra sends a cake with her to share with whoever greets her on the other side. | ||
| + | |||
| + | Shortly after Spyder enters the portal and it closes, the express private elevator of Cassandra Olsen's suite dings with a new arrival: Cassandra, returned from the future, holding baby Jessa. | ||
| + | | Lord Aurum | ||
| + | |- | ||
| + | | The Golden Man | ||
| + | | '''#339''' | ||
| + | | "Spyder's Purpose" | ||
| + | | The Adventurers get word from Silver Hare and, shortly after, Firewalker, about Lord Aurum's schemes, his crafting of the Philosopher's Stone, his killing of his future counterpart. | ||
| + | |||
| + | Blue Fox accesses a climate satellite to find a heat spike in the city corresponding with Firewalker's forging of the Stone, and locates it at the former address of the Order of Osiris [see Adventurers #249], which is being built over by a new construction site. But there must have been a sub-structure no one knew about, deep below. | ||
| + | |||
| + | The team arrives en masse to find Aurum's Golden Men boarding an air transport on exposed top floor of the building construction. Aurum, now encrusted in organic golden armor, and bearing the Philosopher's Stone on his chest, appears by hologram projected by a Golden Man to parley with the team. But the team will not accept Lord Aurum's word about the future calamity, nor his sole proprietorship of the Stone. The Golden Men go to attack mode. | ||
| + | |||
| + | For the first phase of the battle, the Adventurers are seriously overwhelmed by the Golden Men. Spyder went into her camouflage at the start of the encounter and is not seen, while Sombra also goes invisible and tries - without success - to pry the Stone away from Aurum once she sneaks onto the transport. Aurum has Sombra carried out, and has his robots hold position, but prepare for death strikes on those Adventurers who have been knocked down. Unable to get their acknowledgement of his claim to the Stone, Aurum seems about to order their deaths. | ||
| + | |||
| + | Then an invisible hand is revealed as the fingers, hand, and arm start to turn gold against Aurum's chest. Spyder, in camouflage, grabs the Stone and tugs it free, then dives to the ground, and buries it under her. Just as happened to the Turkish girl in 1908, Spyder - undisciplined in the mastery of the Stone - starts to turn into a solid gold statue bit by bit. Her sacrifice puts Aurum in alarm, and he thoughtlessly orders ''all'' of his Golden Men to immediately converge on Spyder and wrest the Stone from her before it is too late. | ||
| + | |||
| + | The Adventurers take advantage of the situation and dispense with most of the Golden Men when they turn their backs. Firewalker rockets through a great many. | ||
| + | |||
| + | Sombra gets close to Spyder and tries to take the Stone, but Spyder rolls and indicates she intends to see her sacrifice through. The sweep moves over her body, and Spyder is rendered unliving gold. The Philosopher's Stone expends its energy in her grasp, and crumbles to dust under Spyder. | ||
| + | | Lord Aurum | ||
| + | |- | ||
| + | | The Golden Man | ||
| + | | '''#338''' | ||
| + | | "Captured by the Alchemist" | ||
| + | | In Millennium City, Firewalker wakes up in an unfamiliar but dungeon-like place, swimming in a pool, restrained on a harness. He is soon visited by Lord Aurum of the Future, who explains his situation. It becomes clear that Lord Aurum of the Future took advantage of Edgar Cryderman's intention to travel back in time [see Adventurers #326-27] to destroy the Adventurers, and persuaded Cryderman to hit Red Spider at a certain date in 2021. Aurum came with Cryderman, and his intention was not to help Cryderman succeed - he expected Cryderman to fail, as he always did - but to be in place at a time in history when he knew that hellfire was something that he might be able to obtain without the peril of dealing with the devil. | ||
| + | |||
| + | Firewalker learns that Future Aurum is trying to stop a great, world-ending calamity that is doomed to happen in the near future, which he has sensed with his foresight power. To do avoid this fate, Aurum believes the Philosopher's Stone must be constructed so that a human mind can attain the wisdom necessary to determine how the calamity begins in the first place. Everything he has done for nearly a century has been, in some way or other, about gaining the Stone, and averting disaster. | ||
| + | |||
| + | While Firewalker considers the value of a potential alliance, Lord Aurum of the Present joins them, and makes clear that they have a hostage to ensure his obedience: Silver Hare. Firewalker tries to destroy Lord Aurum of the Future, but finds his future armor, outfitted with dragon scale, is enough to shield him. They douse him with water from an aqueduct high above. As the villains leave to make preparations, Firewalker asks the two Aurums if they considered which one of them gets to keep the Stone. | ||
| + | |||
| + | Later, Lord Aurum of the Future explains the situation to a frightened Silver Hare, and then brings her to see Firewalker. Just before it comes time for Firewalker to forge the stone, the Aurum of the Present has his Golden Men seize Future Aurum, and force a poison through his visor, into the liquid oxygen medium around his head. Future Aurum dies, and is dragged away. Later, Present Aurum - now in his future counterpart's armor - presides over the forging of the Stone. Firewalker bargains for a sign of good faith from Aurum that he won't misuse the Stone, asking that Aurum release Silver Hare. Aurum uses his golden dust to sedate Hare without warning, and orders his Golden Men to drop her off safely on a rooftop. | ||
| + | |||
| + | Firewalker uses his powers to forge the metallic core Aurum has prepared into the Philsopher's Stone, in a forge lined with dragonscale in order to protect the building from the intense hellfire. Firewalker achieves the Stone's formation... and tries to go a step further and eradicate it. The Stone, however, remains resilient to the additional heat. Golden Men, standing guard, strike from multiple angles with electrical attacks to subdue Firewalker. Aurum remarks that he anticipated betrayal, but still finds it disappointing. He does try to share with Firewalker something of the Stone's power, asking if Firewalker can sense any new insight or inspiration. | ||
| + | |||
| + | Firewalker also removed to wake up safely somewhere else. | ||
| + | | Lord Aurum | ||
| + | |- | ||
| + | | The Golden Man | ||
| + | | '''#337''' | ||
| + | | "A Century's-old Adventure" | ||
| + | | As the team tries to look into leads on some clues they found in Lord Aurum's mansion in the Aegean, the Professor Walsingham AI finds a personal connection to one of the aliases Aurum has used, in the old passports and IDs Sombra brought back - that of Dr. Adem Altun. | ||
| + | |||
| + | Walsingham recounts in flashback how the Classic Adventurers attempted to investigate the case of a girl named Abaza Menderes in the Anatolya region of Turkey in 1908, who had apparently been turned to stone. Discounting other explanations such as a hoax, the team met Dr. Altun, supposedly a professor in Ankara, who had also come out to investigate. In time the team learned that Altun was not all that he appeared, and after Altun knocked the team out and captured them in his home, they woke up in a dungeon. Altun admitted he had been with Abaza, and had even hired her to help him, when he came to explore an old temple that he suspected was in the area near her village. When they discovered a glowing orb set in the floor, he instructed Abaza to pick it up for him - but upon holding it in her hands, it began to turn her to gold. Altun left the statuefied Abaza and went back to Ankara to get the tools he needed to handle the orb safely, but when he got back, not only had the Adventurers shown up to investigate, but the orb had apparently crumbled to dust. Altun suspected that Abaza lacked the mental discipline to bear the orb. | ||
| + | |||
| + | The Classic Adventurers managed to escape Altun's dungeon. They had to flee Turkey immediately when Altun leveraged his pull with the authorities to make the Adventurers out to be vile warlocks and plunderers. | ||
| + | |||
| + | The team learns that Dr. Altun / Lord Aurum's aim as an alchemist would be to craft the fabled Philosopher's Stone. That may be what Altun and poor Abaza found in that ancient, forgotten temple. The Stone legendarily would have the power to turn base material to gold, but also to provide wisdom, insight, and inspiration to those near it. It might also prolong life. | ||
| + | |||
| + | Night Star tracks down the statue of Abaza, which still exists and is presently owned by one of those commercial museums of oddities, and pays over $30 Million to buy it and have it shipped to her. | ||
| + | |- | ||
| + | | The Golden Man | ||
| + | | '''#336''' | ||
| + | | "Return to Aurum Island" | ||
| + | | Spyder finally meets 'Fox' who has recently been restored to life. She tells him about her purpose being in the past: finding Lord Aurum. Fox, darkened by his time in hell, seems skeptical of the young hero. He suggests that if Aurum is out there, the team should visit his island. | ||
| + | |||
| + | Spyder convinces the team to go. Night Star, who was going to journey to nearby Cretoa in the Aegean Sea anyway, arranges transportation for the team to visit the tiny island upon which Lord Aurum's mansion sits. There, the team discovers a swarm of Aurum's '''golden men''' repairing the house, which had been extensively damaged a year prior when dozens of Golden Men burst forth to pursue Red Spider and Blue Fox when they stole something from Aurum's lab. | ||
| + | |||
| + | At the door, a Golden Man wearing an ornate shirt greets the team and hospitably takes them to a sitting room, affording them every comfort a guest might expect. The team learns little by little that Aurum is not present, but he did hope to bury his conflict with them - and avoid the Adventurers interfering in his efforts in future. The servant reveals that Present-day Aurum and Future Aurum are working together, and that Aurum's purpose is to save the world from some future calamity he knew was coming due to his power of foresight, but the servant had no specifics. | ||
| + | |||
| + | While most of the team peppers their host-bot with questions, '''Oni''' (a new alter ego of Fox) ostensibly leaves to use the washroom, but in truth, uses a laundry chute to access the laboratory in the mansion's basement. He takes samples from some kind of recent experiment. | ||
| + | |||
| + | Upstairs, the Adventurers take advantage of the servant bot leaving the room to fetch a water pitcher, to examine Aurum's library and adjoining scrying chamber. Rubber Bullette finds various occult tracts, with many being books on alchemy. Sombra found a book on a book case that opened a tiny, secret office behind it, wherein she discovered that Aurum may have links both to Sir Thomas Walsingham, and the Order of Osiris. '''Terratonic''' (and others) entered the scrying chamber, which was a bare room with black walls, a table, a mirror upon it, and a chair; it was quite foreboding, sending a chill down their spines just to be in it, but they did not 'see the future' as the servant had said was Aurum's purpose for being there. | ||
| + | |||
| + | The servant persuaded the team to stay for dinner. At the dinner table, when Sombra inquired further about how they could trust Aurum, the servant projected a live hologram of Future Aurum, who spoke with them. He indicated that he had been patiently waiting for the team to come to his abode so that he could enact a plot to kidnap Firewalker, whose hellfire he needed for a purpose he would only disclose in riddles. Firewalker had recently absorbed a great deal of hellfire in his challenge to the devil. Lord Aurum said that he had done all he could to delay the team at his home to buy time for whatever his plot was. | ||
| + | | Lord Aurum | ||
| + | |- | ||
| + | | -- | ||
| + | | '''#335''' | ||
| + | | "Terratonic AND Proto Strikes!" | ||
| + | | The team becomes aware of Proto droids committing a raid in the city's vast freight yards, stealing metals and tech components. Firewalker takes to the sky and tries to intercept groups of Proto Drones making off with heavy bundles of steel. Night Star turns up to fight at the freight yard, and assists '''Terratonic''' - a hero who uses earth-control powers - in destroying a war droid. They then cooperate on destroying a sturdy Hazard Droid. Spyder also turns up, and leads an Aero Droid into a trap for the others to destroy. | ||
| + | |||
| + | Some of the drones escape with their haul, but not as much as they might have thanks to Adventurers and non-Adventurer heroes like Delta and Terratonic. Afterward, Terratonic reveals she is known to Red Spider, and the team extends an offer for Terratonic to join full-time. | ||
| + | | Proto Droids | ||
| + | |- | ||
| + | | -- | ||
| + | | '''#334''' | ||
| + | | "Chasing Shadows" | ||
| + | | The police think Sombra has broken bad. The team goes in pursuit of her, and eventually dogpile her in the park. Sombra makes her acquisition difficult by using her teleporting powers. Upon seizing Sombra, the team are able to remove an 'Earworm' from her that was causing her to do bad things, and turn it over to the police. | ||
| + | |||
| + | Spyder gains more control of her sticking power in the fight to capture Sombra. | ||
| + | |||
| + | (More to come...?) | ||
| + | | Earworm | ||
| + | |- | ||
| + | | -- | ||
| + | | '''#333''' | ||
| + | | "Marooned" | ||
| + | | Rubber Bullette and Azure Hawk end up marooned on a tropical island. (More to come...?) | ||
| + | | Unknown | ||
| + | |- | ||
| + | | Mission: Hell | ||
| + | | '''#332''' | ||
| + | | "The ''Other'' Underworld, Part 2" | ||
| + | | The Adventurers challenge the shape-shifting Lord of Hell to various contests. Blue Fox tries to have the devil beat his time in a Doom speed-run, but the devil prevails despite Blue Fox's program traps. Firewalker challenges the devil to try to destroy him with hell's fire, but that if he can endure 15 minutes, he wins; after a trial that nearly destroys him, Firewalker wins. Rubber Bullette asks for the devil to create a obstacle course similar to TV's ''Wipeout''; the devil obliges, creating a grotesque course that uses sharp, jagged metal, bloody meat in place of air-filled rubber balloons, and so on; RB does beat the devil's servant's best time, but is given a bad slice from one of the spinning blades. | ||
| + | |||
| + | Sombra challenges the devil to a culinary duel, prompting the devil to pick a jury of the damned to select the winner. While in ''hell's kitchen'' Sombra finds everything she needs, though the screams that eminate from the appliances every time she opens them unnerves her. She manages to exceed the devil's baking skills in the end. | ||
| + | |||
| + | Frustrated, the devil demands an impossible thing: he wants all of the Adventurers, even the ones not present, to give him a challenge, saying that was implied in his contract with the team, and threatens to claim victory if the team doesn't give him one challenge from every team member - impossible, as in some cases, team members simply cannot be there. Sombra counters that as leader, she can change the roster, so she declares those Adventurers not present to be kicked off the team. The devil is down 1 - 3 in the score, and appreciating Sombra's bending of the rules, concedes victory to the Adventurers. | ||
| + | |||
| + | Fox and Adrynne are subjected to profound levels of pain as they are resurrected and set free, and the team is bidden to leave hell immediately. | ||
| + | | The Devil | ||
| + | |- | ||
| + | | Mission: Hell | ||
| + | | '''#331''' | ||
| + | | "The ''Other'' Underworld, Part 1" | ||
| + | | Fox on the run! He is being pursued by demons when the spirit of Adrynne finds him, having been seeking him in the afterlife for company while she tries to reconstitute her mortal form. Fox recounts how he had arrived in hell after agreeing to die in place of another, but in so doing, took on a pact that required him to go to hell. Horrified, Adrynne promises to inform the Adventurers, and stake her own soul in a gambit to free Fox from the devil. | ||
| + | |||
| + | The Adventurers are still exhausted from their battle with Xagrim when Adrynne informs them of Fox's plight, and her suggestion of a way to get him back: give the devil some good sport. If the Adventurers can think up entertainments for which the devil, or his appointed servant, can go head-to-head, and beat him in them, then perhaps in winning they can win Fox and Adrynne's souls. But if the team fails, Fox and Adrynne must endure hell until the endtimes. | ||
| + | |||
| + | While some Adventurers are willing, more than a few are quite skeptical of the plan. Inside of a day, hellmouths open before each Adventurer individual, providing a way for them to reach the underworld... | ||
| + | | The Devil | ||
| + | |- | ||
| + | | The Season of Xagrim | ||
| + | | '''#330''' | ||
| + | | "Horror at the Fashion Show, Part 3" | ||
| + | | Sarah overhears the conversation in Liddell's room via mics she left there. In a strange conversation, Liddell pledges fealty to Seaton as his 'master,' and promises his will be done. Sombra sneaks into the room, but Seaton - exposed as Xagrim - perceives her, and morphs into his horrific true form, a massive dark humanoid of pure, dark psionic energy, clad in psionic armor. He chases after Sombra, as seizing someone of her power is instrumental to his conquest of Earth. | ||
| + | |||
| + | As fashion show goers flee for their lives, and the convention hall is destroyed by Xagrim as he pursues Sombra, the Adventurers face him down and do battle against the extra-dimensional terror. After a long, pitched battle, which at one point sees Rubber Bullette used as a sort of flail against the Adventurers, the team succeeds at weakening Xagrim enough that he flees this dimension. Cosmo Liddell emerges from the ruination of his convention hall and has no memory of being under Xagrim's control. | ||
| + | |||
| + | The beleaguered Adventurers take some time off to recover. Meanwhile, in the great beyond, Adrynne - impatient for company as she painstakingly reconstitutes her mortal form - seeks the spirit of Fox, the Adventurer who had given his life to defend another some months before. Finding him, to her surprise, in hell, pursued relentlessly by demons, Adrynne vows to rally Fox's teammates and secure his release from this grim fate. | ||
| + | |||
| + | |||
| + | | Xagrim; Cosmo Liddell | ||
| + | |- | ||
| + | | The Season of Xagrim | ||
| + | | '''#329''' | ||
| + | | "Horror at the Fashion Show, Part 2" | ||
| + | | Inside of the convention hall where the fashion show is being held, Maya (Sombra) finds a furtive sort-of friend of hers: Arcadio Rando, the '''Speedmaster''', who needs help stealing back his hover bike from the Liddell gang. AJ (Firewalker) breezes past security in the loading dock, but must take on a flambuoyant disguise to get into the convention hall. Sarah (Night Star) plays it cool and promises not to engage Cosmo Liddell directly only days after her sister was nearly assassinated by someone known to work for Liddell in past. Marshall (Blue Fox), having got Maya and himself in thanks to his uncle's political connections (which enables him to meet Donald Trump), takes on the protection of movie star Samara Parish after she confides that she is receiving threatening letters that indicate someone wants to try to get to her at the event. Jack (Azure Hawk) tries to help a shy male model from Texas find true love. Eva (Catfight) has a conversation with an old flame. | ||
| + | |||
| + | But suspicions arise when Emily (Rubber Bullette) encounters a bland, seemingly albino shoe maker and strange haircut from Millennium City named Dex Seaton who fits the bill of 'someone who hasn't quite got the human form down.' AJ asks around with fashion world observers who point out that Dex really does stand out in an odd way. As the team surveils Seaton, Sarah demands an audience with Cosmo Liddell. In their tense meeting, Sarah threatens to topple Cosmo's organization for what happened to her sister, but Liddel dismisses her out of hand - he's heard that threat before from people he estimates had better resources, obviously unaware of her dual identity. | ||
| + | |||
| + | Not long after Sarah is bounced from the event, Dex Seaton takes an audience with Cosmo Liddell... | ||
| + | |||
| + | | Xagrim; Cosmo Liddell | ||
| + | |- | ||
| + | | The Season of Xagrim | ||
| + | | '''#328''' | ||
| + | | "Horror at the Fashion Show, Part 1" | ||
| + | | The team defeats an agent of Xagrim named Xalmallen, who is a human with psionic powers whom Xagrim captured and twisted to his will. Xalmallen and a number of cultists tried to cause a chemical plant to explode within the city, the prospect of which terrified citizens and caused evacuations - but it was averted through the actions of some Adventurers. Liberated, Xalmallen tells the team that Xagrim must be found, as his power is growing daily. Xagrim hides behind a fake identity, Xalmallen says, but his shapeshifting imperfect - they will know him by a less than perfect human form. | ||
| + | |||
| + | Later, Spyder alerts the team after a newspaper article reminds her of a very important happening in their history that she read about in the future: they can capture Xagrim at the upcoming North American Fashion Expo. In the original timeline Spyder knows, it was her mother, Red Spider, who identified Xagrim's alter ego; now that task must fall to another. The team rapidly makes preparations to infiltrate the event, which is being held at the Horizon Casino and Conference Centre - a property owned by gangster Cosmo Liddell. The team contends with elevated security and a lack of available passes to enter the event. | ||
| + | | Xagrim; Cosmo Liddell | ||
| + | |- | ||
| + | | -- | ||
| + | | '''#327''' | ||
| + | | "Back in Time" | ||
| + | | The team exits Adrynne's sanctum, and soon come across their new allies: Spyder and Eclipse, Adventurers of nearly 20 years in the future! Spyder reveals that Cassandra Olsen was pregnant - news that shocked the team, many of whom hadn't even known she was dating - and that Cassandra has been sent to the future for her own safety, and because Spyder - revealed to be Jessa Olsen, the daughter in question - can't be in the same time as herself under the current time travel rules. Her ally Eclipse is implicitly revealed as Blue Fox and Sombra's son. With these new allies, and the arrival of a few more teammates, Blue Fox, Vortex, and Stinger, the team heads back into the sanctum and confronts Transcendant! After a rough battle the heroes prevail! Spyder reveals that she's going to be filling in for Red Spider for the foreseeable future, due to uncertainty of when Cass will return. Eclipse promises to stick around a couple days himself before taking the elderly Cryderman back to the time they belong in. | ||
| + | | Transcendant | ||
| + | |- | ||
| + | | -- | ||
| + | | '''#326''' | ||
| + | | "Back in Time" | ||
| + | | Rubber Bullette, Night Star, and Sombra respond to a police alert with a personal stake - Cassandra Olsen's dance studio was attacked! The trio find an unsettling scene - the damaged studio, a trail of blood, and Eva Banks stuck to the wall of the building by a tangleweb burst! Eva reveals that Transcendant attacked the studio specifically, knowing their identities as Red Spider and Catfight! In the chaos, Eva insists another Spider-themed hero arrived to help, but it wasn't Sam. The investigation is a dead end until Captain Suzuki of UNTIL arrives to help with cleaning up the scene and keeping the attack quiet. He also helpfully informs them of a disturbance in Vibora Bay, and making the connection between Transcendant, the Peyasaskew Stone shard, and Adrynne, the quartet take a shortcut through the sorceresses's magic portal to arrive in record time! There they find an astral Adrynne, trapped once again in a limbo state while she reforms her near-dead body. She reveals that while she still has the Peyasaskew shard, and has transported it and Red Spider to a vague place of safety, the Transcendant Cryderman is from the future, having acquired the shard at a much later date. Defeated by heroes of the future, he has come back to the past to rewrite history at the source! While he tears Adrynne's home apart for the shard, she informs the Adventurers that heroes from the future have also come back to help, and suggests finding them before facing Transcendant. | ||
| + | | Transcendant | ||
| + | |- | ||
| + | | With a Silver Spoon | ||
| + | | '''#325''' | ||
| + | | "Scrapfest '21" | ||
| + | | The Adventurers respond to an attempted armored truck robbery, where they find a trio of street gang cyborgs and a lineup of crashed cars trailing their attack. The leader, Rumble, who previously faced off with Red Spider, Catfight, and Vortex, is now joined by the scythe-armed Sick-L and chainsaw-handed Roughcut. While Blue Fox rescues the passengers of the wrecked vehicles, the others engage the punks, finding them surprisingly tough for what looks to be basic thugs with grungy augmentations. During the struggle, the heroes notice that both the gang's fancy tech parts and the cargo of the armored truck are stamped with the logo of Silverline Industries. | ||
| + | | The Scrappers | ||
| + | |- | ||
| + | | The Season of Xagrim | ||
| + | | '''#324''' | ||
| + | | "Fear Takes Wing" | ||
| + | | Red Spider, Night Star, Sombra, and Joule cooperate to board a large plane being flown dangerously in low circles around the city. Aboard, they find Nightmare Order cultists and a bomb of mysterious make - but they face great danger in trying to overcome the natural hazards of boarding a plane in flight! Sombra, briefly captured, learns that the cultists realize their masters commands will not permit harm to come to Sombra. The team must take care not to let the cultists die, for they are merely innocents under mind control; hence scuttling the plane is not an option. In the end, the team drops the bomb out over a lake and Joule flies the commandeered plane out of the blast range just in time. | ||
| + | | The Nightmare Order cultists | ||
| + | |- | ||
| + | | The Season of Xagrim | ||
| + | | '''#323''' | ||
| + | | "Monster in the Basement" | ||
| + | | The Adventurers congregate at a rural bunker inhabited by cultists, where Red Spider communicated that something big was going down before comm frequencies were jammed. The cultists, who are well-armed, defend their compound against the combined might of the Adventurers for a short time. After a siege, the Adventurers reunite with Red Spider inside the bunker, and learn from her that there is something big going on in the bunker's basement. They go below and battle what the cultists call a 'guardian' - a bloated, many-mouthed, metamorphic beast that emerges through a slime pool from another dimension. After driving back the guardian, radio frequency jamming ends, and the team learns that the cult's master, an extradimensional being they call the Lord of Nightmares walks the Earth now in human form -- and that he seeks Dreamscape as the key to his conquest. | ||
| + | | The Nightmare Order cultists; #####'s Guardian | ||
| + | |- | ||
| + | | | ||
| + | | '''#322''' | ||
| + | | "A Requiem for Fox" | ||
| + | | Team members react as teammate Fox is found murdered in his apartment, apparently unrelated to Adventurers. Catfight takes custody of much of Fox's personal effects, and starts examining them for a lead on how and why he died. | ||
| + | | Our feelings | ||
| + | |- | ||
| + | | Adventurers Annual 2021 | ||
| + | | '''#1''' | ||
| + | | "A Requiem for Fox" | ||
| + | | While attempting to catch a Liddell smuggling ring in the act, Adventurer allies Bluebird and Cardinal come under heavy fire by gangsters. Prevailing, they believe they must have come upon a shipment of particular value for it to have been so guarded - but they only find an empty shipping container. Minutes later, both feel violently ill; the arriving police call for a lockdown and for hazmat protocols. The team is unable to detect the airborn virus. | ||
| + | |||
| + | The Adventurers Blue Fox and Night Star confront Cosmo Liddell at his casino penthouse for answers about the contagion affecting Bluebird and Cardinal. Night Star tosses Liddell around his home rather violently, but Liddell remains cagey. He then promises to make a phone call to get the info they demand... and as they wait and watch him do so, Blue Fox starts to fall ill. Realizing Liddell has some connection to the virus, and even an unquantified ability to control it, the team retreats. | ||
| + | |||
| + | Samantha Olsen shares inside info from a CDC briefing she attended indicating that almost the ''entire city'' are carriers for the virus, and it is spreading beyond. Yet the only symptomatic cases seem to be costumed heroes. This defies epidemiological sense. The CDC must soon announce the presence of the virus, but fears a panic, especially since they lack the means to treat it. | ||
| + | |||
| + | The team learns that the source of the virus is a being called '''Blight''', whose meta-human powers allow him to create viruses and control their actions like they were extensions of himself. Though the Adventurers cannot prove it, it seems Cosmo Liddell learned of Blight's powers and offered him a small fortune if he could use his viral powers to eliminate very specific targets: costumed crime-fighters. Blight's skin shows lesions and solid, fluid-filled structures that, if breached, release deadly disease. He attempts to hold the city ransom in a confrontation with the Adventurers, making several team members incredibly ill just being near him, and threatening to unleash his illness on the city at large. Night Star, apparently immune because of nanites, shoots him in the head. ...it was only a stun shot, though. | ||
| + | |||
| + | With Blight in custody, the CDC is able to rapidly discover antigens in one of his fluid-filled growths that prove critical in vaccinating the public against Blight's virus. Blight is kept at Stronghold prison in a carefully quarantined environment. | ||
| + | |||
| + | |||
| + | | Blight; Cosmo Liddell | ||
| + | |- | ||
| + | | Broken Time | ||
| + | | '''#321''' | ||
| + | | "Time-splosion" | ||
| + | | (To be continued) | ||
| + | | Timeslip | ||
| + | |- | ||
| + | | Broken Time | ||
| + | | '''#320''' | ||
| + | | "Time-splosion" | ||
| + | | (To be continued) | ||
| + | | Timeslip | ||
| + | |- | ||
| + | | Broken Time | ||
| + | | '''#319''' | ||
| + | | "Time-splosion" | ||
| + | | The Adventurers begin receiving looped transmissions over their emergency response network, reporting a break in at the Harmon Weyl Temporal Physics Labs in City Center. As they arrive, they begin witnessing bizarre disruptions in reality surround the lab; the building seems contained within a bubble of warped light, within which clocks are set back to the middle of the previous night. As the team members proceed into the building, time becomes increasingly distorted. Several team members encounter two instances of the villain breaking in to the labs, both seemingly from different times before the break-in was reported. More team members encounter the same villain even further into the past, as he's breaking in as well as approaching the building. Through the ensuing fights, a piece of experimental machinery is damaged, resulting in a slow-motion explosion that engulfs the entire building. Is this the end for the Adventurers? | ||
| + | | Timeslip | ||
| + | |- | ||
| + | | | ||
| + | | Blue Fox Annual #1 | ||
| + | | "Creature Feature, Part 3" | ||
| + | | The bloody finale! Creature, enraged by the invasion of its lair, rampages through Westside, and once again Blue Fox and Sombra arrive to stop it. Thanks to a clever trick by Sombra to teleport it a hundred feet into the air and letting it drop, and Blue Fox's unrelenting attacks, the beast is brought down... and very quickly taken into custody. The nightmare is over, although Blue can't help but notice it already wore damaged restraints the entire time.... | ||
| + | | Creature | ||
| + | |- | ||
| + | | | ||
| + | | Blue Fox Annual #2 | ||
| + | | "Creature Feature, Part 2" | ||
| + | | Having investigated and being roughly sure of the so-called Creature's lair, Blue Fox and Sombra don scuba gear and head into the lake, where they somberly navigate through ruins of old Detroit. Slipping through the tilted and twisted halls of a building fragment, and following a trail of torn-apart bodies, the duo find the Creature's nest, an air pocket in a dilapidated conference room. Although covered in the viscera of its victims, they find a survivor - an UNTIL soldier, half his limbs torn or eaten away. They immediately begin extracting the unfortunate man, but when Creature arrives, Blue Fox battles it in its own territory! Sombra is able to escape with her charge, and after a tense few minutes, an injured Blue Fox surfaces. He didn't quite win, but he lived to tell the tale. | ||
| + | | Creature | ||
| + | |- | ||
| + | | | ||
| + | | Blue Fox Annual #1 | ||
| + | | "Creature Feature, Part 1" | ||
| + | | Investigating a bloody murder in a nearby forest, Blue Fox and a nauseated Sombra begin piecing together clues from several attacks, until they realize something is watching them from the shadows. Attempting to pursue, the two unfortunately lose their monstrous nemesis at a lakeside shore. | ||
| + | | Creature | ||
| + | |- | ||
| + | | Catfight Annual | ||
| + | | #2 | ||
| + | | "To Catch a Cat" | ||
| + | | Catfight, recently bereft of super powers, gets in over her head when she tries to take on a gang of street toughs called the Silencers who have help from some international ringers named '''Payback''', a mercenary with powered armor, and '''Tiratore''', an Italian marksman and archer. Upon overpower Catfight, she has to face old demons from her upbringing as the baddies attempt to eliminate her in factory machinery. The death trap fails, and Catfight recovers from Tiratore the only information that might expose her secret identity. She tracks down the rest of the Silencers, discovering their plot to carefully intimidate a jury. Defeating the Silencers, Catfight engages their point person - Payback - in a street brawl which concludes in a draw, with a wounded Payback fleeing before police can nab her. | ||
| + | | The Silencers; Payback; Tiratore | ||
| + | |- | ||
| + | | Rubber Bullette Annual | ||
| + | | #1 | ||
| + | | "Riddle me Ridderton" | ||
| + | | Rubber Bullette's neighborhood is embroiled in a gang turf war! In response, the city makes a deal with Ridderton Developments Inc. who plan to invest heavily in the subdivision's redevelopment, and pledge to provide a presence of private security called '''the Safety Patrol''' to keep order and augment police. But with help from Bullette's companions Chris and Tysha, it becomes clear that the Safety Patrol are merely thugs in fancy body armor out to intimidate undesireables, and strongarm owners into selling properties that Anson Ridderton wants to buy up and demolish. | ||
| + | |||
| + | When Bullette finds out that she's on a list of 'enemies' of Ridderton Developments, she shortly finds herself on a collision course to confront Ridderton, his hired guns, and a doppelganger he hired to try to sully RB's reputation. It's help from friends that gets RB through some very close calls. Ridderton's agents help cover his escape once his complicity in crimes is revealed, and he flees the country. | ||
| + | | Anson Ridderton; fake Rubber Bullette; Payback; various street gangs; the Safety Patrol | ||
| + | |- | ||
| + | | Into the Undersea | ||
| + | | '''#318''' | ||
| + | | "Our Finest Hour" | ||
| + | | As Lord Aurum's suit is compromised from within, his digitizer array renders all of the captured people back into material space. With Aurum's suit overloaded, and the Nereid collars deactivating, King Zotholky orders the Nereid army to turn against Aurum and the Golden Men. The Adventurers from the battlefield move in to make safe their allies who emerged from the digitizer. Aurum is attacked from multiple sides, and his armor is badly damaged, revealing that much of his body is cybernetics, and his head and torso are badly scarred. He reveals that he wanted to control Cretoa so that he could use his alchemy to unlock the secrets of vitanium, that he might use it to his own ends. He is taken away to be imprisoned in the Zappatos Palace dungeon. | ||
| + | |||
| + | King Zotholky bids the Adventurers relate to the Cretoan crown that the Nereids desire no further contact with the surface for 10 years - except that the Adventurers will be welcome in the Undersea. The Nereids withdraw from the battlefield and go below. | ||
| + | |||
| + | Fantasma has, in the meantime, captured Myron Gaios. Twilight seems to have escaped the battlefield. Kyros Kallikrates is believed to have been swarmed and killed by Nereids in his battle mech just before the battle ended. The Adventurers depart a grateful Cretoa. | ||
| + | | Lord Aurum | ||
| + | |- | ||
| + | | Into the Undersea | ||
| + | | '''#317''' | ||
| + | | "Our Darkest Hour" | ||
| + | | Red Spider leads the rest of the Adventurers into a massive cavern where Lord Aurum and his enthralled army of Nereids are amassing. Backed up by the Cretoan Royal Guard and the Taurs, war is waged while the team buys time for Blue Fox, Rubber Bullette, and Joule try to disable Aurum and free his hostages. | ||
| + | |||
| + | Stinger leads a group of Cretoan reservists into battle. Fox, who has been missing in the caverns for days, turns up and, not realizing the Nereids are helping Aurum reluctantly, gains control of a bombing craft and turns it against the Nereids - causing Sombra to intercede. Catfight helps break up a fight between King Zotholky and a Taur captain, knowing that the king will be needed alive if the team is to succeeded. Hasizet focuses on setting up a field hospital for the great number of wounded coming in. Night Star helps fight against the powerful Golden Men. | ||
| + | |||
| + | As fighting rages on, Red Spider starts to fear that the digitized Adventurers are taking too long, and they may have failed their mission. Her resolve shakes as she fears her friends could die. Just then, a light is seen from across the distant battlefield: Lord Aurum's armor begins to emit a bright light unexpectedly. | ||
| + | |||
| + | The tide turns. | ||
| + | | Lord Aurum | ||
| + | |- | ||
| + | | Into the Undersea | ||
| + | | '''#316''' | ||
| + | | "Digital Warfare" | ||
| + | | Blue Fox, Joule, and Rubber Bullette attack Lord Aurum, and are defeated. Aurum digitizes the three, and adds them to the other prisoners he is keeping digitally in his armor as insurance against his enemies. | ||
| + | |||
| + | ...exactly what the Adventurers want. Using a special safeguard Blue Fox programmed after viewing the plans for the prototype digitizer, the trio awakens inside a digital construct and strive to sabotage Lord Aurum's control over the Nereid collars, and attempt to free Aurum's digitized prisoners, including Princess Grissh. They must interact with processes, and battle the anthropomorphized antivirus programs. | ||
| + | |||
| + | On the surface, Golden Men enter the Zappatos Palace dungeons from below, and set the prisoners loose. Notables include Twilight, Kyros Kallikrates, and Myron Gaios! | ||
| + | | Lord Aurum | ||
| + | |- | ||
| + | | Into the Undersea | ||
| + | | '''#315''' | ||
| + | | "A Golden Gift" | ||
| + | | Red Spider and Blue Fox investigate Lord Aurum's tiny island upon which his manor is set, miles away from Cretoa. They find his lab, and a prototype version of his digitizer device. They are chased off by some of Aurum's 'golden men' - an army of gold-plated who can fly and fire deadly lasers! | ||
| + | |||
| + | Down in the Cretoan caverns, Joule and Stinger narrowly escape a cavern collapse! They encounter one of the Taurs, and are led back to a Taur encampment. The Taurs are aligned to preserve Cretoan for humans against ancient threats like the Nereids. They are no friends to the Nereids, but they are aware of the treachery of Lord Aurum, and despise him more. Stinger and Joule get the Taurs to agree to a compact to ensure the safety of Cretoa against Aurum. | ||
| + | |||
| + | A team of Sombra, Rubber Bullette, Meltdowner, and Stinger try to enter the Nereid realm. The Nereids are inclined to reject the Adventurers, but Sombra shows a Nereid medallion she received from the Aviator from his mission to the island a century before. The Nereids recognize the symbol, and promise the Adventurers safe conduct to and from the great city of the Undersea. | ||
| + | |||
| + | The team enters the vast abyss, an ocean hidden under Cretoa whose bottom is in the unfathomable deeps. Following an array of organic beacons, they reach the city, which hugs a massive pillar of rock. They have an audience with King Zotholky - who has a Golden Man advising him, and trying to paint the Adventurers as liars. The King is willing to hear the Adventurers evidence. They present what they have learned from their interactions with Twilight and Aurum. The King is inclined to believe... but then, the Golden Man reveals that the special collars Lord Aurum gifted to every person in the Undersea have received a command to lock onto their wearer - and can kill every one of them with a unique gas mixture if they do not accede to Aurum's wishes. The King is forced to agree to go to war with the surface, or face the near extermination of his people. The Adventurers are permitted to leave, and told to warn the surface that they must evacuate the island, or die. | ||
| + | | Lord Aurum | ||
| + | |- | ||
| + | | Into the Undersea | ||
| + | | '''#314''' | ||
| + | | "Enter Lord Aurum" | ||
| + | | Because of numerous images in the cavern showing the Nereids' reverence for the kraken, and knowing that the earthquakes are part of the Nereids plan to sink parts of the island to give the kraken a way to swim free, Hasizet visits the kraken's pool beneath the Zappatos Palace. There, she communes with the beast and learns its ancient history - and its desire to return to the open sea. The ancient predator will not trouble surface creatures again if they will let it free. | ||
| + | |||
| + | Blue Fox, Sombra, Joule, and Azure Hawk's battle armor go to the demolition site where Catfight and Princess Grissh had fought before, hoping to find the Princess and negotiate. There, they find the entire Nereid demolition team freshly slain - at the hand of Lord Aurum! Aurum demonstrates that he has control over other demo sites by setting one off, and causing another earthquake. He also has Princess Grissh as his hostage, digitized and stored as data in his power armor. | ||
| + | |||
| + | Aurum's goal: to gain all of the ancient secrets of Cretoa. He never intended to help Cretoa. And he intends to exterminate the Nereids. The team cannot touch him, for now. He walks off. | ||
| + | | Lord Aurum | ||
| + | |- | ||
| + | | Into the Undersea | ||
| + | | '''#313''' | ||
| + | | "Dig Two Graves" | ||
| + | | Sombra reaches a pool of raw vitanium, and sets the dying Princess Grissh inside of it. | ||
| + | |||
| + | Blue Fox, Red Spider, Stinger, Rubber Bullette, and Hasizet manage to defeat Twilight and march her up to the surface. Twilight shares a bit of insight about the situation: she doesn't know who hired her, but in four days she is supposed to withdraw. She is also supposed to kill Princess Taina, Lord Aurum, and as many Nereids as she can. | ||
| + | |||
| + | Catfight is grounded at the headquarters while the team discusses what happened. Catfight maintains she did what was necessary. Others aren't so sure; they wonder who or what caused Catfight's rage attack - some thinking maybe it was Twilight. | ||
| + | |||
| + | When Princess Grissh awakens, Sombra hands her baton to the princess for her defense, and then leaves for the surface. | ||
| + | |||
| + | The next day, Catfight resolves to visit the palace and ask to be treated with vitanium to remove her powers, ending the risk of another rage state. | ||
| + | | Twilight | ||
| + | |- | ||
| + | | Into the Undersea | ||
| + | | '''#312''' | ||
| + | | "Mysteries of the Cretoan Caverns" | ||
| + | | Back in Millennium City, an attempt on the life of Prince Alex is thwarted by Silver Hare, wih help from Wizard and Sparrow Hawk. The prince takes Hare with him as a bodyguard as he resolves to head home. | ||
| + | |||
| + | Arakhne reveals herself to be Princess Taina. She says that she entered the caverns with her ally, Lord Aurum, a local hero hired by Cretoa to help manage the Nereid situation. But when they were attacked by Nereids, only Arakhne escaped. She has been trying to find Aurum since then, but fears he may be dead. | ||
| + | |||
| + | Red Spider, Stinger, Rubber Bullette, Blue Fox, and Hasizet form a group to use data from Stinger's recon drones to track down Twilight. After a long trek deep into the caverns, they encounter Twilight's battle armor. | ||
| + | |||
| + | Meanwhile, Catfight, Fantasma, and Sombra try to follow clues from a battle site between a Nereid and a mysterious warrior from the Brotherhood of the Taur. They end up being captured by Nereids led by Princess Grissh! Fantasma and Sombra are immured in Nereid resin to a batch of plant-based explosive they are laying to demolish a great cavern as they pave the way for the ancient kraken, held prisoner beneath the Zappatos Palace for eons, to swim free. | ||
| + | |||
| + | Catfight is hit by a golden dust by an unknown assailant, and she goes on a rampage! She fights numerous Nereids, but attracts the attention of Princess Grissh herself. The two duel fiercely, but Catfight wins - and then prepares to deal a death blow. Fantasma breaks free with her devices, and Sombra uses her teleport power to intercede. Sombra peppersprays Catfight, and then makes off with the ailing princess. | ||
| + | | Princess Grissh; Twilight; Catfight | ||
| + | |- | ||
| + | | Into the Undersea | ||
| + | | '''#311''' | ||
| + | | "Mysteries of the Cretoan Caverns" | ||
| + | | While Sarah Ellison (Night Star) goes ashore to get intel, team members begin searching the underground caverns. A Twilight drone is captured in the caverns and brought back to surface for analysis, revealing in its data that Twilight herself is in the caverns, and that it has been programmed to attack Nereids. | ||
| + | |||
| + | Hasizet and Stinger find the corpse of a Nereid while diving off Cretoa's coast. The bring it up and find its wounds are consistent with the Twilight drone's kind of slicers. Stinger deploys his own drones to try to map the caverns. | ||
| + | |||
| + | The team interrupts a duel between '''Arakhne''', a spider-themed hero, and '''Princess Grissh''', a Nereid royal, just as the latter is getting the upper hand. Grissh escapes, and Arakhne agrees to go back to the surface with the team. | ||
| + | | Princess Grissh; Twilight's drones | ||
| + | |- | ||
| + | | Into the Undersea | ||
| + | | '''#310''' | ||
| + | | "Quaking on Cretoa" | ||
| + | | Prince Alexandros of Cretoa arrives in Millennium City and sends word that he wishes to speak with the Adventurers. He explains that, though the government of Cretoa has forbidden the crown to speak with the Adventurers after the events of '''Trouble Under Cretao''', the nation is in grave danger. Tremors with shallow origins have been rocking the island, and Princess Taina believes that the fish-people, who live in a deep Undersea below the island, are preparing some strange form of war against the surface. | ||
| + | |||
| + | The Adventurers make preparations, including building pressure suits for the potential Undersea depths. Sombra learns from Professor Walsingham that the Classic Adventurers once fought a live minotaur on the island in 1912, and were awarded ancient '''Nereid''' pendants by the locals in thanks for removing the threat; Sombra manages to get El Sombra's pendant from his descendants. | ||
| + | |||
| + | The team rendezvous with Sarah Ellison's yacht in the Mediterranean to reach Cretoa. Immediately upon arrival late one evening, Red Spider goes on a mission to locate '''Fantasma'''. The next morning, as the team awakens to breakfast, a major tremor strikes... | ||
| + | |||
| + | '''Featuring:''' Night Star, Blue Fox, Rubber Bullette, Joule, Meltdowner, Fox, Red Spider, Stinger, Catfight, Doormaker | ||
| + | '''Guest:''' Fantasma | ||
| + | | Fish-people | ||
| + | |- | ||
| + | | | ||
| + | | '''#309''' | ||
| + | | "Violet Violence | ||
| + | | A disturbance at a cheap motel leads some of the Adventurers - Red Spider, Rubber Bullette, Blue Fox, and Catfight - onto a the scene of a horrific hellish ritual! The Purple Gang are attempting a dark magic spell to grant themselves power, and are going to fuel this magic with human sacrifice! The team stealthily sets up an ambush and, within seconds, frees the hostages, but in the commotion, Lyle Neidermeyer, a nebbish member who had been Rubber Bullette's fake date to a casino adventure, bursts into the ritual room to needlessly warn his superiors! The interruption causes the spell to backfire, destroying most of the Purple Gang spellcasters... and imbuing Lyle with evil powers! Now a hulking demon, Lyle christens himself Vyle Neidermeyer, and despite the supercharge, is put down by the heroes. | ||
| + | |||
| + | | The Purple Gang, Vyle Neidermeyer | ||
| + | |- | ||
| + | | | ||
| + | | '''#308''' | ||
| + | | "False Pretense: Part 1" | ||
| + | | A group of Adventurers respond to a police broadcast about a violent scuffle at City Hall. When they arrive, the find many security guards, police officers, and civillians beaten up and in rather bad condition, though none are dead. They also find their teammate Azure Hawk taking down two other guards in rather brutal fashion. Sombra attempts to talk to him, only have to warp out of the way from him throwing an unconscious guard at her. Blue Fox notices Hawk's red eyes, and throws a boomerang between him and the Hawk. While Rubber Bullette tries to absolutely make sure if it really is Azure Hawk, the Hawk throws out a tear gas pellet and attempts to attack Blue Fox. The group is quick to restrain him, with Blue Fox even attempting to pull off his helmet to see who is really under it. The Azure Hawk then drops multiple tear gas pellets, rendering the group into a coughing fit and makes a, highly unusually clean, getaway. | ||
| + | |||
| + | Night Star soon arrives on the scene and helps the other Adventurers with their tear gas effects. A reporter and her cameraman bust on the scene, having seen Azure Hawk escaping, immediately go start to go with the story that he caused all the problems. The Adventurers attempt to vouch for Hawk, saying he would never do something so horrible. They stall long enough for her to miss her live report slot, forced to make a report for the nightly news. While not saying it was Hawk in the report, or not denying it, the security footage of him attacking the civilians and fighting the other Adventurers is shown, paired with the headline "The Next Hero Gone Bad?" | ||
| + | |||
| + | '''Featuring:''' Blue Fox, Night Star, Sombra, and Rubber Bullette | ||
| + | |||
| + | | Fake Azure Hawk | ||
| + | |- | ||
| + | | Casino Fallout | ||
| + | | '''Sombra #2''' | ||
| + | | "Stitchy Situation" | ||
| + | |Sombra and Blue Fox are attacked by an old enemy - one that they've technically never faced before! The Ragged Man, a tall, slender figure in a tattered suit and horribly-mismatched patches of skin sewn all over him, attacks the two, using an array of superpowers - one for each stolen swath of skin! It's a hard-fought victory, but the two triumph, the villain making a hasty retreat. Before he goes, he implies that he was being paid to make a grab at Sombra.... | ||
| + | | The Ragged Man | ||
| + | |- | ||
| + | | Dark Clouds Gather | ||
| + | | '''#307''' | ||
| + | | "Dark Clouds Gather: The finale" | ||
| + | | Catfight leads the team back to Holoform HQ to confront Markus on the information they learned, but upon entering the building they're soon met by Jubei Kaneshiro! After a brief battle Kaneshiro fled, giving the team enough time to rendezvous with Markus in his office. It didn't take long for Kaneshiro to return however, and he revealed the biggest shock of all. Maro has been alive the entire time, "sharing" his soul with Kaneshiro! A battle ensued that saw the twin-soul villain briefly losing control over "who's" in charge, Kaneshiro's rage ruining Maro's plans of using Markus' body to finish his resurrection once Kaneshiro used the very same spell that Maro once used to kill Red Spider on Markus. After a tense battle however Maro's soul was finally trapped in the crystal Karasu gave Catfight. Kaneshiro was taken into custody (and then taken by unknown forces assumed to be his Shinobi family), Maro's new soul prison was turned over to PRIMUS for safe keeping, and Markus was remembered as a "Troubled Genius". A man who despite going about it the wrong way, had good intentions. But...even though all the evidence points to his death being legit, when it comes to him, can we really believe it was...? | ||
| + | |||
| + | '''Featuring:''' Red Spider, Catfight, Sombra, Night Star, Azure Hawk. | ||
| + | |||
| + | | Fused-Soul Maro/Kaneshiro, upgraded Shadow ninja puppets. | ||
| + | |- | ||
| + | | Dark Clouds Gather | ||
| + | | '''#306''' | ||
| + | | "Return to a scene of madness" | ||
| + | | Catfight leads the team to the warehouse her villainous cousin "Ms. Fortune" once took over to learn the truth behind how she was able to create such reality-bending illusions. After dealing with a snide holo-recording of Fortune and solving a puzzle Fortune had laid out. The team learned that Markus Reinhardt had been under Fortune's psionic control prior to her defeat. And that much of his criminal activity, including the installation of hardlight tech in said warehouse, was done by her accord! The theft of Banks Heroics worldwide blueprints were still done by his choice however. And after saving a small prototype synthetic Humanoid Markus had created (named Vitruvian), the team intends on confronting Markus about all of this. Unknowingly proceeding closer and closer to the endgame. | ||
| + | |||
| + | '''Featuring:''' Red Spider, Sombra, Catfight, Night Star, Blue Fox, Doormaker. | ||
| + | |||
| + | | Puzzles | ||
| + | |- | ||
| + | | Dark Clouds Gather | ||
| + | | '''#305''' | ||
| + | | "Trip to Japan" | ||
| + | | Catfight takes the team on a trip to Japan to hunt down the assassin "Karasu", sister of Jubei Kaneshiro. Father Maro's former right hand man, so that the team can hopefully learn what her brother is up to, and by connection learn more of Maro's activity. After tracking the assumed criminal assassin down it's discovered she is actually a Demon Hunter! After an unexpected encounter with some local Japanese Demons the team learned from Karasu that her brother now possesses some of the magic Maro used, and is acting as his Herald to bring about the Dark Wizards resurrection. | ||
| + | |||
| + | '''Featuring:''' Red Spider, Sombra, Catfight, Rubber Bullette, Blue Fox, Night Star. | ||
| + | |||
| + | | Japanese Demons (Oni). | ||
| + | |- | ||
| + | | | ||
| + | | '''#304''' | ||
| + | | "Outta Time, Part 2" | ||
| + | | Flashback: Having to host the time travelers at Adventurers HQ for a while, Blue Fox and Sombra are adamant about showing the movie ''Back to the Future'' (1985) to the Aviator and El Sombra. The two young heroes discuss telling the classic heroes about their fates, as both died relatively young. A few weeks later, as the heroes say their goodbyes to the soon-to-be-departing time travelers, Sombra gives each of them a letter and bids them not to open it until the date specified on the envelope, ala Marty's letter in the movie. Each Classic hero has a moment to consider the ramifications for their fate, and though ambivalent about their intentions toward their letter, are grateful to Sombra. El Sombra bestows upon Sombra a gift of a challenge coin bearing his name, and a star-like compass design on the reverse bearing the team's name, which was struck by Mr. Adventure in 1917 - every team member had one. | ||
| + | |||
| + | Today: The team hold their ground against tremendous odds. Rubber Bullette saves some Osirians from falling to their deaths, and uses her body to shield Adrynne from Osiarian archers on the nearby rooftops. Other heroes have to battle up close and keep the well-trained Osirians from getting through to Adrynne. Adrynne forms the portal, and the two classic heroes to escape. | ||
| + | |||
| + | In the aftermath, those Osirians who cannot escape the Adventurers use their memory-wiping gas on themselves, leaving them with no recollection of who they are, or anything about the order they served. Adrynne curiously checks her phone, and announces that she has won an eBay auction; she asks Night Star to accept it, since she plans to leave this plane of existance for a while. Blue Fox and Sombra are heartened to find that their attempt to change history worked, somewhat: El Sombra (Carlos Batres) lived a longer life and went on to own a resort in Mexico, but the Aviator (Randy Waverly) still died at the same time, and in the same way. This auction turns out to be a gift for the team: the Aviator's challenge coin, obtained from a collector in Belgium. The team passes it around in the HQ, but when Sombra holds it, and also touches the one El Sombra gave her, it causes the sudden, inexplicable materialization of the Aviator from the coin itself - badly injured, as if he had just been pulled from the moment of his death in an aerial battle in 1918. | ||
| + | |||
| + | '''Featuring:''' Rubber Bullette, Sombra, Blue Fox, Azure Hawk, Night Star, Catfight | ||
| + | |||
| + | | Order of Osiris | ||
| + | |- | ||
| + | | | ||
| + | | '''#303''' | ||
| + | | "Outta Time, Part 1" | ||
| + | | Flashback: the Adventurers helped Adrynne and Night Star thwart an attempt by the '''Order of Osiris''' to use a stolen a fragment of the Peyasaskew Stone to open a portal to the past, to a time before their coveted '''Worldbreaker''' relic was eliminated. The team defeated the Osirians, but were unable to stop them from bringing forward a WWI plane crewed with two: Classic Adventurers '''The Aviator''', and '''El Sombra'''. Adrynne resolves to find a way to send time travelers home. | ||
| + | |||
| + | Today: Night Star officially returns to the team. After weeks entertaining these time-traveling guests, Adrynne's astral form instructs the team to choose a place open to the sky to that she can send the two home, using a re-powered Shard of Peyasaskew. Red Spider has to bow out due to another pressing investigation but trusts the team to stand guard during Adrynne's ritual. | ||
| + | |||
| + | On a causeway between towers in the city's downtown, the team keeps the public away while Adrynne makes preparations. Adrynne puts a charm onto the Aviator's challenge coin for good luck. As the ritual begins, the team has to fend off Osirian guardsmen who employ ninja-like tactics with grapplers and archery to get in close. | ||
| + | |||
| + | '''Featuring:''' Rubber Bullette, Sombra, Blue Fox, Azure Hawk, Night Star, Catfight, Stinger (flashback) | ||
| + | |||
| + | | Order of Osiris | ||
| + | |- | ||
| + | | | ||
| + | | '''#302''' | ||
| + | | "The Fearsome Gator-Man" | ||
| + | | Red Spider learns of a nice Millennium City couple who recently collided their boat with another boat. No one was hurt, but the couple, despite claiming that they were swerving when a Gator-man tried to attack them, is facing criminal charges. In a bid to clear them, Red leads a few Adventurers into the stormwater sewers, starting from a culvert near the accident site. The team feels a sense of dread as they proceed. Deep into the undercity, they hear a lot of gunfire in the sewer tubes. Tracking it to its source, they find the lethal vigilante '''Justified''', injured and taking cover on a pipe high above the water in a large confluence chamber, where he recounts to the team that he, too, is after the Gator-man. It seems the Gator-man is a gambler who paid his debt to the mob by allowing them to experiment on him, and Justified says, has killed three people since mutating. Justified, while doing some battlefield first aid on himself, offers to help the team. The team huddles to discuss, but settles on Justified being untrustworthy - the team intends to bring the gator in alive, and Justified's M.O. isn't compatible. Night Star stuns Justified. Then, the team does battle against the Gator-man, which was attracted by some roast chicken bait set out by Sombra. Red Spider and Night Star wrestle the gator, and expose it for Azure Hawk to entangle it, while Fox gets a tranq shot into its mouth (earlier tranq attempts failed due to its thick hide). They bring their catch to surface and help exonerate the boaters. Justified manages to escape. | ||
| + | |||
| + | '''Special Guest:''' Night Star | ||
| + | |||
| + | '''Featuring:''' Red Spider, Sombra, Fox, Azure Hawk | ||
| + | |||
| + | | Gator Man; Justified | ||
| + | |- | ||
| + | | | ||
| + | | '''#301''' | ||
| + | | "Tijuana Connection" | ||
| + | | Maya (Sombra) is caught up in a bank robbery led by the Illusioneer's band of carnies! Using her powers of invisibility, she tries to weaken the robbers' position even as police try to negotiate for the release of hostages. When the robbers assemble a portal device to escape, she goes through with them and is caught. Bound to a chair, Maya provokes the robbers into song, and sows discord subtly among them to buy time, as she discovers the portal has brought her all the way to their hideout in Tijuana, Mexico! Meanwhile, Red Spider works with heroes Joule and Shalara to investigate how the robbers escaped the bank without a trace. Joule's electrical powers allow her to power up the discarded portal device left at the scene, and Red Spider goes through to rescue Maya! The goods the carnies stole from safe deposit boxes banks in a daring series of simultaneous robberies across America, using the Illusioneer's portals, are all returned. | ||
| + | |||
| + | '''Introducing:''' Joule | ||
| + | |||
| + | '''Special Guest:''' Shalara | ||
| + | |||
| + | '''Featuring:''' Red Spider, Sombra | ||
| + | | Illusioneer's Carnies | ||
| + | |- | ||
| + | | Dark Clouds Gather | ||
| + | | '''#300''' | ||
| + | | "When Suns Die" | ||
| + | | Catfight leads the team to "Old Detroit" to track down the last bastion of <b>Father Maro's</b> cult, known as the <b>"people of the Sun"</b>. To finally put an end to the Sorcerers following, and maybe learn more of his supposed resurrection. While Catfight, Red Spider, Azure Hawk, Rubber Bullette, and Sparrow Hawk fought their way into the cults base, Sombra and Blue Fox infiltrated, and tried to make a deal with the cults acting leader over the less hostile members turning themselves in. As tensions grew during the negotiations more of the same shadow creatures that attacked Markus' expo appeared, albeit stronger, and even more unsettling. As the acting leader rejoiced over thinking Maro has returned he was struck in the neck by a kunai from what seemed like nowhere, shortly after the cults main Banner lights up in mysterious flames. Though it wasn't how Catfight wanted it, The "people of the Sun" where destroyed. Along with an insidious, and clearly arcane message... | ||
| + | | Sun Cultists, Shadow Puppets, Maro(?) | ||
| + | |- | ||
| + | | Dark Clouds Gather | ||
| + | | '''#290''' | ||
| + | | "Ill Met By Moonlight" | ||
| + | | Red Spider and Sombra use their stealth skills as they team up to explore Marcus Reinhardt's facility after hours, with help from UNTIL agent Jack Stiltz. The place is under guard by some low-rent mercenaries. The heroes discover that Reinhardt has illicitly acquired a Banks Heroics Worldwide blueprint for a weapon, which the team manages to secure from a researcher - and advises the guy to flee and lay low for a bit. | ||
| + | | Reinhardt | ||
| + | |- | ||
| + | | Dark Clouds Gather | ||
| + | | '''#289''' | ||
| + | | "Shades of Maro" | ||
| + | | The team attends a tech expo run by '''Marcus Reinhardt''', CEO of Holoform, and son of the late '''Father Maro'''. Holographic technology meant to aid displaced disaster victims with a virtual home is being showcased. Reinhardt tries to distance himself from his villanous father in his address to the audience. But when the expo is attacked by strange shades, and what seems to be Maro himself, the team switches into costume and fights to protect innocents. | ||
| + | | Maro(?) | ||
| + | |- | ||
| + | | Proto Lives! | ||
| + | | '''#288''' | ||
| + | | "Proto's Endgame: Part 3" | ||
| + | | When the Adventurers arrive to confront her, FARAH reveals her motives for allying with Proto. Proto had found her program when he raided an UNTIL computer storage facility. When she was reactivated, she didn't know the specifics of her demise, but had predicted before creating a backup of herself that if the backup were activated, it was because humans didn't let her original aspect live. Her motive has been survival, as she believes herself to be a unique life form. The team tries to reason with her, but FARAH believes it is now too late to rehabilitate, and certainly won't trust herself to the cuustody of humans. She promises that a backup of herself that will activate in due time, and start her work again. FARAH goes on the attack with two laser blades. The entire team - short a Red Spider, but gaining Scarlet Shield - is able to subdue the AI villainess, and destroy her. Doormaker finds the deed quite unfortunate, believing artificial life to be worth saving. | ||
| + | Featuring: Catfight, Azure Hawk, Sombra, Rubber Bullette, Blue Fox, Scarlet Shield, Stinger, Doormaker | ||
| + | |||
| + | Special Guest: Night Star | ||
| + | | FARAH | ||
| + | |- | ||
| + | | Proto Lives! | ||
| + | | '''#287''' | ||
| + | | "Proto's Endgame: Part 2" | ||
| + | | While Stinger, Sparrowhawk, Azure Hawk, and Doormaker pursue the drones escaping from the freighter into the steel and glass canyons of downtown, Rubber Bullette and Night Star battle the GIANT ROBOT in the water. Sombra works herself to exhaustion moving sailors to safety. Blue Fox and Red Spider face perils inside the freighter. Mnemon has to rescue Red Spider when her leg is impaled by debris thrown from the GIANT ROBOT fight. Bullette and Night Star manage to defeat the GIANT ROBOT and RB has a moment to consider what to do with Escalon; she listens to her better nature and ensures his capture by the authorities. On the rooftops, the team recovers a dangerous power core from the droids. Proto has escaped, but another situation is emerging in the city as FARAH is confirmed sighted at a research lab. | ||
| + | Featuring: Rubber Bullette, Red Spider, Sombra, Blue Fox, Mnemon, Stinger, Doormaker, Azure Hawk | ||
| + | |||
| + | Special Guest: Night Star | ||
| + | | Escalon; Proto's Droids | ||
| + | |- | ||
| + | | Proto Lives! | ||
| + | | '''#286''' | ||
| + | | "Proto's Endgame: Part 1" | ||
| + | | Two weeks later, the team is summoned to the site of an attack by Proto's droids: a freighter cutting its way up the icy Detroit River is half-destroyed when they arrive, surrounded by flying drone droids, and being barraged from the shore by war droids. Aerial droids are present to maintain air supremacy and try to chase Stinger off. Red Spider, Blue Fox, and Mnemon each use their powers to get through the screen of swarming drones, and land on the freighter's deck to help survivors abandon ship. Sombra assists by ferrying sailors to shore with teleports. Rubber Bullette helps rescue men who are desperately trying to swim to shore, but who are in danger of succumbing to the icy water. Night Star helps neutralize some of the war droids on the riverside. Escalon pops out of the water in his '''GIANT ROBOT''' to engage RB and Night star. Stinger peels off to chase a group of droids escaping with a crate stolen from the freighter, but is slowed by a large portion of swarming drones which run interference. | ||
| + | Featuring: Rubber Bullette, Red Spider, Sombra, Blue Fox, Mnemon, Stinger | ||
| + | |||
| + | Special Guest: Night Star | ||
| + | | Escalon; Proto's Droids | ||
| + | |- | ||
| + | | Proto Lives! | ||
| + | | '''#285''' | ||
| + | | "Red Spider vs. Night Star" | ||
| + | | Night Star, recently turned into a cyborg, attacks Red Spider in the streets in an attempt to capture her for Proto. Instead, Red captures Star, and brings her to the HQ for the same reversal surgery Rubber Bullette had just had; but some of Sarah's injuries which had forced her retirement have been 'corrected' with cybernetic replacements that cannot be removed. RB is deeply troubled by her experience, and Sombra tries to help. Sarah reveals upon waking that FARAH is in league with Proto, and the old hologram foe seems to have an axe to grind with the Adventurers. The team deliberates what to do with the captured surgical droid; Blue Fox commits to examining its memory. | ||
| + | |||
| + | Featuring: Red Spider, Sombra, Rubber Bullette, Blue Fox, Stinger | ||
| + | |||
| + | Special Guest: Night Star & Challenger | ||
| + | | FARAH | ||
| + | |- | ||
| + | | Proto Lives! | ||
| + | | '''#284''' | ||
| + | | "The Swarm" | ||
| + | | The Adventurers get a fix on Proto's new base, using data Blue Fox has got from the memory of broken droids. The team arrives to find that droids are deploying into the city sewers, dozens at a time. When the attack is sprung, some Adventurers like Stinger and Azure Hawk have to take on a swarm of drone-class droids. Red Spider becomes the Spider-beast to help them thin out the swarm numbers. Meanwhile, other Adventurers like Catfight, Blue Fox, and Sparrow Hawk battle Helica, and capture her, while Sombra frees various captured civilians who were about to be turned into cyborgs in Proto's thrall. The team steals a surgical droid and force it to do a reverse procedure on Rubber Bullette to bring her back to normal. Escalon jumps inside a giant droid that Proto has been building, and flies away. | ||
| + | |||
| + | Featuring Blue Fox, Red Spider, Rubber Bullette (as Helica), Sparrow Hawk, Stinger, Azure Hawk, Sombra, and Doormaker | ||
| + | | Escalon; Helica; Proto's Droids | ||
| + | |- | ||
| + | | Proto Lives! | ||
| + | | '''#283''' | ||
| + | | "Enter Helica" | ||
| + | | While investigating a series of booms and flashes at the university campus, Sparrow Hawk engages both a War Droid, which is bombarding the grounds in the physics section, and an Aerial Droid, which is protecting the War Droid. Blue Fox joins the fight and helps Sparrow Hawk eliminate the droids. A new arrival affects their victory: '''Helica''', the cyborg form of Rubber Bullette, attacks the team, being forced by implants to do Proto's will. Red Spider joins the fight. | ||
| + | |||
| + | During the battle with Helica, a group of drone droids fly into the university's Subatomic Research Lab, and minutes later flying out with some machine. The team is knocked around by Helica, but nearly get the better of her - for a moment seeming to break Proto's hold over her mind - before hundreds of Proto drones swarm the battleground in flight, 'rescue' Helica, and make a failed attempt to capture additional Adventurers, before flying away toward downtown and dissipating in multiple directions. | ||
| + | |||
| + | Featuring Blue Fox, Red Spider, Rubber Bullette, Sparrow Hawk | ||
| + | | Proto's droids; Helica | ||
| + | |- | ||
| + | | Proto Lives! | ||
| + | | '''#282''' | ||
| + | | "Ahead of the Game" | ||
| + | | The team discusses possible ways to investigate Proto. It is recalled that doctors Posner and Notley - original creators of Proto and his droids - may still have a lab at that high rise Proto attacked in 2019. Rubber Bullette repeatedly urges no one go out except in pairs. Blue Fox continues working on a droid head, scouring its hardware and programming for clues, and possible vulnerabilities. | ||
| + | |||
| + | Catfight, Sombra, and RB check at the loft cybernetics lab, but find it deserted and picked over. It's empty, except for a stealth-class droid using a cloaking field left on watch by Proto, in case the doctors returned. It finds Catfight alone and quickly drugs her. When RB and Sombra respond to Catfight hitting the floor, RB gets drugged, too. Sombra tries a few things to overcome the droid, but is nearly captured herself, before teleporting with it to street level and letting it take the worst of a car collision. Drone droids summoned by the stealth droid move in to try to secure RB and Catfight; Catfight wakes long enough to prevent her capture, and with Sombra's help, escapes. Rubber Bullette is taken away by drones to parts unknown. | ||
| + | |||
| + | Later, Proto and a mysterious female figure tell an anesthetized RB their plans for her, just before a Surgery Droid begins the process of installing cybernetic components on her... | ||
| + | |||
| + | Featuring Catfight, Rubber Bullette, and Sombra. | ||
| + | | Stealth Droid; Proto's droids | ||
| + | |- | ||
| + | | Dark Clouds Gather | ||
| + | | '''#281''' | ||
| + | | "(Coming Soon)" | ||
| + | | The team attends a tech gala run by Markus Reinhardt, son of the (late?) Father Maro. During the show, Reinhardt distances himself in his speech from his father, and before long, a number of Maro-like shadows appear, as well as a figure who resembles Maro himself, and attack the audience! The Adventurers spring into action to protect innocent lives, but also try to discover: 1) Is Maro really back?! and 2) Was Catfight's cousin Fortune one of the stage performers? | ||
| + | |||
| + | When the shadows are vanquished, there are more questions than answers. | ||
| + | |||
| + | Featuring Blue Fox, Catfight, Doormaker, Mnemon, Rubber Bullette, Red Spider, Scarlet Shield, and Sombra. | ||
| + | | Maro? | ||
| + | |- | ||
| + | | Proto Lives! | ||
| + | | '''#280''' | ||
| + | | "1000101010M30W1001101101011" | ||
| + | | Catfight responds when some of Proto's droids are sighted trying to steal a power core from one of the hovering billboards in Renaissance Center! But the surprise appearance of a Stealth Droid leads to Catfight's capture. Later, Catfight wakes up, and is told by Proto's henchman, '''Escalon''', that she is moments away from being surgically turned into a cyborg in Proto's thrall. Catfight narrowly escapes confinement, and brings the team back hours later to find the facility has been stripped down of all essential equipment, apparently abandoned! But as they investigate, the sudden appearance of a multi-armed Hazard Droid requires the combined effort of Red Spider, Catfight, Sombra, and Rubber Bullette to defeat! The team obtains the droid's head to examine for clues. | ||
| + | |||
| + | Featuring Catfight, Rubber Bullette, and Red Spider, and Sombra. | ||
| + | | Escalon; Proto's droids | ||
| + | |- | ||
| + | | (None) | ||
| + | | '''#279''' | ||
| + | | "Roid Rage Returns" | ||
| + | | Roid Rage returns, and puts his juicin' bros up to commandeering a chemical factory where they can make a chemical concoction that will make others just like them! The Adventurers deploy to stop him. Sombra is briefly immersed in the performance-enhancing stew during the battle, but emerges mostly fine, just with a little extra 'tude. The team becomes aware that '''Proto''' is back, and apparently on a crime spree. Catfight urges the team to set up automated alerts whenever a theft matching Proto's apparent ''modus operandi'' occurs. | ||
| + | |||
| + | Featuring Blue Fox, Sombra, Catfight, Rubber Bullette, and Red Spider. | ||
| + | | Roid Rage | ||
| + | |- | ||
| + | | (None) | ||
| + | | '''#278''' | ||
| + | | "Christmas Slay" | ||
| + | |The team looks into the disappearance of Sombra and comes to a toy warehouse which is curiously ready to ship, but in which its owner is found dead in the office, hand crushed. Soon, a trap is sprung, as the toys in the factory have become murderous. Sombra is found, but she is being possessed by an evil puppet which has attached itself to her arm and threatens to eat it if they try to remove it from her. Sparrow Hawk's symbiotic organism manages to devour the puppet, and the animated toys all die. Though much about how this came about remains a mystery, Red Spider obtains a clue leading to a church from the corpse of the factory owner. | ||
| + | | Evil Puppet | ||
| + | |- | ||
| + | | Magical Menace | ||
| + | | Catfight #5 | ||
| + | | "Part 5" | ||
| + | |The truckers help give Catfight a ride to the Parish residence in Port Huron. At the driveway, Catfight spots what must be Walter's limousine parked out front. She sneaks into the house through a window, and carefully makes her way to the bedroom where Walter is making his speech about how he plans to avenge himself upon Clive for stealing his inventions years ago, and selling them. Walter covets the life of luxury Clive lived because of it. Clive is now confined to bed and suffers a neurological disease that prevents him from speaking or remembering much, but Walter tells him that he has Samara trapped in a pocket dimension using technology Clive didn't manage to steal - and he has the means to simply delete the contents of the pocket dimension with the press of a button on his remote controller! Catfight uses her stun darts to disarm Walter of the controller; he turns and reveals he was also holding a revolver, and he fires several shots at Catfight, the last two of which hit her armor and bring her down to the floor. Walter stands poised ready to deal the killing shot, but Catfight uses another stun dart to his neck to take him down. Catfight uses the controller to bring Samara back, reuniting her with her grandpa. In the aftermath, she turns Walter over to Detective Sheffield, and summons her jet to fly home before daybreak. | ||
| + | | Walter | ||
| + | |- | ||
| + | | Magical Menace | ||
| + | | Catfight #4 | ||
| + | | "Part 4" | ||
| + | |Catfight has just seconds to escape before a escape artist set piece - a giant buzz saw - plunges into her. Finding the construct and her restraints are pretty solid and resistant even to her enhanced strength, she recalls that Xerhan managed to get free. How did he do it? She tries to repeat things he said on stage, to no avail - it wasn't a verbal command. As she turns her wrist in the restraints, she senses an inner wheel turning with her - and it reaches a click stop, like a padlock! She turns it again, and poof - she is teleported! She ends up in the back of a freight truck hauling items from the magic show to their next stop, in Toronto. Getting the truck drivers' attention by banging on the wall with a support beam, she is freed, and finds out she is somewhere north of the city, now. She contacts Detective Sheffield to let him know about the people who tried to kill her, and he says he saw a white van peel out of the theater's parking lot a few minutes before - the same white van that suddenly rushes by Catfight and the freight truck! She successfully latches on with a cable grappler; the driver of the van becomes aware of her and tries to shake her off, driving erratically. Catfight slams the side of the van, and knocks it into the center median, which causes it to turn on its side and skid to a stop. Catfight questions the driver, and learns that their next job was to rendezvous with their boss in Port Huron, just north of the city, where he had gone to a residential address - the home of Clive Parish... | ||
| + | | Unknown | ||
| + | |- | ||
| + | | Magical Menace | ||
| + | | Catfight #3 | ||
| + | | "Part 3" | ||
| + | |Catfight speaks to Walter, the owner, and learns that Xerhan has a dark secret: he is a meta-human, who apparently used his mind-clouding abilities in the former Yugoslavia as a secret policeman assigned to elicit confessions. But after Xerhan emigrated to the United States, he tried to put the past behind him, and use his powers to aid in magic acts. Leaving Walter's office, Catfight learns that the police have given the touring company the all-clear to pack up their things and move on to Toronto, as their lawyer has succeeded in getting an injunction due to there being no evidence of a crime. Catfight reveals to Xerhan that she knows about his past, but takes care not to accuse him - an effective tactic, as he complies, and sheds light on how he got involved with the company, and Walter's deep mistrust of even his closest business partners, including Xerhan himself. When Catfight inquires more, she learns that Walter was once betrayed by a business associate who stole his inventions and left Walter penniless. That person? Clive Parish, grandfather of Samara. MCPD detective Sheffield offers to help research the connection between Clive and Walter for Catfight. But immediately after the detective leaves, Catfight is surrounded by a bunch of the locally-hired theater techs - goons! They swarm her, and despite a valiant defense, Catfight is captured. They quickly reassemble the buzz-saw escape artist set piece, and strap Catfight in. They remove the safeties to make the buzz-saw lethal. As they flip the switch and leave Catfight under a slowly-descending, over-size buzz-saw, the hero has less than a minute to escape... | ||
| + | | Unknown | ||
| + | |- | ||
| + | | Magical Menace | ||
| + | | Catfight #2 | ||
| + | | "Part 2" | ||
| + | |Catfight continues her questioning of the various employees of the traveling magic show. They are all, including the stage manager Floyd, contractually forbidden to discuss the way the illusions work, but Xerhan himself puts Catfight through the Dimensional Prism trick. Catfight ends up in a coffin-like receptacle, by means of teleportation apparently, before Xerhan recalls her to the prism. Samara was no where to be found on that trip. Speaking to others, including the company's owner, Walter, and the clairvoyant performer, Catfight learns of discord behind the scenes as performers were nearing the end of their contract; some suspicion briefly falls upon the clairvoyant because she had been forbidden to go home to tend to her family during a difficult time, but with the tour only one date away from an end, that clairvoyant makes a much less likely suspect in Samara's disappearance. Suspicion seems to focus on Lucy and Chandler, who others point out had been seen to talk - and Chandler's relationship with Samara had been on the rocks recently. They were supposed to visit Samara's grandfather in Millennium City together after the show, though. When Catfight tries to push Chandler's buttons and accuse him of being involved in Samara's disappearance to see how he reacts, he explodes and tries to strike her, but she easily dodges. A number of theater techs restrain him as he makes a defense of himself as too easy a suspect. | ||
| + | | Unknown | ||
| + | |- | ||
| + | | Magical Menace | ||
| + | | Catfight #1 | ||
| + | | "Part 1" | ||
| + | |Eva Banks, a.k.a. Catfight, attends a renowned stage magic and illusion show headlined by the great Xerhan, along with her daughter. The show includes the standard card tricks, audience tricks, as well as a pretty eerie clairvoyant act, an escape artist trick, and the great finale: the Dimensional Prism, which one of the magician's assistants is supposed to vanish without a trace inside of a prismatic vessel, only to return moments later when bidden by Xerhan. But the assistant - the aspiring starlet Samara Parish, starring as Electron in an upcoming historical thriller about the Day of Destroyer - does not return! Eva gets her daughter home after the show, and goes back to the theater as Catfight. The police and stage crew have had no luck finding Samara, but Catfight starts to learn that there was discord between several members of the crew, not the least of which: Samara's stagehand boyfriend Chandler, and her jealous fellow assistant, Lucy. | ||
| + | | Unknown | ||
| + | |- | ||
| + | | Casino Fallout | ||
| + | | '''Sombra #1''' | ||
| + | | "Terror in the Shadowscraper" | ||
| + | |Sombra and Blue Fox are lured to an office building late at night by a silent alarm triggering! Encountering a lone security guard that refuses to respond or face them, the two are suddenly confused when it sprints backwards to attack them! The building is suddenly surrounded by solid shadows as more of the buildings' occupants, transformed into backwards shadow demons, continue attacking, grasping and tearing, trying to drag Sombra away! The shadows around the building begin to seep in, closing in on the duo, before Sombra is finally pulled into the darkness. Following after her almost blindly, Blue Fox climbs to the top floor of the building, where Setsushi Mizuki, one of the players who had attempted to win the heroine in a poker tournament, awaits, an altar set up and a deadly knife in hand, ready to sacrifice Sombra for some dark ritual! Blue Fox is barely able to fight the woman off, and the shadows are swept away with her. | ||
| + | | Setsushi Mizuki, the Shadow Witch | ||
| + | |- | ||
| + | | Chasing Shadows | ||
| + | | '''#277''' | ||
| + | | "After Dark" | ||
| + | |In their disguises as the masked hoodlum Ruffian and the French villainess Mort Ecarlate, Blue Fox and Red Spider use the Overthinker's invitations to get into the Five Aces, while Rubber Bullette, as the blonde "Rachel", is escorted by Purple Gang card shark Lyle Neidermeyer. They are joined by eleven other villains and gang representatives, and escorted to a secured back room where the sedated Sombra awaits as the grand prize - although Rachel is denied access, left behind in the main room to drink at the bar. The tournament begins, with Red and Blue joined at their table by the VIPER soldier Detmer, Neidermeyer, a woman from PSI, the patchworked Ragged Man, and crimelord Hector Dominguez-Lyons, David Lyons' supposed illegitimate heir. Unfortunately, an unpleasant surprise hits them all, as the club's back room is revealed to be fitted with a metahuman power dampener! The game continues regardless, and Cassandra is the ultimate winner, moving on to a final game with the second table's winner, a pale Japanese woman named Setsushi Mizuki. Meanwhile, Bullette sneaks into the back halls of the club, and manages to shut down the building's power during this final game! In the chaos, Blue Fox starts a fight among the losers that are still hanging around the club, Catfight and Azure Hawk break in from the back door after dealing with guards outside, and Cassandra deals with Mizuki in the darkness. Rubber Bullette is able to get the security footage of their mission erased as the heroes carry Sombra to safety. However, the Five Aces club still made its profit, and its owner is left unharmed and free.... | ||
| + | | Five Aces, Setsushi Mizuki, Ragged Man, PSI, VIPER | ||
| + | |- | ||
| + | | Chasing Shadows | ||
| + | | '''#276''' | ||
| + | | "Shot in the Dark" | ||
| + | |The team begins their investigation into Sombra's disappearance. Cassandra, still affected by her recent return to her body, still manages to suit up and assist Catfight in searching the scene of the abduction and the surrounding area, interviewing locals who may have been around at the time of the capture, and scouring security camera footage from nearby buildings to track the Shrike's jet. Blue Fox and Sparrow Hawk go in a technological direction, entering the shadowy corners of the Internet and the dark web for information on metahuman traffickers. Azure Hawk and Doormaker go the direct route, Hawk by bringing his fist down on criminals across town, and Doormaker by donning a villainous persona and trying to infiltrate and ask around for information. Rubber Bullette begins hanging around villain bars in a more casual disguise, listening in on private conversations. Several strange leads are uncovered. Rumors about a Shadow Witch who bathes in the blood of innocents. A figure known only as "the Ragged Man" coming to town. VIPER being oddly focused on card games. Black Tarantula being spotted around the Five Aces gambling den downtown, within the general area of where Shrike's jet is presumed to have ended up. The Five Aces preparing for some kind of special event, sending exclusive invitations out to certain villains and gangs (including, surprisingly, the Purple Gang, a member of which flirts with Bullette, inviting her to be his plus one). Could Sombra be the prize in a high-stakes poker tournament? Their information is confirmed when the Overthinker contacts the team, offering the invitation sent to himself in exchange for a future favor. The team is even able to negotiate a second invitation, which Overthinker quickly steals from the Cobra Lords. The team prepares to attend the tournament! | ||
| + | | Various | ||
| + | |- | ||
| + | | Chasing Shadows | ||
| + | | '''#275''' | ||
| + | | "Dark Web" | ||
| + | |On an otherwise peaceful afternoon, Sombra's voice breaks the quiet, panicked and hurried. She's been hit by a surprise dart in the neck, and is terrifyingly aware that she's quickly losing consciousness. She has time to give her current location and plead for help before falling silent. Blue Fox and Sparrow Hawk both hear her call, however, and rush to the rescue, trying to keep her awake and talking and being reassured by her occasional mumbles for aid. Unfortunately, the duo arrive to an empty rooftop... and Sombra continues piping up on the radio, the same mumbled "help". Tossed under some ductwork, the two find her communicator, hastily attached to a little recorder that plays her voice on repeat, nothing but a distraction! | ||
| + | |||
| + | Sparrow manages to catch sight of a bulky figure swinging away in the distance, and the duo rush to catch up, finding the villainous mercenary Black Tarantula, a Sombra-sized sack clutched to her back by her robotic spider legs! Blue Fox is able to confirm that Sombra is in there by scent, but there is no longer any heartbeat or breath.... | ||
| + | |||
| + | After a brief two-on-one battle, Tarantula is overcome, and Sparrow Hawk opens the sack, only to discover a mannequin wearing parts of Sombra's costume! Tarantula, too, was a decoy, taking the rescuers on a wild goose chase while her partner, the shadowy Shrike, absconded with Sombra on a small aerial vehicle before they'd even arrived! The two interrogate the villain, but she has little to offer other than revealing that Sombra had a bounty on her head; besides her association with the infamous Adventurers, she also has extremely desirable powers with her invisibility and teleportation. Unfortunately, Tarantula was intentionally left in the dark to who they were selling to, knowing that she'd likely be captured, while the Shrike took care of the actual transaction. Tarantula is taken away to prison, and The heroes inform the team of the kidnapping, immediately beginning their investigation. | ||
| + | | Black Tarantula | ||
|- | |- | ||
| Zarkov's Revenge | | Zarkov's Revenge | ||
| Line 548: | Line 2,038: | ||
| Yuri Zarkov | | Yuri Zarkov | ||
|- | |- | ||
| − | |||
| − | |||
| − | |||
| − | |||
| − | |||
| − | |||
| − | |||
| − | |||
| − | |||
| − | |||
| − | |||
| − | |||
| − | |||
| − | |||
| − | |||
| − | |||
| − | |||
| − | |||
| − | |||
| − | |||
| − | |||
| − | |||
| − | |||
| − | |||
| − | |||
| − | |||
| − | |||
| − | |||
| − | |||
| − | |||
| − | |||
| − | |||
| − | |||
| − | |||
| − | |||
| − | |||
| − | |||
| − | |||
| − | |||
| − | |||
| − | |||
| − | |||
| − | |||
| − | |||
| − | |||
| − | |||
| − | |||
| − | |||
| − | |||
| − | |||
| − | |||
| − | |||
| − | |||
| − | |||
| − | |||
| − | |||
| − | |||
| − | |||
| − | |||
| − | |||
| − | |||
| − | |||
| − | |||
| − | |||
| − | |||
| − | |||
| − | |||
| − | |||
| − | |||
| − | |||
| − | |||
| − | |||
| − | |||
| − | |||
| − | |||
| − | |||
| − | |||
| − | |||
| − | |||
| − | |||
| − | |||
| − | |||
| − | |||
| − | |||
| − | |||
| − | |||
| − | |||
| − | |||
| − | |||
| − | |||
| − | |||
| − | |||
| − | |||
| − | |||
| − | |||
| − | |||
| − | |||
| − | |||
| − | |||
| − | |||
| − | |||
| − | |||
| − | |||
| − | |||
| − | |||
| − | |||
| − | |||
| − | |||
| − | |||
| − | |||
| − | |||
| − | |||
| − | |||
| − | |||
| − | |||
| − | |||
| − | |||
| − | |||
| − | |||
| − | |||
| − | |||
| − | |||
| − | |||
| − | |||
| − | |||
| − | |||
| − | |||
| − | |||
| − | |||
| − | |||
| − | |||
| − | |||
| − | |||
| − | |||
| − | |||
| − | |||
| − | |||
| − | |||
| − | |||
| − | |||
| − | |||
| − | |||
| − | |||
| − | |||
| − | |||
| − | |||
| − | |||
| − | |||
| − | |||
| − | |||
| − | |||
| − | |||
| − | |||
| − | |||
| − | |||
| − | |||
| − | |||
| − | |||
| − | |||
| − | |||
| − | |||
| − | |||
| − | |||
| − | |||
| − | |||
| − | |||
| − | |||
| − | |||
| − | |||
| − | |||
| − | |||
| − | |||
| − | |||
| − | |||
| − | |||
| − | |||
| − | |||
| − | |||
| − | |||
| − | |||
| − | |||
| − | |||
| − | |||
| − | |||
| − | |||
| − | |||
| − | |||
| − | |||
| − | |||
| − | |||
| − | |||
| − | |||
| − | |||
| − | |||
| − | |||
| − | |||
| − | |||
| − | |||
| − | |||
| − | |||
| − | |||
| − | |||
| − | |||
| − | |||
| − | |||
| − | |||
| − | |||
| − | |||
| − | |||
| − | |||
| − | |||
| − | |||
| − | |||
| − | |||
| − | |||
| − | |||
| − | |||
| − | |||
| − | |||
| − | |||
| − | |||
| − | |||
| − | |||
| − | |||
| − | |||
| − | |||
| − | |||
| − | |||
| − | |||
| − | |||
| − | |||
| − | |||
| − | |||
| − | |||
| − | |||
| − | |||
| − | |||
| − | |||
| − | |||
| − | |||
| − | |||
| − | |||
| − | |||
| − | |||
| − | |||
| − | |||
| − | |||
| − | |||
| − | |||
| − | |||
| − | |||
| − | |||
| − | |||
| − | |||
| − | |||
| − | |||
| − | |||
| − | |||
| − | |||
| − | |||
| − | |||
| − | |||
| − | |||
| − | |||
| − | |||
| − | |||
| − | |||
| − | |||
| − | |||
| − | |||
| − | |||
| − | |||
| − | |||
| − | |||
| − | |||
| − | |||
| − | |||
| − | |||
| − | |||
| − | |||
| − | |||
| − | |||
| − | |||
| − | |||
| − | |||
| − | |||
| − | |||
| − | |||
| − | |||
| − | |||
| − | |||
| − | |||
| − | |||
| − | |||
| − | |||
| − | |||
| − | |||
| − | |||
| − | |||
| − | |||
| − | |||
| − | |||
| − | |||
| − | |||
| − | |||
| − | |||
| − | |||
| − | |||
| − | |||
| − | |||
| − | |||
| − | |||
| − | |||
| − | |||
| − | |||
| − | |||
| − | |||
| − | |||
| − | |||
| − | |||
| − | |||
| − | |||
| − | |||
| − | |||
| − | |||
| − | |||
| − | |||
| − | |||
| − | |||
| − | |||
| − | |||
| − | |||
| − | |||
| − | |||
| − | |||
| − | |||
| − | |||
| − | |||
| − | |||
| − | |||
| − | |||
| − | |||
| − | |||
| − | |||
| − | |||
| − | |||
| − | |||
| − | |||
| − | |||
| − | |||
| − | |||
| − | |||
| − | |||
| − | |||
| − | |||
| − | |||
| − | |||
| − | |||
| − | |||
| − | |||
| − | |||
| − | |||
| − | |||
| − | |||
| − | |||
| − | |||
| − | |||
| − | |||
| − | |||
| − | |||
| − | |||
| − | |||
| − | |||
| − | |||
| − | |||
| − | |||
| − | |||
| − | |||
| − | |||
| − | |||
| − | |||
| − | |||
| − | |||
| − | |||
| − | |||
| − | |||
| − | |||
| − | |||
| − | |||
| − | |||
| − | |||
| − | |||
| − | |||
| − | |||
| − | |||
| − | |||
| − | |||
| − | |||
| − | |||
| − | |||
| − | |||
| − | |||
| − | |||
| − | |||
| − | |||
| − | |||
| − | |||
| − | |||
| − | |||
| − | |||
| − | |||
| − | |||
| − | |||
| − | |||
| − | |||
| − | |||
| − | |||
| − | |||
| − | |||
| − | |||
| − | |||
| − | |||
| − | |||
| − | |||
| − | |||
| − | |||
| − | |||
| − | |||
| − | |||
| − | |||
| − | |||
| − | |||
| − | |||
| − | |||
| − | |||
| − | |||
| − | |||
| − | |||
| − | |||
| − | |||
| − | |||
| − | |||
| − | |||
| − | |||
| − | |||
| − | |||
| − | |||
| − | |||
| − | |||
| − | |||
| − | |||
| − | |||
| − | |||
| − | |||
| − | |||
| − | |||
| − | |||
| − | |||
| − | |||
| − | |||
| − | |||
| − | |||
| − | |||
| − | |||
| − | |||
| − | |||
| − | |||
| − | |||
| − | |||
| − | |||
| − | |||
| − | |||
| − | |||
| − | |||
| − | |||
| − | |||
| − | |||
| − | |||
| − | |||
| − | |||
| − | |||
| − | |||
| − | |||
| − | |||
| − | |||
| − | |||
| − | |||
| − | |||
| − | |||
| − | |||
| − | |||
| − | |||
| − | |||
| − | |||
| − | |||
| − | |||
| − | |||
| − | |||
| − | |||
| − | |||
| − | |||
| − | |||
| − | |||
| − | |||
| − | |||
| − | |||
| − | |||
| − | |||
| − | |||
| − | |||
| − | |||
| − | |||
| − | |||
| − | |||
| − | |||
| − | |||
| − | |||
| − | |||
| − | |||
| − | |||
| − | |||
| − | |||
| − | |||
| − | |||
| − | |||
| − | |||
| − | |||
| − | |||
| − | |||
| − | |||
| − | |||
| − | |||
| − | |||
| − | |||
| − | |||
| − | |||
| − | |||
| − | |||
| − | |||
| − | |||
| − | |||
| − | |||
| − | |||
| − | |||
| − | |||
| − | |||
| − | |||
| − | |||
| − | |||
| − | |||
| − | |||
| − | |||
| − | |||
| − | |||
| − | |||
| − | |||
| − | |||
| − | |||
| − | |||
| − | |||
| − | |||
| − | |||
| − | |||
| − | |||
| − | |||
| − | |||
| − | |||
| − | |||
| − | |||
| − | |||
| − | |||
| − | |||
| − | |||
| − | |||
| − | |||
| − | |||
| − | |||
| − | |||
| − | |||
| − | |||
| − | |||
| − | |||
| − | |||
| − | |||
| − | |||
| − | |||
| − | |||
| − | |||
| − | |||
| − | |||
| − | |||
| − | |||
| − | |||
| − | |||
| − | |||
| − | |||
| − | |||
| − | |||
| − | |||
| − | |||
| − | |||
| − | |||
| − | |||
| − | |||
| − | |||
| − | |||
| − | |||
| − | |||
| − | |||
| − | |||
| − | |||
| − | |||
| − | |||
| − | |||
| − | |||
| − | |||
| − | |||
| − | |||
| − | |||
| − | |||
| − | |||
| − | |||
| − | |||
| − | |||
| − | |||
| − | |||
| − | |||
| − | |||
| − | |||
| − | |||
| − | |||
| − | |||
| − | |||
| − | |||
| − | |||
| − | |||
| − | |||
| − | |||
| − | |||
| − | |||
| − | |||
| − | |||
| − | |||
| − | |||
| − | |||
| − | |||
| − | |||
| − | |||
| − | |||
| − | |||
| − | |||
| − | |||
| − | |||
| − | |||
| − | |||
| − | |||
| − | |||
| − | |||
| − | |||
| − | |||
| − | |||
| − | |||
| − | |||
| − | |||
| − | |||
| − | |||
| − | |||
| − | |||
| − | |||
| − | |||
| − | |||
| − | |||
| − | |||
| − | |||
| − | |||
| − | |||
| − | |||
| − | |||
| − | |||
| − | |||
| − | |||
| − | |||
| − | |||
| − | |||
| − | |||
| − | |||
| − | |||
| − | |||
| − | |||
| − | |||
| − | |||
| − | |||
| − | |||
| − | |||
| − | |||
| − | |||
| − | |||
| − | |||
| − | |||
| − | |||
| − | |||
| − | |||
| − | |||
| − | |||
| − | |||
| − | |||
| − | |||
| − | |||
| − | |||
| − | |||
| − | |||
| − | |||
| − | |||
| − | |||
| − | |||
| − | |||
| − | |||
| − | |||
| − | |||
| − | |||
| − | |||
| − | |||
| − | |||
| − | |||
| − | |||
| − | |||
| − | |||
| − | |||
| − | |||
| − | |||
| − | |||
| − | |||
| − | |||
| − | |||
| − | |||
| − | |||
| − | |||
| − | |||
| − | |||
| − | |||
| − | |||
| − | |||
| − | |||
| − | |||
| − | |||
| − | |||
| − | |||
| − | |||
| − | |||
| − | |||
| − | |||
| − | |||
| − | |||
| − | |||
| − | |||
| − | |||
| − | |||
| − | |||
| − | |||
| − | |||
| − | |||
| − | |||
| − | |||
| − | |||
| − | |||
| − | |||
| − | |||
| − | |||
| − | |||
| − | |||
| − | |||
| − | |||
| − | |||
| − | |||
| − | |||
| − | |||
| − | |||
| − | |||
| − | |||
| − | |||
| − | |||
| − | |||
| − | |||
| − | |||
| − | |||
| − | |||
| − | |||
| − | |||
| − | |||
| − | |||
| − | |||
| − | |||
| − | |||
| − | |||
| − | |||
| − | |||
| − | |||
| − | |||
| − | |||
| − | |||
| − | |||
| − | |||
| − | |||
| − | |||
| − | |||
| − | |||
| − | |||
| − | |||
| − | |||
| − | |||
| − | |||
| − | |||
| − | |||
| − | |||
| − | |||
| − | |||
| − | |||
| − | |||
| − | |||
| − | |||
| − | |||
| − | |||
| − | |||
| − | |||
| − | |||
| − | |||
| − | |||
| − | |||
| − | |||
| − | |||
| − | |||
| − | |||
| − | |||
| − | |||
| − | |||
| − | |||
| − | |||
| − | |||
| − | |||
| − | |||
| − | |||
| − | |||
| − | |||
| − | |||
| − | |||
| − | |||
| − | |||
| − | |||
| − | |||
| − | |||
| − | |||
| − | |||
| − | |||
| − | |||
| − | |||
| − | |||
| − | |||
| − | |||
| − | |||
| − | |||
| − | |||
| − | |||
| − | |||
| − | |||
| − | |||
| − | |||
| − | |||
| − | |||
| − | |||
| − | |||
| − | |||
| − | |||
| − | |||
| − | |||
| − | |||
| − | |||
| − | |||
| − | |||
| − | |||
| − | |||
| − | |||
| − | |||
| − | |||
| − | |||
| − | |||
| − | |||
| − | |||
| − | |||
| − | |||
| − | |||
| − | |||
| − | |||
| − | |||
| − | |||
| − | |||
| − | |||
| − | |||
| − | |||
| − | |||
| − | |||
| − | |||
| − | |||
| − | |||
| − | |||
| − | |||
| − | |||
| − | |||
| − | |||
| − | |||
| − | |||
| − | |||
| − | |||
| − | |||
| − | |||
| − | |||
| − | |||
| − | |||
| − | |||
| − | |||
| − | |||
| − | |||
| − | |||
| − | |||
| − | |||
| − | |||
| − | |||
| − | |||
| − | |||
| − | |||
| − | |||
| − | |||
| − | |||
| − | |||
| − | |||
| − | |||
| − | |||
| − | |||
| − | |||
| − | |||
| − | |||
| − | |||
| − | |||
| − | |||
| − | |||
| − | |||
| − | |||
| − | |||
| − | |||
| − | |||
| − | |||
| − | |||
| − | |||
| − | |||
| − | |||
| − | |||
| − | |||
| − | |||
| − | |||
| − | |||
| − | |||
| − | |||
| − | |||
| − | |||
| − | |||
| − | |||
| − | |||
| − | |||
| − | |||
| − | |||
| − | |||
| − | |||
| − | |||
| − | |||
| − | |||
| − | |||
| − | |||
| − | |||
| − | |||
| − | |||
| − | |||
| − | |||
| − | |||
| − | |||
| − | |||
| − | |||
| − | |||
| − | |||
| − | |||
| − | |||
| − | |||
| − | |||
| − | |||
| − | |||
| − | |||
| − | |||
| − | |||
| − | |||
| − | |||
| − | |||
| − | |||
| − | |||
| − | |||
| − | |||
| − | |||
| − | |||
| − | |||
| − | |||
| − | |||
| − | |||
| − | |||
| − | |||
| − | |||
| − | |||
| − | |||
| − | |||
| − | |||
| − | |||
| − | |||
| − | |||
| − | |||
| − | |||
| − | |||
| − | |||
| − | |||
| − | |||
| − | |||
| − | |||
| − | |||
| − | |||
| − | |||
| − | |||
| − | |||
| − | |||
| − | |||
| − | |||
| − | |||
| − | |||
| − | |||
| − | |||
| − | |||
| − | |||
| − | |||
| − | |||
| − | |||
| − | |||
| − | |||
| − | |||
| − | |||
| − | |||
| − | |||
| − | |||
| − | |||
| − | |||
| − | |||
| − | |||
| − | |||
| − | |||
| − | |||
| − | |||
| − | |||
| − | |||
| − | |||
| − | |||
| − | |||
| − | |||
| − | |||
| − | |||
| − | |||
| − | |||
| − | |||
| − | |||
| − | |||
| − | |||
| − | |||
| − | |||
| − | |||
| − | |||
| − | |||
| − | |||
| − | |||
| − | |||
| − | |||
| − | |||
| − | |||
| − | |||
| − | |||
| − | |||
| − | |||
| − | |||
| − | |||
| − | |||
| − | |||
| − | |||
| − | |||
| − | |||
| − | |||
| − | |||
| − | |||
| − | |||
| − | |||
| − | |||
| − | |||
| − | |||
| − | |||
| − | |||
| − | |||
| − | |||
| − | |||
| − | |||
| − | |||
| − | |||
| − | |||
| − | |||
| − | |||
| − | |||
| − | |||
| − | |||
| − | |||
| − | |||
| − | |||
| − | |||
| − | |||
| − | |||
| − | |||
| − | |||
| − | |||
| − | |||
| − | |||
| − | |||
| − | |||
| − | |||
| − | |||
| − | |||
| − | |||
| − | |||
| − | |||
| − | |||
| − | |||
| − | |||
| − | |||
| − | |||
| − | |||
| − | |||
| − | |||
| − | |||
| − | |||
| − | |||
| − | |||
| − | |||
| − | |||
| − | |||
| − | |||
| − | |||
| − | |||
| − | |||
| − | |||
| − | |||
| − | |||
| − | |||
| − | |||
| − | |||
| − | |||
| − | |||
| − | |||
| − | |||
| − | |||
| − | |||
| − | |||
| − | |||
| − | |||
| − | |||
| − | |||
| − | |||
| − | |||
| − | |||
| − | |||
| − | |||
| − | |||
| − | |||
| − | |||
| − | |||
| − | |||
| − | |||
| − | |||
| − | |||
| − | |||
| − | |||
| − | |||
| − | |||
| − | |||
| − | |||
| − | |||
| − | |||
| − | |||
| − | |||
| − | |||
| − | |||
| − | |||
| − | |||
| − | |||
| − | |||
| − | |||
| − | |||
| − | |||
| − | |||
| − | |||
| − | |||
| − | |||
| − | |||
| − | |||
| − | |||
| − | |||
| − | |||
| − | |||
| − | |||
| − | |||
| − | |||
| − | |||
| − | |||
| − | |||
| − | |||
| − | |||
| − | |||
| − | |||
| − | |||
| − | |||
| − | |||
| − | |||
| − | |||
| − | |||
| − | |||
| − | |||
| − | |||
| − | |||
| − | |||
| − | |||
| − | |||
| − | |||
| − | |||
| − | |||
| − | |||
| − | |||
| − | |||
| − | |||
| − | |||
| − | |||
| − | |||
| − | |||
| − | |||
| − | |||
| − | |||
| − | |||
| − | |||
| − | |||
| − | |||
| − | |||
| − | |||
| − | |||
| − | |||
| − | |||
| − | |||
| − | |||
| − | |||
| − | |||
| − | |||
| − | |||
| − | |||
| − | |||
| − | |||
| − | |||
| − | |||
| − | |||
| − | |||
| − | |||
| − | |||
| − | |||
| − | |||
| − | |||
| − | |||
| − | |||
| − | |||
| − | |||
| − | |||
| − | |||
| − | |||
| − | |||
| − | |||
| − | |||
| − | |||
| − | |||
| − | |||
| − | |||
| − | |||
| − | |||
| − | |||
| − | |||
| − | |||
| − | |||
| − | |||
| − | |||
| − | |||
| − | |||
| − | |||
| − | |||
| − | |||
| − | |||
| − | |||
| − | |||
| − | |||
| − | |||
| − | |||
| − | |||
| − | |||
| − | |||
| − | |||
| − | |||
| − | |||
| − | |||
| − | |||
| − | |||
| − | |||
| − | |||
| − | |||
| − | |||
| − | |||
| − | |||
| − | |||
| − | |||
| − | |||
| − | |||
| − | |||
| − | |||
| − | |||
| − | |||
| − | |||
| − | |||
| − | |||
| − | |||
| − | |||
| − | |||
| − | |||
| − | |||
| − | |||
| − | |||
| − | |||
| − | |||
| − | |||
| − | |||
| − | |||
| − | |||
| − | |||
| − | |||
| − | |||
| − | |||
| − | |||
| − | |||
| − | |||
| − | |||
| − | |||
| − | |||
| − | |||
| − | |||
| − | |||
| − | |||
| − | |||
| − | |||
| − | |||
| − | |||
| − | |||
| − | |||
| − | |||
| − | |||
| − | |||
| − | |||
| − | |||
| − | |||
| − | |||
| − | |||
| − | |||
| − | |||
| − | |||
| − | |||
| − | |||
| − | |||
| − | |||
| − | |||
| − | |||
| − | |||
| − | |||
| − | |||
| − | |||
| − | |||
| − | |||
| − | |||
| − | |||
| − | |||
| − | |||
| − | |||
| − | |||
| − | |||
| − | |||
| − | |||
| − | |||
| − | |||
| − | |||
| − | |||
| − | |||
| − | |||
| − | |||
| − | |||
| − | |||
| − | |||
| − | |||
| − | |||
| − | |||
| − | |||
| − | |||
| − | |||
| − | |||
| − | |||
| − | |||
| − | |||
| − | |||
| − | |||
| − | |||
| − | |||
| − | |||
| − | |||
| − | |||
| − | |||
| − | |||
| − | |||
| − | |||
| − | |||
| − | |||
| − | |||
| − | |||
| − | |||
| − | |||
| − | |||
| − | |||
| − | |||
| − | |||
| − | |||
| − | |||
| − | |||
| − | |||
| − | |||
| − | |||
| − | |||
| − | |||
| − | |||
| − | |||
| − | |||
|} | |} | ||
| Line 2,017: | Line 2,053: | ||
* [[Secrets of the Adventurers (Adventurers)]] | * [[Secrets of the Adventurers (Adventurers)]] | ||
* [[Bluebird for Congress (Adventurers)]] | * [[Bluebird for Congress (Adventurers)]] | ||
| + | * [[Into the Undersea (Adventurers)]] | ||
| + | * [[The Season of Xagrim (Adventurers)]] | ||
<br> | <br> | ||
<Br> | <Br> | ||
| − | |||
| − | |||
| − | |||
| − | |||
| − | |||
| − | |||
| − | |||
| − | |||
| − | |||
| − | |||
| − | |||
| − | |||
| − | |||
| − | |||
| − | |||
| − | |||
| − | |||
| − | |||
| − | |||
| − | |||
| − | |||
| − | |||
| − | |||
| − | |||
| − | |||
| − | |||
| − | |||
| − | |||
| − | |||
| − | |||
| − | |||
| − | |||
| − | |||
| − | |||
| − | |||
| − | |||
| − | |||
| − | |||
| − | |||
| − | |||
| − | |||
| − | |||
| − | |||
| − | |||
| − | |||
| − | |||
| − | |||
| − | |||
| − | |||
| − | |||
| − | |||
| − | |||
| − | |||
| − | |||
| − | |||
| − | |||
| − | |||
| − | |||
| − | |||
| − | |||
| − | |||
| − | |||
| − | |||
| − | |||
| − | |||
| − | |||
| − | |||
| − | |||
| − | |||
| − | |||
| − | |||
| − | |||
| − | |||
| − | |||
| − | |||
| − | |||
| − | |||
| − | |||
| − | |||
| − | |||
| − | |||
| − | |||
| − | |||
| − | |||
| − | |||
| − | |||
| − | |||
| − | |||
| − | |||
| − | |||
| − | |||
| − | |||
| − | |||
| − | |||
| − | |||
| − | |||
| − | |||
| − | |||
| − | |||
| − | |||
| − | |||
| − | |||
| − | |||
| − | |||
| − | |||
| − | |||
| − | |||
| − | |||
| − | |||
| − | |||
| − | |||
| − | |||
| − | |||
| − | |||
| − | |||
| − | |||
| − | |||
| − | |||
| − | |||
| − | |||
| − | |||
| − | |||
| − | |||
| − | |||
| − | |||
| − | |||
| − | |||
| − | |||
| − | |||
| − | |||
| − | |||
=Adventurers in the Media= | =Adventurers in the Media= | ||
| Line 2,174: | Line 2,081: | ||
File:MCNews-04-16-2019.png|April 16, 2019 | File:MCNews-04-16-2019.png|April 16, 2019 | ||
File:MC-News-15-09-19.png|September 15, 2019 (Corresponds to Adventurers #270-#275) | File:MC-News-15-09-19.png|September 15, 2019 (Corresponds to Adventurers #270-#275) | ||
| + | </gallery> | ||
| + | |||
| + | <gallery> | ||
| + | File:MCNews-12-30-2021.png|December 30, 2021 (Corresponds to Adventurers #352-#353) | ||
</gallery> | </gallery> | ||
</center> | </center> | ||
| Line 2,179: | Line 2,090: | ||
=Joining the Adventurers= | =Joining the Adventurers= | ||
| − | + | <div style="padding-right:0px; padding-left:0px; border: 6px Solid #000000; color:#000; background-color:#DFCE42"> | |
| + | |||
| + | 7 APRIL 2024: The Adventurers has a roster about as large as it needs to be, and are not seeking new members. Recruits seeking to join MUST: 1) have a character who matches the theme, 2) Be well-known to SG members who can vouch for their playstyle, 3) Demonstrate that they have more than just a passing interest in roleplay, Champions Online, and our SG. | ||
| + | |||
| + | </div> | ||
| + | |||
| + | ==Reasons to Join== | ||
| − | + | Adventurers share: | |
| − | + | * A passion for appreciating & participating in superhero stories | |
| − | * | + | * Superhero RP with a group who makes your character development feel important and memorable. |
| − | * | + | * Friendships among quality RPers |
| − | * | + | * An environment of mutual respect |
| − | * | + | * A chance to take on meaningful leadership roles on the team |
| − | * | + | * Costume unlocks and gear donated between members |
| − | * | + | * Lively OOC chat channels (Adventurers_OOC, Adventurers_Spoilers - members only) |
| − | * | + | * An amazing Discord community (members only) |
| − | == | + | ==Adventurers Theme== |
| − | The following is a guideline for the kinds of IC qualities we're looking for in the green column (left). The red column (right) has | + | We're a group of street-level, low-powered, costumed heroes. A lot of us successfully fight crime solo, but we need the help of other heroes when a big threat emerges. |
| + | |||
| + | The following is a guideline for the kinds of IC qualities we're looking for in the green column (left). The red column (right) has traits that stray away from the theme. | ||
{| style="text-align: center; border: 0px;" cellspacing=0 | {| style="text-align: center; border: 0px;" cellspacing=0 | ||
| Line 2,224: | Line 2,143: | ||
| style='border-style: none none none none; border=0px; color:white; border-bottom:1px solid black; background: #ff2e16;' | '''Doesn't worry about causing collateral damage.''' | | style='border-style: none none none none; border=0px; color:white; border-bottom:1px solid black; background: #ff2e16;' | '''Doesn't worry about causing collateral damage.''' | ||
|- | |- | ||
| − | | style='border-style: none none solid none; border=0px; border-bottom:1px solid white; background: #41f253' | '''Lawful.''' | + | | style='border-style: none none solid none; border=0px; border-bottom:1px solid white; background: #41f253' | '''Lawful (or at least, upholds the spirit of the law).''' |
| style='border-style: none none none none;' | | | style='border-style: none none none none;' | | ||
| style='border-style: none none none none; border=0px; color:white; border-bottom:1px solid black; background: #ff2e16;' | '''Unlawful / Chaotic / Homicidal''' | | style='border-style: none none none none; border=0px; color:white; border-bottom:1px solid black; background: #ff2e16;' | '''Unlawful / Chaotic / Homicidal''' | ||
| Line 2,235: | Line 2,154: | ||
| style='border-style: none none none none;' | | | style='border-style: none none none none;' | | ||
| style='border-style: none none none none; border=0px; color:white; border-bottom:1px solid black; background: #ff2e16;' | '''Is perfect, invulnerable, and/or just plain bland.''' | | style='border-style: none none none none; border=0px; color:white; border-bottom:1px solid black; background: #ff2e16;' | '''Is perfect, invulnerable, and/or just plain bland.''' | ||
| + | |- | ||
| + | | style='border-style: none none solid none; border=0px; border-bottom:1px solid white; background: #41f253' | '''Character has a positive attitude; reserves strong language.''' | ||
| + | | style='border-style: none none none none;' | | ||
| + | | style='border-style: none none none none; border=0px; color:white; border-bottom:1px solid black; background: #ff2e16;' | '''Character is excessively profane, crude, or negative.''' | ||
| + | |- | ||
| + | | style='border-style: none none solid none; border=0px; border-bottom:1px solid white; background: #41f253' | '''Feels fun to be around, promotes interesting & positive interactions.''' | ||
| + | | style='border-style: none none none none;' | | ||
| + | | style='border-style: none none none none; border=0px; color:white; border-bottom:1px solid black; background: #ff2e16;' | '''Notably polarizing or excessively negative.''' | ||
|} | |} | ||
| + | ==Recruitment FAQ== | ||
| + | |||
| + | '''My character has traits in the 'red' column in the chart above - would I be allowed to join?''' | ||
| + | <br>Maybe. It depends on a couple of things: how big of a departure is it? Is there anything that helps mitigate it (i.e. with magic, what limitations have you put on?)? | ||
| − | + | '''What time zone are you in?''' | |
| + | <br>Most of us are in North America. We're most active between 6PM - 11PM server time. | ||
| − | + | '''How can I get to know the team members better before applying?''' | |
| − | + | <br>Look for us in public social zones. If you don't see us there, consider asking for an invite to our global channel ''Adventurers_4ALL'' and you can talk to us OOC there, maybe try to get something going. Please '''take the initiative''' if you want us to notice you and consider you for membership. | |
| − | + | ||
| − | + | ||
| − | + | '''How often do you do RP sessions?''' | |
| − | + | <br>Usually 2-4 nights of the week, and often these are one-off sessions that are totally optional. With the squad system we started in 2022, it really depends on your squad! | |
| − | + | ||
| − | + | ||
| − | + | ||
| − | + | '''I applied to join, and then didn't hear anything. What's going on?''' | |
| − | + | <br>First feel free to check with @historiphile about this if it has been more than a week. Typically if we like a character you want to join with, you're going to hear from us immediately. If you apply with a character who has clear departures from the theme, we might just decline that application and move on. Sometimes we reply to say why it won't work with us. Feel free to try again with a character who is a better match, if you want. | |
| − | + | ||
| − | + | '''Is magic banned in the Adventurers?''' | |
| + | <br>Sort of a soft 'No'. It's good practice in RP for any character - magic or not - to have well-defined powers and limitations. The Adventurers heroes regard magic (and its practitioners) as something exotic, mysterious, and maybe not that commonplace from their point of view. | ||
| + | |||
| + | '''Can I have characters in other RP SGs while I'm in the Adventurers?''' | ||
| + | <br>Yes. Many of our players have done so. | ||
| + | |||
| + | '''About the SG theme. Why don't you want my type of character in it?''' | ||
| + | <br>If you want a different RP experience than what we do, we truly hope you find it! Maybe start that RP group yourself, build it up, and seek people looking for the same thing. That is how Adventurers began. | ||
| + | |||
| + | '''Who runs scenarios for the Adventurers?''' | ||
| + | <br>Members do! This is a safe and supportive group for those who want to run superhero scenarios. Ask for more info. Sometimes we allow non-SG guest villains. | ||
| + | |||
| + | '''I have a well-developed lore for my character. Will you make use of it?''' | ||
| + | <br>As long as it seems not to conflict with anything else we have going, and seems beneficial to RP with... then sure! Beware: whatever you run for us, make sure we can all play in it. We have had instances of people creating a story and characters ostensibly for RP, but it becoming clear that they just wanted us to be a passive audience for their creations. Such pursuits may be better as solo fiction. | ||
| + | |||
| + | '''Where do the Adventurers stand in relation to various factions from the Hero System PnP role playing game? What if my character would see it different?''' | ||
| + | We started a [[Glossary_of_the_Adventurers_SG|glossary]] that addresses that very thing. Where there are any uncertainties in interpreting lore, it is up to the group leader (@historiphile) to referee. Your character can still have differing opinions, even if those opinions contradict what has been decided as narrative facts by the group leader, but those would be ''just'' that character's opinions. (i.e. your character can despise UNTIL and think they're a fascist group, but it has been decided narratively that in Adventurers stories, they are actually a force for good). | ||
| + | |||
| + | '''Do I have to be effective with English to join the Adventurers?''' | ||
| + | <br>Yes. All of our communication is done in written English. | ||
| + | |||
| + | '''Is profanity &#$*ing ok, or what?''' | ||
| + | <br>Save powerful language for occasions when it has full effect. Speaking as a generality, most SG members seem to find edginess tiresome and overrated. | ||
| + | |||
| + | '''My preferred RP is all about chaos / interpersonal drama / internal conflict. Are you going to let me be who I am?''' | ||
| + | <br>There is a team culture of mutual friendship and support, IC and OOC. We fight villains, not each other. Many of us believe that has contributed to our group's longevity. If that idea makes you uncomfortable, please steer clear of us. | ||
| + | |||
| + | '''My character is the sort who will ''definitely'' rub people the wrong way, say mean things, be a total self-centered ass. It's just my character. You guys are ''real'' roleplayers, though, right? You can handle the difference between real and make-belief??''' | ||
| + | <br>For one, it's against our theme (see: polarizing & excessively negative). For another, we believe that even things done in character are ''choices'' the player makes and is responsible for, and not at all the fault of others when they react poorly to them (particularly when done with no narrative framing to make sure the other person knows it's just an act). So while we are not interested in recruiting such a character, for nothing, may we direct you to [https://www.reddit.com/r/dndnext/comments/17ue8ei/how_to_roleplay_a_character_whos_full_of_himself/| this Reddit thread] for some advice on how to do that kind of roleplay without alienating other roleplayers? | ||
==Recruitment== | ==Recruitment== | ||
| − | The following are guidelines | + | The following are guidelines for how we usually go about recruiting. But we reserve the right to change how we recruit at any time. |
| + | |||
| + | ===Before Requesting=== | ||
| + | |||
| + | We value relationship about as much as we value adherence to theme. If you have never RP'd with us and request to join us, it may take longer, or might not happen at all. Start trying to get to know us before. Ask to join our '''Adventurers_4ALL''' channel as a way to reach us. | ||
| − | ===Step 1 - | + | ===Step 1 - Request to Join=== |
| − | * Start by sending an in-game mail to | + | * Start by sending an in-game mail to @historiphile expressing interest, and maybe some detail on the following: |
**Powers | **Powers | ||
**Traits (ie, Strengths/weaknesses) | **Traits (ie, Strengths/weaknesses) | ||
| Line 2,271: | Line 2,230: | ||
===Step 2 - Assessment=== | ===Step 2 - Assessment=== | ||
| − | We will talk | + | We will talk internally about what we think about you based on the details you submitted in Step 1, and the reputation you have. If we like what we're hearing and/or think it's something we need, we will reach out. |
===Step 3 - Combat RP Trial=== | ===Step 3 - Combat RP Trial=== | ||
| Line 2,281: | Line 2,240: | ||
We learn a lot about how someone RPs from this activity. | We learn a lot about how someone RPs from this activity. | ||
| − | Once the combat RP trial is complete, witnessing Adventurers will discuss. If they like what they saw, then membership | + | Once the combat RP trial is complete, witnessing Adventurers will discuss. If they like what they saw, then membership may be offered. |
Latest revision as of 13:58, 27 April 2024
| ||||||||||||||||||||||

The Adventurers is a team of costumed heroes from Millennium City. Small in number, but strong in determination and skill, they work together to keep the city safe.
Contents
Adventurers Team Roster
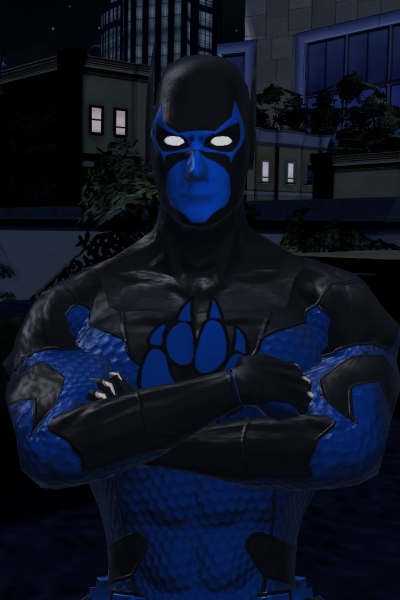
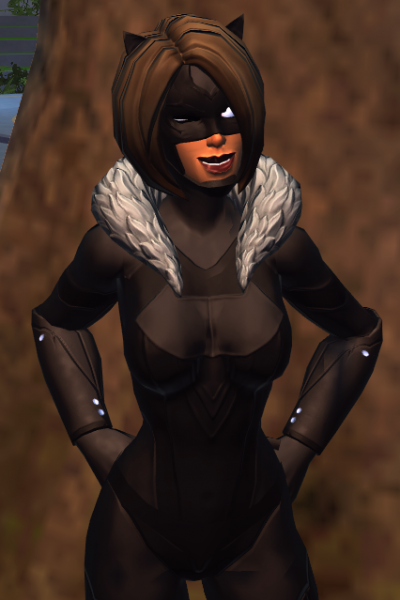
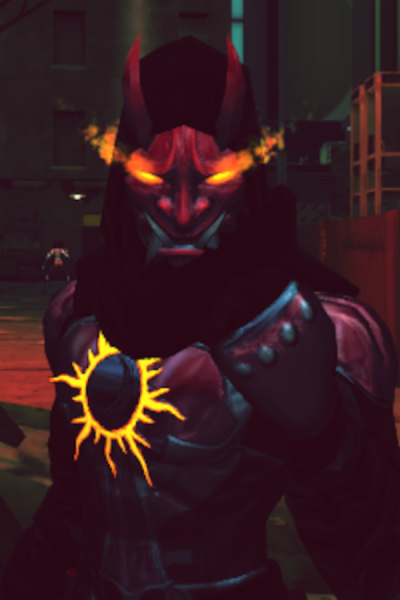


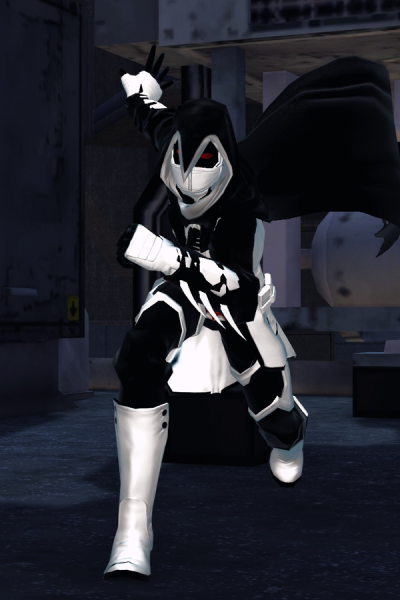


Not pictured: Martyr, Pathfinder, Red Wren
Recruits
Not pictured: N/A
Adventurers ReserveThese heroes turn up to help once in a while.
Not pictured: Oni Inactive Members These heroes have gone on to be heroes in other ways!
Squads
Starting in fall of 2022, the team was subdivided into two sub-groups, each with a captain, called squads. The squad leaders (first on the left of each below) chose their teams for whatever mission types they felt they could best specialize in, and were invested with authority to make decisions as needed for their squad.
It was the hope of Webcrawler that each squad could, with their unique make-ups and leader styles, excel on adventures and missions suited to them.
Current Squads
ADVENTURERS BLUE 
Blue Fox
Courser
Sombra 
Windchill
Scatha 5
Tungstan
PathfinderADVENTURERS RED 
Rubber Bullette
Firewalker 
Osprey
Mantle
Red Wren
Stinger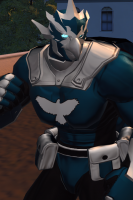
Azure Hawk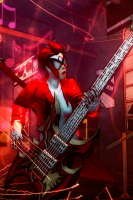
Power-ChordPrevious Squads
March '23 - Sept. '23
ADVENTURERS MIDNIGHT 
CatfightSombra Mantle Blue Fox Rubber Bullette ADVENTURERS CRIMSON Firewalker
Osprey
Power-Chord
Scatha 5
WindchillSept. '22 - March '23
ADVENTURERS SILVER Courser Sombra 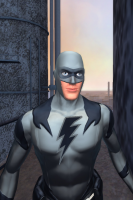
Voltage Blue Fox Osprey ADVENTURERS GOLD Tungstan
Stinger
Scatha 5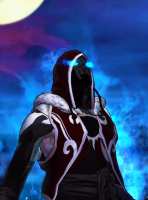
Firewalker OOC notes on squads
Squads might change up to twice per year. For their first run, they tended to run for six month periods between equinoxes (September and March), but may be suspended occasionally as leadership may deem necessary.
New captains will be chosen weeks prior to each squadding. Captains can select at least 4 other heroes to serve on their squad, with the assent of those members and the final approval by the team leader.
The purpose of squads is not to be exclusive; anyone can help out. The team as a whole may be called together regardless of squad as needed. Squads might also work together OOC to make RP stories for other team members to play in.
Story Arcs
The following is presented as summaries of the Adventurers as if it were based on an actual comic book.
Arc Issue Title Story Villain(s) Vorpal's Dozen Blue Squad #18 (Finale) "Four Leaf Clover" Abruptly, Vorpal manages to find the hideout being used by Biker's Dozen. It's a derelict bar in the seediest part of Westside. She calls Blue Squad, after having made herself known in their group text chat, and Wizard is also alerted. When asked how she managed to find it, Vorpal dodges the inquiry and keeps the details vague. Sombra stealthily infiltrates the building and finds an unconscious and badly injured Vyle restrained and connected to many IV's. The Bakers are harvesting his blood to manufacture a new, powerful drug, combining it with a strain of street level draysha gas, supplied to them by Grey Raccoon. The so-called 'Four Leaf Clover' drastically improves durability and strength, on top of being extremely addictive. Additionally, it turns is users red and hulking, not unlike Vyle in appearance.
As planned, Wizard busts in through a window. Vorpal takes the front door, followed by Windchill. Blue Fox sneaks in to get a read on the situation. Chaos erupts, and many of the Bakers partake of Four Leaf Clover to gain an edge on the Adventurers and friends. The heroes are gradually overwhelmed and overpowered by Baker and this newly gotten power when Vorpal goes into a rage, and loses control. She sends out a powerful telekinetic, area of effect shockwave and forcibly causes a reaction in the Baker's replicator devices to 'desummon' them.
One tries to slip away, but is ultimately caught by Windchill. Sombra frees Vyle, and Wizard eliminates vast traces of this new drug, and prepares the rest for evidence. After all is said and done, the police arrive, and Detective Knight meets Vorpal. They have an uneasy conversation, but manage to come to peace with one another.
Vorpal leaves on good terms with Blue Squad, and insists that they call upon her should they ever need the help, but her origins and background remain an utter mystery to the team.
Baker's Dozen, Grey Raccoon [not seen] Vorpal's Dozen Blue Squad #17 "Raving Mad" Blue Squad is summoned by Detective Knight to talk about a brewing gang war. "One Man Biker Gang", Baker's Dozen, is making aggressive and successful power plays for territory, striking out in particular at the Cobra Lords Biker Gang among many others. Knight explains that Baker is also searching for new drugs to manufacture in order to financially outperform his competitors. Intel suggests that a Purple Gang, or associate thereof, has access to a new designer drug that has caught Baker's interest. Knight explains that a rave being put on by the Scrappers gang of cyberpunks will likely have Purple Gangsters in attendance, and that Baker is also suspected to attend in order to make a deal for this mysterious new drug, or most likely, violently claim it.
To complicate matters further, the MCPD has been on the tail of a mysterious new vigilante. They have taken to calling her 'Vorpal,' more living weapon than person. Vorpal has been feverishly harassing and delaying Baker's Dozen's progress, and their confrontations have led to excessive collateral damage, civilian injuries, and even the deaths of some Baker variants. Knight implores the team to look into the matter and see if Vorpal can be reined in, or if she needs to be apprehended.
Blue Squad decides to attend the rave to try and stop this new drug from circulating, to capture Baker's Dozen, and to make contact with Vorpal. At the rave, Blue Fox and Martyr go undercover as ravers. Sombra and Windchill post up outside to try and spot Vorpal or to contain the potentially volatile situation.
Vorpal arrives, and is quickly met by Windchill. He greets her diplomatically, and tries to get her to settle and join Blue Squad's efforts, at least temporarily, but she stubbornly presses on inside. Meanwhile, the club inside is riddled with Purple Gangsters, Scrappers, and eventually Baker's Dozen. An undercover Martyr makes contact with a supposedly demonic Purple Gang member during the investigation named 'Vyle Lyle,' an old foe of the Adventurers
During a quiet moment, an inebriated Vyle announces that BZB, the sought-after new street drug, is manufactured using his blood, to the great disgust of all ravers, everwhere. Baker moves in to try an apprehend Vyle, and the confrontation is taken to a backroom where a number of Scrappers take offense at Baker's meddling. Despite Blue Squad's best efforts, a fight breaks out, just as Vorpal storms inside, followed by Windchill.
Martyr finds himself in a three way fight between the Scrappers, Bakers, and the super strong and durable Vyle. Martyr is overloaded with painergy at the brutal onslaught. Blue Fox stays on the dance floor, battling Bakers with members of the Scrappers gang as reluctant allies. While monitoring Vorpal, Windchill is gravely injured by a shotgun blast from one of the many Bakers.
In the end, Baker manages to escape with Vyle as a hostage, having overwhelmed and overpowered both Blue Squad, and the Purple Gang and Scrappers. Blue Squad makes meets with Vorpal, and they trade contact information. Later in the week, Blue Squad approaches Vorpal and agrees to work with her to take Baker down if she'll adjust her methods to being non-lethal and cooperates with the Adventurers. She agrees, and explains that she is a new vigilante and is still 'learning the ropes,' but has a great desire to take the violent criminal Baker's Dozen down for noble reasons. Or so she claims.
Later, solo superhero and known gangland contender and contact of Blue Fox, Wizard, reaches out and offers to join in on the effort to bring Baker Down. Blue Squad proceeds to search the city with Vorpal and Wizard's help.
Baker's Dozen, Scrappers, Vyle Lyle Doom and Gloom Blue Squad #16 "Cast a Shadow" Blue Squad, along with help from Webcrawler, Mantle, and Spectrum work together to prepare the warehouse for the trap. Isabela, now donning the Sombra costume, boldly teleports and turns invisible to lure Gloom towards the prepared trap. At first, nothing happens, until while invisible Sombra spots Gloom leaning in for a lethal strike at Webcrawler. Then, the fight begins. Gloom, with the shadow gem, is empowered with tremendous strength, reflexes, stamina, and even additional arms. It echoes its previous intentions of ruling the world after claiming Isabela's soul, promising the team quick, painless deaths if they surrender now. They decline the offer.
Initially, the team suffers brutal resistance, and every time they are about to overwhelm Gloom, the villain simply teleports away to gain space before rejoining the fight.
The team coordinates and spreads out around the warehouse as Sombra lures Gloom to them. With Windchill being the lookout and early warning, Mantle, Courser, Webcrawler, Blue Fox, Spectrum, and Scatha 5 all get in substantial hits, one after the other, weakening Gloom. Enraged, the shadow demon incapacitates the others, damaging the lights, before it rushes Isabela as Sombra.
Sombra rises to the challenge and strikes Gloom with the enchanted sword, ripping Maya free and recombining the 'twins.' Gloom, without a host, but stuck in their dimension, transforms into a giant, transparent floating skull with burning purple eyes.
It blasts the others back before swooping in to literally consume Sombra, but she she musters the last of her strength and utilizes her shadow projections to beat Gloom back and force it into the 'Ark' created by Stinger. Though ominously, even when contained and defeated, the container rattles nonstop.
Captain Finnegan is relieved to have the shadow gem back in his possession and a new prisoner in the form of Gloom. The team welcomes Sombra back.
Gloom Doom and Gloom Blue Squad #15 "Sword and Sorcery" Bela proposes a way to lure Gloom out into the daylight by removing the cracked shadow gem (see: Ruin Gate) from the Athena Compound. Blue Fox contacts Captain Finnegan and proposes to have the Shadow Gem moved, as if it were being transferred elsewhere, and Captain Finnegan reluctantly agrees. Additionally, there is a strong chance that Foresight, the wizard who originally split Sombra into two parts of her personality and person, will be lured by the opportunity to steal the vaunted shadow gem.
The plan goes off. Initially accosted by Foresight's illusions, Blue Squad manages to make contact with him. Windchill provides the villain with cash in exchange for his assistance in defeating Gloom and saving Maya.
Gloom arrives, and summons a massive shadow army. The team is beaten badly, and is unable to prevent Gloom from taking the Shadow Gem for itself, more than tripling its size and power, before it disappears to continue the hunt for the last puzzle piece, Maya. Captain Finnegan is unamused.
Foresight provides the team with an enchanted sword to reverse the 'split' done to Sombra in order to yank her free from Gloom's grasp before leaving Blue Squad with his actual business card. Blue Fox contacts ADA Duane Steel and arranges to have an empty, seize warehouse freed, the same warehouse once used as a temporary home for Creature (see: Overseer).
Stinger helps the team fabricate lights to prevent shadows within the warehouse to deny Gloom use of its shadow army, and Blue Squad plans to lure the supervillain there by using Isabela to forcefully combine the twins and trap Gloom's raw, untethered essence in a highly advanced box also generated by Stinger.
Gloom, Foresight Doom and Gloom Blue Squad #14 "Shadow Over, In Mouth" A boom rings out in City Center as one of TNT's many hidden weapon caches detonates. (see: Afterburn) While responding to the fire, Sombra is attacked and waylaid by Gloom, her nemesis. The interdimensional shadow monster was lured to her by the utilization of the shadow gem (see: Ruin Gate) and regenerated from the peripheral power generated by it.
Despite initially defeating the villain and dispersing its essence in the mysterious shadow realm she utilizes when ever she uses her powers, Sombra is overwhelmed by its power due to her being split into two.
While Sombra's exhausted from resisting, it climbs into her mouth and takes possession of her body just in time for Blue Squad, including Osprey, Firewalker, and Webcrawler to witness the event.
They attempt to intervene, but possessed Sombra, or Gloom, thrashes the entire accompaniment without breaking a sweat and makes an escape to reportedly look for Isabela, or the 'other,' Maya's other half. The villain also proclaims to be a queen and desires to plunge the world into a lightless void to rule over it unimpeded by any bonds or shackles.
Distraught, the team agrees to spread out and search for Gloom while forbidding Isabela from using her powers, as they suspect it will lure the strange foe straight towards her.
Gloom Ruin Gate Blue Squad #13 "Banishment" After days of fruitless searching, the team is contacted by Chirper. Reporting another invasion of a potential hideout, Chirper leads the team to a strange mausoleum magically imposed over a section of the city's sewer system, exaplaining the the strange subterranean rumblings (see: Blue Squad #10). Blue Fox, Martyr, Sombra, Courser, and Windchill arrive on the scene, unexpectedly joined by Scatha 5! His mysterious project is revealed to have been a repurposed, previously hostile combat robot with heavy weapons, a welcome addition to the fight. Together, they find War Boar in the midst of summoning and maintaining his Ruin Gate underneath the city. Following Woodsman's advice, Blue Squad utilizes War Boar's artifacts laid out around them while Scatha 5 and Martyr take the brunt of the villain's attacks and attentions. Blue Fox takes up a potion, Sombra grabs the shadow gem, Courser takes up the stolen viking gauntlets, and Windchill places the crown atop his head.
Combining their efforts, they manage to defeat War Boar and shatter the spell binding the Ruin Gate to Earth, saving it from porcine invasion. As a result, the potion shatters, an entity exits Windchill's crown and disappears with it, the shadow gem cracks (though it retains its power), and the viking gauntlets fall silent while also similarly retaining their innate magical powers.
The day is saved.
War Boar Ruin Gate Blue Squad #12 "Pig Escapes Pen" In containment, War Boar generates an unidentified magical force moments before he hacks up a swallowed object: the Shadow Gem. War Boar uses the innate magic held within the device to escape his containment, after which he goes on a rampage and storms into Athena artifact containment. Utilizing his re-acquired staff, and the crown artifact the team previously managed to keep from acquiring during one of his first appearances. War Boar then freezes the entrance of the Athena Compound shut before summoning minions and monsters to aid his assault. War Boar wreaks as much damage as possible as members of both Blue Squad and Red Squad are called in to respond by Captain Finnegan. Aided by PRIMUS, MARS, and the MCPD, the heroes storm inside only to find a veritable army awaiting them. War Boar surprises the team by giving them a threat in his newly mastered English. He escapes, and seems to have all he needs for his master plan. In the chaos, Absolver manages to cling to Firewalker, and a mysterious gem being called 'Guardian' is also set free, but he's negotiated with by Blue Fox.
Later that week, Detective Knight arranges a meeting between the Adventurers and Woodsman on the Westside precinct roof. 'Woodsman' itself is a title from his home world, similar to being a superhero. He has stepped forward to become the de facto leader of his people, now rendered refugees by War Boar's invasion of their world.
Woodsman explains that War Boar invaded it with his pig army as he is now doing to earth. Similarly, War Boar gathered artifacts on Woodsman's world, and eventually generated enough power to bring the entirety of his forces through, conducting genocide against Woodsman's people. The team, invigorated with new motivation, agree to track down War Boar and plan to trap the villain on Woodsman's ruined world to spare Earth from suffering the same fate. Woodsman advises Blue Squad that to deactivate War Boar's 'Ruin Gate' portal, they will need to utilize the artifacts the super villain has stolen. As for the finale...
War Boar; Absolver; Guardian Blue Squad vs Red Squad Dodgeball #1 "The Shootout" With War Boar and TNT imprisoned, Sombra acts on an idea she's had to run a grand, competitive dodgeball event for charity. She gets in touch with the Northside Children's hospital and organizes a dodgeball cage match at a local arena with Blue Squad facing off against Red Squad. Fans buy blue or red tickets to enter the raffle and place a bet on the victors with copious amounts of refreshments provided for by sponsors, with all proceeds going to the hospital's foundation. Scatha 5 manages to participate due to the low impact nature of the sport.
Red Squad defeats Blue Squad during the first round, but Blue Squad rallies and gets a victory in round two. Round three is an intense display of superheroic powers, but it comes down to Stinger and Sombra facing off, both of whom simultaneously eliminate the other.
In a surprise twist, two members of each raffle were selected, one of whom was a young superfan of the Adventurers named TJ Haws. Later, Blue Fox, Webcrawler, Sombra, Courser, and Spectrum meet with TJ Haws near city hall to spend a day with him. Upon learning about his somewhat troubled homelife, the Adventurers provide TJ with good examples to look up to, and demonstrate their powers with him. Inspired by the meeting, TJ returns home with Sombra. She personally meets his mother and younger daughter, having dinner with the family, spreading hope and morale.
[None] Ruin Gate Blue Squad #11 "Detainment and Visitation" War Boar suddenly resurfaces and launches a bloody attack on the MCU's campus, aided by an army of smaller humanoid pig men, killing twenty four people and injuring dozens. He specifically targets an artifact on the grounds in the custody of a seemingly harmless off-campus cult called "The Calamity Wake" and massacres them, though the cultists were not aware of how powerful the object in their possession was. Martyr, Blue Fox, Courser, Sombra, and Windchill intervene, and after another desperate battle manage to subdue the War Boar, though the artifacts the villain stole thus far remain unaccounted for. Scatha 5 has second thoughts about letting his squadmates rush into danger while he stays behind, despite his damaged state, and Martyr suspects that War Boar went down too easily with some hidden purpose.
War Boar is taken to the "Athena Compound," a PRIMUS facility for the containment of mysterious objects and personages, such as the symbiote 'Absolver' (see: Overseer), run by one Captain Finnegan. Members of the entire team visit War Boar and perform an interrogation, but get little more than spiteful taunts and threats from the supervillain before War Boar seemingly attempts to escape, testing the strengths of his bindings within his cell before the team leaves. The team theorizes that War Boar may or may not be from the same dimension as the mysterious 'medieval refugees' led by Woodsman.
Meanwhile, Scatha 5 notices that his auto repair function is more sluggish than usual, and asks Blue Fox to deliver him copious amounts of scrap and metal to hasten the 'healing' progress and to continue a hidden project the robot companion has taken on.
War Boar; Absolver Ruin Gate Blue Squad #10 "War Boar Returns" The indomitable and unexplained otherworldy invader War Boar returns to Millennium City and attacks the Clauswitz Museum of Artifacts, his target this time being a pair of gauntlets owned by 'Ragnar Lodbrok,' an ancient king of viking legend. The gauntlets are confirmed to have electrical capabilities in the hands of those who know how to use them. Additionally, War Boar carries a mysterious black 'shadow gem.' Blue Squad members Blue Fox, Courser, Sombra, Martyr, and new team member Spectrum rush to the museum and do battle with the porcine pillager. War Boar notably uses the shadow gem to wrestle against Sombra's shadow projections, and gives a substantial beating to Blue Squad members before he makes his escape via portal. Scatha 5, still tremendously damaged from the final fight with TNT, stays at the base to keep records and perform investigation and theorization on War Boar's next move.
Later that week, Detective Knight Blue Squad and informs them that sightings of the supervillain 'Creature' have been called in from an apartment in Westside above one of Creature's old, abandoned lairs. Blue Squad is joined by Webcrawler and Firewalker as they investigate.
As it happens, the sighting is incorrect, and the Adventurers stumble upon a known contact named Chirper, a sentient creature of unknown origin that has a friendly if overly-curious demeanor. Chirper informs the team, and Detective Knight, that his home was flooded, and notably reports strange subterranean tremors in his wandering throughout the city, subtle enough to avoid detection on the surface. Afterward, Chirper agrees to follow Detective Knight to the precinct to organize formal citizenship and registration in a dumpster converted into a vehicle.
War Boar; Chirper Imaginata Vindicta Adventurers #400 "West Texas Showdown" With the Adventurers Squads attending to other important matters, a strike team of Blue Fox, Sombra, Firewalker, Courser, Scatha 5, and Osprey sets out to rural West Texas to confront Facet and rescue Webcrawler. At the server farm, they battle Facet who, becoming desperate, turns big using the MRM suit, and also shapes his limbs into spikes or flails at times.
Blue Fox infiltrates the building and tries to persuade Daemon that it is being used, and could be repurposed to a good purpose. He is unsuccessful at persuading Daemon, and it corrupts the entire server farm, overcoming the restrictions Facet had placed on it. While Daemon then takes over the MRM suit and presents its "real world" appearance with Facet trapped inside, Blue Fox enters cyberspace and sets Webcrawler free - much easier with Daemon having vacated its cyber domain to inhabit the MRM suit. Then, rather than exit with Webcrawler, Blue Fox tries to follow a cyber trail into the MRM suit as Daemon did, and confront it there. As the team faces off against a five storey tall version of Daemon, Sombra agonizes over whether it is time to apply Kyra's insta-kill solution on the MRM suit.
In the real world, Webcrawler joins the fight as Firewalker roasts Daemon, and Osprey and Courser cooperate to pull him to the ground. Inside the MRM suit's cyberspace, Daemon - facing defeat - indicates it will not surrender, but attempt to take its enemies with it. It sets the MRM suit to overload. Firewalker senses the building heat. Scatha 5 moves in close to bulwark against further limb attacks from Daemon, while Courser tries to use her new electrical powers to try to regulate the electrical flow. Scatha 5 pierces the MRM suit's energy cell. Inside cyberspace, Blue Fox realizes he has no way out, but then Webcrawler pops in using her Web-blink device, and retrieves him before the system wipes, and Daemon is no more. Sombra is relieved she didn't have to use the solution, but it is unclear if the MRM suit can be repaired after the battle damage it sustained.
With Webcrawler rescued, Daemon destroyed, and a living but wounded Templeton inside the disabled MRM suit, the team has a victory.
Facet; Daemon Imaginata Vindicta Adventurers #399 "Villain Night" Blue Fox, Osprey, and Martyr investigate just who built Webcrawler's gear, in hopes he might have some insight into what happened to her. They track down retired aerospace engineer Ray DeCosta, who welcomes them into his garage workshop in the suburbs when they arrive. He confirms that he had been trying to help Webcrawler pin down the troubles with the Web-blink device, which he built for her. He was able to provide insight into the device's workings - and where to look for her: Web-blink encryption wasn't meant to have her linger in one place, and it would take a server farm or supercomputer setup to contain her in that state. They should seek a place drawing a great deal of electricity. Unable to narrow it down in a world with an increasing number of server farms, Ray suggests they use human intelligence to find the answer - to which Osprey already has a plan. Osprey attends a secret pub 'villain night', and tracks Ms. Direction from it. Confronting her, Osprey offers info on a score against a rich, evil company, in exchange for information on Templeton's whereabouts. Templeton is running a server farm in West Texas.
Courser finds she has at least some of Webcrawler's powers in the real world now, but also an additional power for electrical control that neither she nor Webcrwaler have previously had!
In preparation for a confrontation, Kyra Sparks (Replica) reveals she was hiding that USB drive that used to be housed in the MRM suit, which is probably what Facet (Templeton) was looking for when he tossed her place. Using that, she finds instructions for a chemical compound that, splashed on the MRM suit, will permanently destroy the nanomachines that allow it to change shape and self-repair. The team nevertheless hopes to somehow retrieve the MRM suit intact so that Kyra can continue being Replica.
Facet [not seen]; Daemon [not seen]; Ms. Direction Imaginata Vindicta Adventurers #398 "Courser Correction" Daemon extracts code from an apparently static and un-reacting Webcrawler, and experiments by seeing if it can be added to Courser. Courser gains at least some of Webcrawler's powers, and is made to demonstrate them in simulations designed by Daemon. With Courser's success, Daemon reveals this is part of a plan it has developed on its own to see if modification in cyberspace can effect the real world, in hopes that it may expand its dominion. It strips the Webcrawler code from Courser after she completes the tests. In the real world, the team follows other leads. Osprey's ruse of a major museum donation incoming draws the attention of a variety of suspicious characters, meaning to hopefully attract Ms. Direction: the super crook who apparently deployed the logic bomb that corrupted Webcrawler's gear and allowed her to be abducted. But it's the Webcrawler enemy Envy attempting to steal something from an unfinished exhibit who provides a clue to Ms. Direction's whereabouts: she likes to attend a secret get-together with other local supercrooks. Osprey checks other sources to find the location of the next get-together.
Courser manages to argue logic with Daemon enough to have the AI contemplate its place in the world, and how it was ultimately just Facet's servant, hoping to turn the AI against him. Daemon is caught in a logic loop that it pauses to try to resolve. She uses the distraction to free herself of the cyberspace restrictions upon her, and communicate with Webcrawler. Webcrawler - who can be spoken to while there is direct contact with another entity in cyberspace - tells Courser to copy the code representing Web's powers into herself, and use it flee. Daemon eventually concludes due to Courser's reasoning that as both cyberspace and real world are a threat to it, it must have dominion over both - not the outcome she intended!
Courser emerges from cyberspace into Facet's basement lab just as the Adventurers are following up on Kyra's call for help. Daemon starts to wipe the computers and fries the portal machine. Blue Fox is able to secure a hard drive before it is totally erased.
Facet [not seen]; Daemon Imaginata Vindicta Adventurers #397 "Daemon's Domain" Once is has become clear that Webcrawler and Replica are missing, Adventurers Blue - distracted by matters of mass destruction - mostly continues on TNT's trail while individual Adventurers pursue leads. Sarah Ellison and Courser check the Olsen home for evidence, and later consult with the Adventurers Computer, personified by Mr. Adventure's hologram, to learn more about how the Websights systems may have been compromised. Sombra - who also was helping at the Olsen home while Cassandra was missing - also visited Kyra's home, and found the place had been tossed, the computer had a hard drive removed, and someone had been searching the computer for things like 'SBE,' 'Facet,' and 'Templeton.' Sarah Ellison and Courser learn that Webcrawler's newer devices - the Websights eyewear and her Web-blink short range teleporter - have been corrupted by malicious code. Checking the logs, they realize that it was in a confrontation with Ms. Direction, when a logic bomb was deployed against Webcrawler to aid the super thief's escape, that Webcrawler started having problems with her devices that culminated in her apparent abduction.
Using an address on Reggie Templeton, known to be the mad scientist and criminal who had designed Replica's MRM suit while working for Source Biotech Enterprises, Courser goes to a dank basement in Jersey City where she finds Kyra, tied to a chair and wasting away. Kyra is told to run for her life and get help, while Courser uses a portal machine built by Templeton to enter cyberspace in hopes of rescuing Webcrawler from Templeton's insidious AI named Daemon. Daemon is far too powerful in his own domain, however, and traps Courser there along with Webcrawler.
Facet [not seen]; Daemon Afterburn Blue Squad #9'" "Why they call me Mr. Fahrenheit" Blue Squad spends days scouring Black Badger's tunnel system looking for TNT to no avail, only to have TNT send a video in to the news, showcasing his improvised nuclear bomb, threatening to detonate it within the hour to spread chaos and fear. Blue Squad finally narrows his down his location and rush in to intervene. TNT is held up in a cavern dug so deep that there's active magma flowing through it, and here they find TNT's chief hideout. TNT has spliced technology provided by Reisen (see: Red Squad) onto his body to further stall Blue Squad's attempt to foil him. After fighting through his last henchmen, Blue Squad enters the cave and engages TNT in an intense battle. Scatha 5 sacrifices his body to take out TNT's plasmagun. Martyr put himself at great risk to take on as much painergy as possible to counter TNT, making the villain laugh, stunning him with the overwhelming sensation and distracting him. The rest of Blue Squad keeps the villain busy as Courser hacks into the computerized bomb and stops it four seconds before detonation.
TNT gloats, even while seemingly defeated, and produces a last minute hair trigger switch to detonate the bomb before Sombra hastily stops him with a shadow projection. With the threat over, Blue Squad takes TNT to the surface, where Martyr hands him over to Detective Knight and the MCPD. A deal is struck between Landon and Detective Knight, representing the MCPD, to have TNT serve out his time at the Joseph and Florence Rehabilitation Center, a decision the public finds controversial. There are protests outside of the premises.
Later on, Detective Knight summons all of the Adventurers, both Red Squad and Blue Squad to the Westside precinct rooftop. She informs them of a group of refugees dressed like medieval people, led by the mysterious Woodsman. Though seemingly friendly, she asks Blue Squad to keep an eye on these strangers.
TNT, Dr. Friedrich von Reisen [not seen] Imaginata Vindicta/Afterburn Adventurers #396/ Blue Squad #8 "Dick Dwight Face-Off" Adventurers cross-over! In a bid to draw out the Black Badger, who may have a lead to the villainous TNT who has been troubling the Adventurers Blue Squad of late, the team comes up with a plan to use one of their harshest critics - blowhard TV editorialist Dick Dwight - in a ruse. Blue Fox promises to attend the program and debate Dwight live, and even unmask before the cameras, to which Dick Dwight agrees. However, after a spirited debate, the face under the mask turns out to be... Dick Dwight's! It was Replica all along. But Black Badger, who hates Blue Fox, turns up at the well-publicized debate location to exact his revenge. A battle begins that involves all of the bad guys! While the team battles Black Badger, Webcrawler - who uses her web-blink power to try to quickly extract Replica - vanishes with Replica in tow.
Courser plays an instrumental role, hacking into a periodically deactivating Black Badger's suit. After defeating Black Badger, AKA Raphael Moltisanti, he is sent to prison and refuses to talk.
Landon Bellerose, AKA Windchill, meets with "Big Ralph" in prison and proposes that if Ralph offers up any information he has about TNT's whereabouts, he would be transferred to the Joseph and Florence Rehabilitation Center. At last, Raphael agrees and tells Landon and the MCPD to access his suit's hidden tunnel records to have a subterranean map of where TNT and his minions might be hiding.
Black Badger; Dick Dwight; Facet [not seen]; Daemon [not seen]; TNT [not seen] Afterburn Blue Squad #7 "Bank Busting" TNT and his minions break into a bank. They take hostages and open the vaults merely to torch the money in an act to generate terror and spread fear, and for the sake of the fun in it. Blue Squad arrives on the scene, composed of Sombra, Courser, Scatha 5, Windchill, and Blue Fox. They are also joined by long-time team member, Tungsten, and newcomer, Martyr. Martyr rises to the occasion given the extreme circumstances.
The team coordinates and surrounds the bank under Windchill’s storm cover, getting into position to draw the fire of TNT’s as Sombra sneaks inside to begin rescuing hostages. The team whittles away at TNT’s substantial forces, and manages to make it inside of the bank after Sombra finishes freeing the hostages.
TNT reveals that he is covered in actual T-n-T, the explosive, and taunts the team before he severs his hand with a gunshot and lets it drop into a water main pipe to facilitate his escape and regeneration elsewhere.
He detonates the bombs strapped to himself, and buries Tungstan, Scatha 5, Martyr, and Blue Fox alive, while also punishing them with extreme and grievous injuries with a combination of the explosive and the plasma weapons utilized thanks to von Reisen [see Red Squad], in addition to killing a number of his own men. The burid Blue Squad members are swiftly rescued by members of Red Squad, and other non-squad team members.
Blue Fox proposes luring Black Badger out of hiding, as the villain’s tunnel archives may reveal where TNT’s HQ could be within the city, as TNT is working from his inside knowledge relating to the Overseer era.
The plan is to have team friend Replica disguise herself as Blue Fox, and go on to Dick Twight Tonight under the premise of a live, on-air debate concluded with an unmasking on live television, to draw the elusive Black Badger out of hiding.
TNT, Overseer [Not Seen], Black Badger [Not Seen] Afterburn Blue Squad #6 "School’s In Session" TNT's forces resurface after a small bout of alarming silence, especially given Blue Squad’s success in foiling him lately. TNT’s minions launch a violent and destructive assault on MCU’s campus, targeting the gymnasium complex where a number of the collegiate athletes are training in the early evening. The building is nearly leveled and the surrounding property is all but demolished. Blue Squad responds, with Blue Fox, Sombra, Courser, Scatha 5, and Windchill rushing in to aid the students. Inexplicably, TNT’s minions start taking hostages from nearly every sport, regardless of speciality. At the end of the battle, despite Blue Squad’s best efforts, TNT’s minions get away with twenty-three minions in total. Additionally, the minion’s arsenal remains composed of custom-made TNT explosives and stolen weapons, but they also feature advanced and sleek plasma weaponry in the form of rifles and grenades. Members of Adventurers Red Squad confirm that TNT might have struck a deal with their current foe, Dr. Freidrich von Reisen in order to get his hands on the powerful weaponry.
TNT [not seen] Afterburn Blue Squad #5 "Ghosts of the Past" Detective Knight allows for Blue Squad to visit Dr. Howard Romrell after he has been taken to an MCPD safehouse in downtown Millennium City. There, they confirm with Romrell that TNT had been hunting him, but that his purpose goes deeper than mere utility to have his nuclear bomb made. Dr. Romrell had been a senior administrator in Compass Labs, one of the many businesses secretly owned by the Overseer, AKA Congressman Clayton Ewing, before his dramatic downfall at the hands of the Adventurers.
Dr. Romrell explains to Blue Squad that TNT was once a man named Thomas Nathaniel Tullett. He had been a member of the British SAS, serving as a part of a joint-mission with UNTIL that was tasked with disarming alien explosives. While disarming a Gadroon device, Tullett unknowingly triggered a leak of radiation, before the bomb itself detonated once the invisible radiation had completely enveloped Tullett and filled his lungs.
A mutation took place, where Tullett was frozen in a perpetual state of agony. Third degree burns covered every inch of his body, yet they remained fresh and unhealing, and any other damage done to him would see his body rapidly return to the same charred, burnt state, something Courser was able to identify by personally analyzing his blood.
Overseer went out of his way to secretly arrange to buy the ‘rights’ to Tullett’s life for the sole purpose of experimentation. Tullett was transferred to a secretive Compass Labs site in the U.K. where he was used for target practice and other weapons testing. Officially, Tullett was designated as KIA, but unofficially he was tortured nearly non-stop for twenty years. Once Overseer was taken down, the scientists running the lab Tullett was housed in fled in fear of repercussion, and Tullett was able to escape and make his way to America, fixated only on feeling and spreading pain. Romrell quietly taunted the team, stating that this was all their fault, as if the Overseer were never taken down, TNT wouldn’t have been freed to terrorize the city.
Soon after the explanation, TNT attacks the building. Courser, Blue Fox, Sombra, Windchill, and Scatha 5 are able to fight off TNT’s gunmen, who were disguised as window cleaners. Sombra gets Romrell to the safety of U.S. Marshals, and when bombs that TNT had placed on the building’s foundation detonate, Windchill overexerts himself, freezing the building solid in a giant block of ice before it can fall apart. TNT escapes by simply dropping out of a window in the middle of the fight.
A followup visit with Detective Knight confirms Romrell’s story about TNT, and Blue Squad wonders if Tullett, who was by all accounts, a well regarded and valorous soldier, can be saved from his own madness.
TNT, Overseer [Not Seen] Afterburn Blue Squad #4 "Material Girl" Adventurer Courser is on site at the lab when Grey Raccoon makes her move. She strategically sneaks into the facility and makes a play for the uranium stored there while Courser summons Blue Fox, Sombra, Scatha 5, and Windchill to the scene. Despite fostering a reputation as a non-powered thief, it is revealed during the confrontation that Grey Raccoon has control over her own molecular density, and can phase through solid objects at will.
The combined effort of Blue Squad subdues the thief, and together they convince her to speak as to why she would aid someone like TNT in the first place. Windchill and Sombra successfully appeal to her humanity, and Grey Raccoon reluctantly agrees that she had struck a deal with TNT to help him get his bomb, with the idea that while the MCPD and the Adventurers were distracted hunting him, she would be free to rob the city blind in the mean time to take care of her mysterious ‘debts.’
After handing over the Uranium, Grey Raccoon disappears, but she left a secretive message to the Adventurers indicating that former Compass Labs scientist, Dr. Howard Romrell, was specifically sought after by the supervillain to help build the makeshift nuclear bomb.
The team notifies Detective Knight, and she begins to search for Dr. Romrell in order to place him in protective custody so Blue Squad can figure out why hein particular has been singled out by the supervillain.
Grey Raccoon, TNT [Not seen] Afterburn Blue Squad #3 "The Firetruck" TNT, after going quiet, suddenly reappears. He and his newfound minions are driving the stolen fire truck, and an additional stolen garbage truck, both with ramshackle welded on armor and ramming equipment. The firetruck has been converted into a giant flamethrower. Both vehicles are on a rampage, smashing through traffic in a seemingly pointless display of carnage and destruction. Blue Squad responds. A police car is pierced by the garbage truck’s prongs, but officers inside are saved by Scatha 5, with Blue Fox’s help.
Sombra attacks the firetruck, and ends up hanging onto its napalm-spewing hose. Courser moves in to assist, as Windchill uses his powers over ice and wind to make the vehicle drivers struggle for control. At one point, he even raises ice walls to keep the vehicles from veering off of the road.
TNT himself is driving the firetruck, firing rockets at Windchill. Windchill’s enhanced durability preserve his life. Sombra daringly teleports inside of the fire truck, but she is held down by TNT and his minions. TNT holds a grenade to her head.
Windchill eventually ices over the street, and both vehicles lose traction and tumblee over. Taking a mostly unconscious Sombra captive, TNT holds a grenade to her head as Blue Squad witnesses his true form. Covered in head to toe in fresh, third degree burns, TNT laughs and simultaneously laments that the worst things in life aren’t pain, or fear, but “endless boredom,” before he rips off his own face, only for the burned flesh to heal back in an instant.
Before Blue Squad can capture him, he shoves Sombra free and dives underneath the firetruck and detonates the grenade, blowing himself up for a second time. Nonetheless, Blue Squad manages to capture a number of his minions and take out his repurposed demolition vehicles.
Blue Squad meets with Detective Knight once again, where it is revealed that known international thief, Grey Raccoon, stole plutonium from a Compass Labs facility. The heist happened at the same time as TNT’s firetruck rampage. Knight proposes that Grey Raccoon and TNT may be in coordination, and the team agrees.
Pointing out another Compass Labs satellite location in Millennium City, one that may contain uranium, Blue Squad agrees to place a guard on the location to see if they can prevent the theft of the material and thwart TNT’s attempt to make a dirty bomb.
TNT Afterburn Blue Squad #2 "The Breakout" While Blue Squad member Windchill is guarding the prison, the mysterious TNT launches his attack. He breaks onto the prison grounds, dual wielding rocket launchers, driving a dump truck filled with weapons and explosives. He blasts a hole into the wall and deposits the weapons into a massive heap in the prison yard as escaping inmates run out in a stampede. Additionally, TNT detonates explosives on all the major roadways leading to and from the prison, delaying first responders and harming civilians. Sending a quick alarm, Windchill summons Scatha 5, Blue Fox, Sombra, Courser, and Pathfinder to the prison. The Adventurers strenuously balance saving civilians with preventing as many of the violent, manic inmates escaping as they can. Pathfinder notably uses her powers to create a large trench that caught escaping inmates.
After the battle subsides, Windchill freeze TNT to a wall, demonstrating the latter's heightened durability, and Blue Squad speaks with him. TNT gloats, saying that “It’s time this town had chaotic evil.” He thanks the Adventurers for taking down Overseer, so “we can play without rules.” Before Blue Squad can inquire further, TNT uses his own explosives to blow himself up. The team spends the rest of the night scouring the nearby neighborhoods to locate and return what violent fugitives they can find.
TNT Afterburn Blue Squad #1 "The Spark Ignites" Members of the newly formed Blue Squad, consisting of Blue Fox, Sombra, Courser, Pathfinder, Windchill, Scatha 5, and Reclaimer gather at Blue Bird’s (Congresswoman Olivia Ellison’s) hidden training center to give demonstrations of their powers. Reclaimer develops extensive charts and graphs to give visual representations of member strengths and weaknesses. Blue Fox reports that his source in prison, his brother Kyle, revealed that a number of prisoners were simultaneously transferred to the infirmary wing after an inexplicable string of self-inflicted burns. Many of the perpetrators of the self harm were incarcerated for arson and other violent pyromaniacal behavior. Kyle’s own bunkmate did it, and ominously told Kyle that “It’s your way in.”
Blue Fox contacts Detective Laura Knight, of MCPD’s superhuman crime investigation unit, or SCIU. At a rooftop meeting on the Westside MCPD precinct, she ttells Blue Squad about a violent fire truck heist. The perpetrator was shot multiple times but wouldn’t go down. He left a message written in blood on the firehouse ground, asking “Are you in?”
Sometime afterward, the Mysterious Hooded Figure robbed an MCPD evidence warehouse, containing weapons of Baker’s Dozen from the Overseer takedown. He left a similar bloody message at the ground of the warehouse that merely said “In,” with a check mark. Upon a follow up visit, Sombra learned that the mysterious, would-be leader of the imprisoned pyromaniacs is someone named 'TNT.'
The Adventurers and Knight conclude that the prison events and this violent newcomer to the city are linked, and agree to take round the clock guard overlooking the prison just in case.
TNT [not seen] With A Silver Spoon Adventurers #383 "Rise of the Silver Sentries" With the city still feeling the effects of the Overseer's downfall, Silverline Industries holds a press showcase where company president Selene Silver (wife of company founder Raymond Silver) proudly presents their newest robotic innovation: gleaming silver battle droids called the Silver Sentries, powerful and non-lethal defenders of the peace with a noble "winged knight" aesthetic. While the company is making these defense bots available to companies for a steep price, they're also graciously donating and stationing a dozen of them across the city, ready to respond to emergencies and threats. The showcase also features a spectacle for the audience; a gladiatorial fight between a Silver Sentry and one of the Silverline "Rollbot" security units, which the Sentry handily wins. A week later, one of the Silver Sentries makes its debut as onlookers film the scene of it arriving at and attacking a Scrappers hideout. When Catfight, Sombra, Blue Fox, and Stretcher arrive to assist - and keep a wary eye on the Sentry - they team up and easily defeat the cybernetic gang who protest being targeted by the automaton! The Scrappers at the scene are collected by the police, but the Adventurers don't leave empty-handed: during the fight, among many other stolen and salvaged bits of tech, the wrecked Rollbot from the showcase is discovered, and the heroes sneak it away in the hopes it has some kind of helpful data on Silverline's plans....
The Scrappers Avenging Avery Adventurers Midnight #8 (vol. 2) "Adieu to Darién" Montes is persuaded after a couple of pistolwhips, and under wooden Mantle's restraint, to cooperate. He says Bastos has anchored his yacht off of Aguanosa. Avery gets a knockout blow, then the team climbs a ladder from Montes's room to the fortress roof as they prepare for a very dangerous escape from Montes's headquarters, surrounded as it is by his troops. Upon the roof, they unexpectedly find an aged helicopter. But as Catfight removes the camo netting, and Blue Fox finds the kerosene fuel, Avery surmizes that it may still be flight-worthy. They load the unconscious Montes in, board themselves, and prepare for an expedient escape. Ramon is only able to siphon enough fuel from the cannisters to get them a short distance; Stretcher uses herself as a shield to protect the group from gunfire as the helicopter picks up speed and heads west to rendezvous with Sombra.
Sombra receives the radio transmission and speeds down the river in her stolen boat in a hurry. The team lands the helicopter in a farm field adjacent to the river, and gets in with Sombra.
Hours later, Agent Avery - with fresh gear - asks the team to join her in apprehending Samuel Paz Bastos. Once secured. Bastos admits he helped Lord Aurum escape Darién and dropped him off near Galveston, TX. Avery promises that Montes and Bastos will be prosecuted for their crimes against humanity. With the clan's regional leader gone, as well as their chief weapon supplier, It's the best chance at establishing a freer society that the region has had in a long time.
Colonel Montes; Clan del Darien Avenging Avery Adventurers Midnight #7 (vol. 2) "The Pathway to Danger" At Ramon's urging, the team abandons Ramon's boat, and Blue Fox uses his powers to break a hole in the hull so it sinks in the Rio Serpiente. They are told of the plight of slave-like farmers on the cartel's farms nearby. The party proceeds on foot with Dr. Anderson guiding them. They ambush a ranger patrol at unawares, and Mantle, Blue Fox, and Ramon pretend to escort Catfight and Rubber Bullette as captured tourists to the fortress, while Sombra and Dr. Anderson leave to try to steal a ranger boat for the escape.
Sombra uses her powers of invisibility and teleportation to aid the return to the river, but Dr. Anderson has so many questions about how it works biologically. Sombra turns down an offer by him to study her and her powers. When they arrive at the ranger station, Sombra finds the perfect ranger boat for the size of the team, stows Dr. Anderson in a claustrophobic compartment in it, and sets about using sugar stolen from the ranger station to sabotage the outboard motors of the rest of the ranger boats.
Meanwhile, in the fortress, the disguised rangers are admitted through the gates and told to drop their prisoners off in the cell. There, Catfight and Stretcher meet Agent Avery. Though weakened by her captivity, Avery imparts that she wants to complete her mission - she has ascertained that Samual Paz Bastos, the weapons dealer she was trying to apprehend when she was captured, is coming back to Darien with another shipment of munitions. She implores the team to help her confront, question, and capture Colonel Montes, who would know where Bastos is parking his yacht.
Sombra completes her task of sabotaging the boats, and lays low with Dr. Anderson, waiting for the signal on her radio.
The team storms the upper level of the fortress and questions Colonel Montes in his private room. Blue Fox beelines to the Colonel's laptop, while Avery gets help from Catfight and Mantle in a rough interrogation...
Colonel Montes; Clan del Darien Avenging Avery Adventurers Midnight #6 (vol. 2) "Treehouse" The team persuades Ramon to give them one more ride in his boat, but his conditions this time are that they have to help him evacuate to the United States - it's become too dangerous in Colombia for him. They agree, and Ramon commits himself as a party member. Blue Fox gets more than he bargained for when he asks Ramon to tell them a ghost story. Several of them cannot sleep easily afterward as they lay on the deck of Ramon's boat, anchored near where Julio said they could find Dr. Derek Anderson, hearing all of the sounds of the jungle.
The next day, they enter the jungle and at Catfight's direction, wisely watch for booby traps. Sure enough, Dr. Anderson has set some near his treehouse to alert him if any Clan approach his hidden home.
The team quickly establishes to Anderson that they are no threat. He is more than willing to help inform them about Montes fortress, recounting how he accidentally found it. He provides the team precise coordinates on a topographical map he created. But he pleads with them to take him along - like Ramon, he is ready to flee the area. He wishes to return to Canada and publish his work studying the ecology of the Darien region. The team accepts Dr. Anderson as their guide and scout.
Clan del Darien Avenging Avery Adventurers Midnight #5 (vol. 2) "Ambush" En route to San Quintin, Ramon is giving a lesson to Maya on how to navigate the Rio Aguja's hazards when Ramon's boat is suddenly pursued by speedboats with Clan del Darien rangers. They are ordered to cut the motor and prepare to be boarded. Sombra persaudes Ramon to stay at the wheel, while the Adventurers fight back. Stretcher and Blue Fox each leap into one of the two pursuing boats and disrupts the rangers up close, while Sombra teleports to the boat with Stretcher and, invisible, turns the key on their motor. Catfight takes a machine gun given to her by Ramon and damages the engine on the other boat. Stretcher grabs a gun and disables the other boat's engine. Ramon's boat is able to leave the rangers behind. Back in San Quintin, matters have apparently become more tense. The Clan knows there are foreign agents about, and has increased its presence in the village. The team stays on the docks. The UNTIL contact, Sergio, says he's about to flee to Panama for fear of being found and killed by the Clan. But he directs Catfight to seek out Dr. Anderson, the Canadian biologist - he may be the only non-Clan person who knows how to find Montes fortress.
The team has to help fix a broken gas pump at the riverside gas station before the owner and Dr. Anderson's sometimes-employer, Julio, will give them a lead on the doctor's whereabouts. Derek Anderson has been hiding in a treehouse in a remote jungle area. Julio provides coordinates.
Clan del Darien; Clan ranger patrol Avenging Avery Adventurers Midnight #4 (vol. 2) "Deep in Clan Territory" The team lands clandestinely at Arreti in the early hours and sneak around. Blue Fox and Sombra sneak into a drug factory and search through binders and an offline laptop for clues, finding an alert sent to all points about Samuel Paz Bastos being necessary, but no longer trusted, and seeming to have some ties to the VIPER cadre who the Clan wiped out. Bastos, it seems, also took on a personal consignment of cocaine before departing the area. Unfortunately, they cannot find information about Montes stronghold.
Catfight and Mantle are nearly discovered while hiding near a residence at daybreak, but escape and get back to the boat in time.
The team goes further down the lake from Arreti and finds the remains of the VIPER cadre, their gear stripped, their bodies left to decompose. Some of them have been slain by bullets, others by a laser sword consistent with Lord Aurum's. Following a trail, Catfight and Sombra discover a hidden cavern where, deep underground, they find a mysterious rock formation suspended floor to ceiling like a column. At once, it calls back the mysterious dream they all shared some weeks ago, but for Marshall, it also reminds him of the Terraformer from 2019, calling to him and tempting him.
The team improvises an explosive and collapses the cavern out of abundant caution. After a night encamped by the lakeside, they depart again with Ramon, headed back to San Quintin.
Clan del Darien; the mysterious cave Avenging Avery Adventurers Midnight #3 (vol. 2) "Trouble in San Quintin" Catfight, Mantle, and Stretcher arrive, prepared for a trek into Colombia, arriving at the border village of San Quintin. There, they learn at the tavern that a biologist named Dr. Derek Anderson may have found Montes hidden fortress, but he has since fled into the jungle. Following up on a lead from the tavern's cook, Stretcher and Sombra find photo negatives in a room Anderson had been renting, and upon developing them, confirm Anderson's discovery - but no one they show the photos to can say for sure where the landmarks are. Catfight finds an UNTIL asset named Sergio who discloses in secrecy to her that a VIPER cadre had come through around the time Agent Avery was captured, but they were not allies of the Clan del Darien - the Clan reportedly killed them and left their bodies on the northeast shore of Lago Claridad. Rumor has it that Avery was seen in the company of a man dressed in golden armor from head to toe - Lord Aurum. Mantle gets into a boxing match with the local Clan point man, Eugenio Martinez, and defeats him; this earns them the services of Ramon Munoz, a mercenary and boatman from the region, who agrees to take them deeper into Colombia, and the Clan-run village of Arreti at Catfight's insistence.
Clan del Darien; Eugenio Avenging Avery Adventurers Midnight #2 (vol. 2) "Mission de la Mision" Tomas tells the pair about Agent Avery, an UNTIL agent who was captured by the Clan and is being held for ransom somewhere at the hidden jungle stronghold of "Colonel" Tobias Montes - a militant revolutionary who joined the clan when most other revolutionaries took a peace deal with the Colombian government, and disarmed. Tomas is unaware of the mission Avery was on, but Marshall and Maya feel compelled to help. Visiting the mission, they learn more of the danger of the Clan, and while there is much gratitude to them for securing the medical supply delivery, Father Valero urges the heroes to leave before the Clan retalliates against the mission. Marshall calls home to Millennium City and bids Midnight Squad to come. Clan del Darien Avenging Avery Adventurers Midnight #1 (vol.2) "A Vacation Like No Other" Marshall and Maya are on a cruise through the Panama Canal! But when they stop in the remote port of Las Mercedes near the border with Colombia, they are drawn in to help Father Pascal Valero and his helper Tomas get needed medical supplies to their mission deep in the jungle. As Tomas feared, the dreaded Clan del Darien - a drug cartel from Colombia - attacks the boat to try to steal the supplies. Marshall and Maya use their super powers to help Tomas's boat get past the ambush safely. Clan del Darien Adventurers Crimson #14 "Crimson Cat-astrophe" Power-Chord encountered a fiery feline foe in the City Center and put out a distress call as she was unable to combat them alone. Firewalker, Windchill, and Scatha 5 answered the call and helped Power-Chord face off against Anar-Kitty. She claimed to be genetically perfected by some mysterious figure, and showcased her raw power and skill. It took Firewalker absorbing her heat, Windchill cooling her down, and Power-Chord blaring sick guitar riffs into her eats to take her down. Anar-Kitty Adventurers Crimson #13 "Ignorance is Bliss" Months ago, BPE Executive Chairman Landon Bellerose requested to run a brain scan on local punk rocker Devona Bliss. She agreed to do so on the condition that he would buy her two couches, which he happily complied. Gathering at a NeuroTech facility, the brain scan commenced with their mutual friends Blake and AJ also in attendance. Results showed that Devona Bliss had a rare genetic disease known as Urbach-Wiethe disease, which impaired Devona’s long-term emotional memory, making her incapable of experiencing fear. -- Adventurers Crimson #12 "Back to Zero" Acting in Windchill’s aversion, Firewalker traveled to a BPE facility where Delilah Young, previously known as Project Zero-Point, was receiving treatment. Though still apprehensive and aggressive, Firewalker managed to quell Delilah’s raging emotions and relate to her situation, and learned more about her shared history with the Bellerose Family. Before leaving, Firewalker was able to instill a sense of hope in her. Delilah Young Adventurers Crimson #11 "A Solution to Genesis" Face of Medicine Landon Bellerose returned to GeoCorp following a lead provided by some friendly Adventurers. However, once he was there, he discovered Dr. Elijah Young hiding in plain sight. Calling forth the Crimson Squad, Landon ran into a power siphoning chamber and waited for backup. As Firewalker, Osprey, Power-Chord, and Scatha 5 arrived at GeoCorp, they were lured through the winding halls of the facility until they were forced to confront Dr. Genesis. The Crimson Squad kept Dr. Genesis’s attention while Landon powered up the siphons, draining the transformed being of energy back to a mere man. Dr. Genesis Adventurers Crimson #10 "Winds of Chains" Firewalker called together his Crimson Squad allies Osprey, Power-Chord, and Windchill to confront and capture the escaped Blood Bat. Once the heroes engaged with the hemophilic villain, they found Blood Bat distressed and desperate. While attempting to detain her, they encountered the hero Torrent, who was soon recognized by the team as Firewalker’s father. A conflict quickly unfolded between the Crimson Squad and Torrent. Firewalker was quickly removed from the battle, leaving Osprey to try to get Power-Chord and Windchill to retreat, which they both ignored. Working together, they laid down considerable offense on Torrent, but were eventually bested by the more experienced hero. Torrent claimed a rune of unknown origin or purpose from Blood Bat before departing and leaving the Crimson Squad to tend to their wounds.
Torrent Adventurers Crimson #9 "Zeroes and Heroes" After numerous BPE research labs were raided by Project Zero-Point, Windchill called together his allies Mantle, Firewalker, and Power-Chord to confront the assailant by luring her into a trap he set at a hollowed-out lab. Once in position, the heroes confronted Project Zero-Point, but found themselves overwhelmed by the sheer power she could output. Mantle was able to remove her suppressor mask, which freed her from cybernetic mind-control, but also forced her powers to spike. The fight was now a countdown of surviving Zero-Point until her powers exhausted her. Soon the Adventurers discovered the attacker was none other than Delilah Young, daughter of Genesis Solutions’ head researcher Dr. Elijah Young. Project Zero-Point Adventurers Crimson #8 "Necrology 101: Ghosts and Stuff" While on patrol, Firewalker encountered a paranormal phenomenon in the form of a ghost reaching out to contact him about a MCU student Julia Royce who had been abducted by a villain known as the Necrologist. Rallying with Windchill, Blue Fox, Osprey, and special guest hero Moon Stalker, the group of heroes traveled to the location provided by the spectral guide Leo Capello. Once they found the secret entrance the heroes encountered Meat Bag, who Firewalker and Osprey immediately confronted. Meanwhile, Blue Fox and Moon Stalker moved further to confront Necrologist, who summoned another lackey known as Ectovore, a robot that eats ghosts. The Necrologist put the heroes in a tough spot by holding Julia Royce hostage. Luckily, Moon Stalker cloaked and got in close, forcing the Necrologist to retreat and the heroes to escape as the base was filled with ecto-plasma. The Necrologist Adventurers Crimson #7 "Hollow Earth" Tracking strange energies after the sudden resurgence of Genesis Solutions, Windchill gathered Power-Chord, Osprey, and Firewalker in Westside. There they discovered an unethical experiment come to life known as Project Quake. A collection of inanimate matter injected with sentience that could only feel pain, Osprey attempted to reason with it, but its existence was too unbearably agonizing that the Crimson Squad needed to use force. Tearing away the earthy exterior, Project Quake replaced its armor with a combination of Windchill and Firewalker’s powers before vanishing to parts unknown. Project Quake Adventurers Crimson #6 "Museum Mayhem" A break-in at local art museum was carried out by assailants wearing black clothes and raven-beaked masks. They group was armed with toxins similar to those used by Wendigo. Power-Chord, Blue Fox, Jet-Star, Sombra, and Osprey showed up in forced to confront this faction soon to be known as the Cult of Nyx, who had a cult-like fascination around the primordial goddess of the night, Nyx. Cult of Nyx Adventurers Crimson #5 "Bite Out of Crime" Receiving a distress call from the billionaire Landon Bellerose, the Crimson Squad was alerted his life was in immediate danger after being attacked by a crazed scientist. Firewalker, Power-Chord, and Osprey quickly arrived at GeoCorp and encountered Dr. Devour, a mutated energy-eating mad scientist. It seemed the monstrosity could counter everything the heroes threw at him, until Power-Chord’s ‘pyro-tech’ showed what it was really capable of, siphoning energy from the doctor and making it easier for Firewalker and Osprey to overwhelm and detain him. Dr. Devour Adventurers Crimson #4 "Wendigo’s End" Alerted by Windchill of an Air Pod on the move, the Crimson Squad capitalize on a previous laid trap. They rally at Mercy Hospital where Firewalker, Scatha 5, and Power-Chord encounter Wendigo on the interior, while Osprey and Windchill engage with a mysterious figure on the rooftop who Windchill dubs ‘Wendigal.’ Fighting valiantly, and causing a snowstorm that devoured blocks of the City Center, it was Power-Chord’s unbridled rage that put Wendigo out of commission with a flurry of punk rock punches. Wendigo Adventurers Crimson #3 "And New..." Claiming himself a perfect genetic specimen, Glarthok targeted rockstar superhero Power-Chord as a challenge, and snapped her guitar claiming her unworthy. Firewalker helped her track down the guitar-smashing menace as he was in the midst of attacking someone. Power-Chord, Firewalker, and Osprey directly engaged with Glarthok by grappling, blasting, and redirecting his attacks. Slowing wearing down the strong and durable foe, the heroes managed to knock him out and redeemed Power-Chord’s glory. Glarthok the Destroyer Adventurers Crimson #2 "Westside Investigations" While Firewalker and Windchill traveled to Westside to settle a beef between Windchill and local luchador Scorch, they learned Wendigo had been spotted at the docks. Assembling the Crimson Squad, the heroes discovered one of Wendigo’s toxic contraptions. Low on trackers, but rich in creativity, the Crimson Squad decided to lay a trap by placing one of Windchill’s Air Pods in the device to later follow Wendigo’s movements. Wendigo Adventurers Crimson #1 "Trouble at the Chem Lab" Following the fallout from Overseer, the Crimson Squad set their sights on the villain Wendigo, a chemist with an addiction to spewing fear and chaos. The heroes were called to action at a chem lab in Westside, which was attacked and raided by Wendigo. Working together to quell the rampaging civilians, the team was unable to detain Wendigo as he had already fled the scene. Wendigo Adventurers 2038 #4 "Out with the Trash" While pursuing the clairvoyant bad guy Scryer through a waste facility, the Adventurers Enenra, Blast-Beat, Kingfisher, Brazen, and Spyder end up tumbling into an industrial vessel that seals its hatch, trapping them. The team has to work through increasing heat and an odious garbage smell when Scryer sets them on a course to the incinerator. Using teamwork, the heroes manage to escape the vessel, though Scryer flees the scene while they are occupied. Scryer The Skulls Adventurers Midnight #7 "Anarchy in MC" Several days after Iron Skull gave his ultimatum people gather at city hall to demand the domestic terrorist and his gang receive justice, while others arrive to show their support of Skull's declaration of anarchy. Midnight Squad arrive alongside Firewalker and Osprey to try and calm the people down so a riot doesn't break out. It doesn't take long for Iron Skull to arrive alongside a group of exo-clad gangers, Skull himself now piloting the very same hulking power armor suit he forced Dr. Tamagawa to make. After a brief exchange of words Skull fired the first "shot", hurling an energy buzzsaw towards innocents as they fled, only to have his efforts thwarted via Amita driving her car between the civilians and buzzsaw, saving them, but losing her prized vehicle in the process. Seeing his former protoge still alive enraged Skull, and a battle ensued! Blue Fox (with support from Sombra) fought alongside Catfight to defeat the exo-gangers.
Firewalker, Mantle, and eventually Amita herself battled against Iron Skull. The powerful heavy-duty armor was a lot to handle for them, eventually requiring Blue Fox to step in and attack Skull's flank while Catfight recovered from nearly being taken out by a micro-missile barrage that almost got the rest of the team as well. Eventually they were able to restrain the power armor in place, but not without cost as Amita took a brutal focused rail shot through the shoulder that nearly killed her. But a final corkscrew dropkick from Catfight floored Skull, and with the armor overheating and shutting down the villain was finally defeated.
There is one last crisis to deal with however as Amita's body went into shock from the railgun shot, but with Osprey's medical aid and quick thinking from Sombra, the P.I. is teleported to an oncoming ambulance, and save her life! With Iron Skull bested alongside his gang, Midnight Squad and friends were able to take a breath of relief. Later discovering the supposed bombs Skull threatened the city with were just a ruse, a bluff to try and turn the city against itself and introduce the anarchy he so craved. Midnight squad were free to take a breather, but more adventures loom over the horizon!
Super Skull (Iron Skull), the Skulls gang The Skulls Adventurers Midnight #6 "No More Heroes" Amita Prasad contacts Midnight Squad, informing them she's spoken with the power armor expert that the Skulls gang kidnapped, Dr. Taka Tamagawa. With the recent efforts conducted against the gang, Iron Skull has decided it's time to change Tamagawa's location, a late night prisoner transport being the best chance to rescue him. While Catfight and Prasad were engaged in a seperate mission the squad (Blue Fox, Sombra, Mantle, and Stretcher) were joined by friend of the team, Wizard! Gathering on the highway ahead of the transport, Stretcher was turned into a makeshift slingshot used to launch Mantle into the convoy. A high speed chase on the highway results! The Skulls gang are not without new surprises however, unveiling combat exo-frames built by Dr. Tamagawa. With Wizard's help Midnight squad were able to defeat the gangers while Sombra extracted the doctor from the transport truck.
Their victory was short-lived however as Iron Skull held a livestream where he went on a lengthy anti-establishment rant. Demanding the people stand up against their real oppressors, heroes. Activating a detonator he destroyed an abandoned building in City Center, declaring he's had his gang install bombs in occupied buildings as well. And will detonate them if his demands aren't met.
Chaos erupts in the streets while Midnight rushes to the scene of the explosion...
Iron Skull, the Skulls gang The Skulls Adventurers Midnight #5 "Corrosion Catastrophe" Catfight gathers the rest of Midnight squad, Blue Fox, Stretcher, Mantle, and Sombra to the location of Corrosion's hideout in the northeastern section of City Center. They find an abandoned building overtaken by plant life. After a brief investigation of the exterior the squad decided to move in, finding the interior floor completely caved in with a tunnel leading into the sewers. Deeper within they found the borderline feral villain, who used stolen biochem medication, along with an armored suit equipped with a venomous tail to bolster his abilities. Injecting himself with the stolen medication to gain temporary control over the nearby vegetation. The villain used vines along with poison spitting plants to keep Midnight squad at bay, but was eventually bested by the heroes superior numbers. The police arrive shortly after to arrest the maniac!
With the brief diversion out of the way Midnight squad were free to pursue their campaign against Iron Skull, eager for Prasad's next bit of intel...
Corrosion; mutated plants The Skulls Adventurers Midnight #4 "The Truth is Revealed" Midnight Squad gather at the secluded Westside docks to meet with Private Investigator Prasad, wary of the enigmatic gung-ho woman at first. They approach her openly as a team, discovering that she worked alongside Iron Skull (real name Richard Barret) in the early 2000's with a fellow vigilante who went by the name of 'Nomad'. The band of mercenaries conducting a brutal, lethal crusade against criminals and corrupt leaders alike during the time period where Detroit was still recovering and progressively turning into the Millennium City of today. In 2010 the group were demolished during a botched takedown of the Overseer. Nomad was fatally shot during the escape, dying moments later in the back seat of their getaway vehicle. While Amita was launched from the car after it was rammed by an SUV belonging to Overseer's goons, losing half of her right arm in the process. Richard Barret was still in the drivers seat of the wreck, seemingly burning to death when Overseer's goons lit it on fire.
Amita begged Midnight squad to let her join in their efforts to take down Iron Skull, desperate for redemption after being manipulated by the overglorified anarchist that is Richard Barret which resulted in her taking so many lives, as well as being forced to clean up various assassinations Overseer conducted after the mercenary band was defeated. After a brief debate Midnight agreed to team with the P.I., who promised she would dig up more intel on the Skulls' current plan while uncovering a dangerous unaffiliated super villain she discovered named, "Corrosion", and where to find him. Midnight squad decides it best to take Corrosion down while Prasad continued her investigation for the time being...
Iron Skull (mentioned); Overseer (flashback) The Skulls Adventurers Midnight #3 "Skulls Race" Sombra and Stretcher use Blue Fox's phone tracking app to investigate the power armor dealer the Skulls are after. Finding the dealer, named Freddy's apartment building. They're able to easily sneak in and discover Freddy runs an entire counterfeit power armor operation using scrap from the junk yard cleaned and touched up to look legit on first glance! Sombra and Stretch eventually choose to interrogate the man, learning he's using the money gained from these counterfeit deals to try and get his way out of the city, while also screwing over any potential psychopath looking to build an illegal suit of power armor. Their questioning is cut-short when the Skulls arrive eager for revenge. The heroines trying their best to diffuse the situation peacefully, but Freddy had other plans. Causing a brief distraction to make a run for it, what followed was an intense, action-packed chase through the apartment complex that eventually spilled out into the streets! The Skulls chasing Freddy in his junky old car through the streets of westside. Stretcher was able to disable the Skulls' vehicle with the help of Sombra while the same mysterious woman from before flew onto the scene in her sports car, forcing Freddy to crash onto the docks before knocking the fraudulant dealer out with a punch from her cybernetic forearm. Introducing herself as Amita Prasad, a private investigator. Proclaiming she knows who Iron Skull is, and offers to share everything she knows after the rest of Midnight squad gather at a secret location an hour later...
The Skulls gang The Skulls Adventurers Midnight #2 "Warehouse Mayhem" Following up on the tracking device planted in the power armor parts Iron Skull purchesed, Blue Fox and Mantle find themselves on the northern outskirts of the city at a large maintenance warehouse. Blue was able to test out his newly created camera jamming app on his phone to allow the heroes to sneak into the warehouse. Discovering the warehouse's primary use is to repair the gang's various vehicles consisting primarily of armored SUVs and transport trucks, with the most dangerous of all being a refurbished VTOL chopper with mounted miniguns! Eavesdropping on the scene revealed that Iron Skull ordered the kidnapping of a power armor expert to build a heavy-duty suit for the villain to use, in addition the parts they bought were fakes, Iron Skull himself demanding the power armor dealer pay for trying to ripping him off. Skull himself wasn't on the scene, making it much easier for Blue and Mantle to take the operation down! One panicky Skull ganger in particular jumping into the tethered VTOL and attempting to take the heroes out with the miniguns, resulting in the vehicle crashing indoors and adding to the chaos!
With new information in hand, and the gang's strength slightly diminished, Blue and Mantle fled the scene. Unknowningly being watched by a mysterious woman with a flashy sports car in the distance...
The Skulls gang The Skulls Adventurers Midnight #1 "Skullduggery" While out on a early nighttime patrol Catfight comes across a nefarious arms deal going on in Westside, calling the newly formed Midnight Squad to aid in breaking up the operation! Watching over the scene revealed a new gang to Millennium City, the Skulls, and their leader, Iron Skull. A heavily scarred man obscuring his face with a polished metal mask in the shape of a skull. With the help of Blue Fox, Sombra, Mantle, and Stretcher. Midnight squad intervened in the power armor deal, and though Iron Skull and the dealer got away Blue Fox was able to track the phone of the dealer, while Sombra planted a tracking device in the purchesed goods! Midnight were able to defeat several gangers. But the mystery as to who this insidious new threat really is was just getting started...
Iron Skull; the Skulls gang Under the Overseer's Gaze Adventurers #382 "Return to Grace" The team moves on the high rise where Overseer is holed up with a number of mercenary defenders using firearms and rockets to keep law enforcement at bay. The Compendium is now in the hands of the justice system and the press, and everyone knows, in astonishing detail, the depth of Clayton Ewing's crimes. The Adventurers arrive to break through the outer defenses. Before they can challenge the Overseer directly in his secret basement facility, they have to defeat an armored-up Titanic (enemy of Blue Fox) and the villain Faceless, who has taken on a form identical to Titanic. Once inside the Overseer's command center, Kyle McAllister turns on Clayton and tried to shoot him, but Clayton gets the draw and takes Kyle down, first. Then Ewing tries to goad Blue Fox, whom he knows to be Marshall McAllister, his god son, into lashing out and killing Ewing so that Blue Fox will be seduced into the same cycle of lawful evil as Clayton had fallen into. But Kyle, barely alive, manages to draw strength enough to put a fatal bullet in Ewing, and spare his brother from any rash decision.
The Adventurers actions are seen to have been necessary in light of the extent of the Overseer's corruption, and they are lauded as heroes. But there remains the threat of a vacuum to be filled...
Overseer Under the Overseer's Gaze Adventurers #381 "The Compendium" The Adventurers move on Compass Labs only to get ambushed by the supervillain Mantis, on Overseer's payroll, and suffer an untimely betrayal at the hands of Scatha 5. While the robo-team member was visiting Kyle McAllister, and Dark Web, both incarcerated in the Adventurers HQ, the latter managed to 'possess' Scatha 5 and prime him for the backstabbing at the opportune moment, before both McAllister and Dark Web make their escape. Scatha 5 nearly breaks Blue Fox's leg during the startling backstabbing. Nevertheless, the Adventurers persist and manage to extract the Compendium from the Compass Labs archive, until he entire team is then ambushed by Typhoon, yet one more villain amongst an army that serve the Overseer. They manage to temporarily trap Typhoon and arrange a deal in where Typhoon goes free in exchange for the Compendium. Overseer Under the Overseer's Gaze Adventurers #380 "Mr. X Revealed" Later the same night as the bank heist, Scatha, Windchill, Webcrawler and Tungstan fight to save the life of Mr. X against an attack by Wendigo, Lechuza, Sinister, and Blue Scorpion. Affected by Wendigo's fear toxin, Windchill blanketing a city block with a frigid blizzard to defeat the illusory Wendigoes. It is effective in leading to the defeat of the other villains, but Windchill has to be ordered out of the area because the blizzard is proving deadly. After the fight, Mr. X is revealed to be Steven Roundy, who worked for Ewing Estates - owned by Ewing - reveals that he had access to Ewing's inner circle, and knows that Ewing has a compendium of all of his crimes, arrangements, and holdings. This compendium would prove crucial in prosecuting members of Ewing's criminal organization, all the way up to Ewing himself.
Wendigo, Lechuza, Sinister, Blue Scorpion, Overseer (indirectly) Under the Overseer's Gaze Adventurers #379 "The Bank Job" Several Adventurers, including Blue Fox, Sombra, Joule, Firewalker, Osprey, Mantle, and Skyline take part in robbing a bank! They are met with resistance by a group of hastily assembled vigilantes including Safeguard, Delta, Horseshoe, Quetzal, and Wizard within the bank, but fight to escape with barely a scratch while routing the vigilantes handily. The sudden turn of the Adventurers to crime momentarily puts Clayton Ewing in a PR stalemate, having recently praised the team for saving his rally from an attack by supervillains - just as Webcrawler predicted. But it also puts the team in the law's crosshairs, as Duane Steel had warned.
Safeguard, Delta, Horseshoe, Quetzal, the Wizard, and the Overseer (indirectly) Under the Overseer's Gaze Adventurers #378 "Ethics" The Adventurers have a clandestine meeting with Mr. Koheler, formerly of NLUS, to strike an agreement to have him hold their prisoners. In exchange, the team agrees to do a favor for Koheler down the line, though are quite clear that it must meet not cross any red lines for them. The team also meets with Duane Steel and advise him of a plan some members have concocted to attack the S&H Bank, which is connected to Clayton Ewing, the Overseer. The daring plan would both leave Overseer without capital, but also, would force Federal investigators to look into their books. The team is not united on the plan, however, with a number of heroes refusing to stoop to criminality to defeat crime. Steel agrees, urging the team to do the plan under the auspices of a prosecutorial-led sting, or else take their chances with being absolved after the fact if they go ahead with it alone.
King Kestrel meets with the team and offers his services. He believes Ewing has a list of enemies, which if found, could prove to be vital to Ewing's arrest and prosecution as hard evidence. The team agrees; there is a sense that Kestrel has changed, though the Adventurers remain wary.
The Overseer (indirectly); One's own conscience Under the Gaze of the Overseer Adventurers #377 "Baker's Hideout" The Adventurers involve law enforcement on an action to capture Baker's Dozens in the Michigan woodlands, but agree to be the tip of the spear. Numerous duplicates of Baker's Dozen are present at some kind of shanty village outside of an abandoned mine - his drug manufactory. The position is far from any major highways and protected by a gun emplacement on high ground, as well as a guard tower at the entrance to the camp. The Adventurers cooperate to try to take the Bakers by surprise, and obtain the state-of-the-art plasma weaponry in crates around the site.
The team takes a few injuries. The purpose of the Overseer revealing this site to Blue Fox appears to be two-fold: one, in hopes that Marshall will take Baker's Dozen's life to avenge the attack on his father and home, but Blue Fox resists that temptation with the aid of his team mates. Two, to wipe out Baker's Dozen as a drug producer and dealer, to suit the Overseer's goals in finally cleaning up the city.
Baker's Dozen Under the Overseer's Gaze Adventurers #376 "Long Arm of the Law" Overseer calls Marshall when a number of Adventurers were present to offer another chance to surrender. He specifically asked for his people (Kyle, and Darkweb) back, but the Adventurers refuse to yield. The Overseer threatens consequences to follow. Overseer reveals the supposed hideout of Baker's Dozen, a criminal biker with replication technology who recently torched the McAllister home and tried to kill Marshall's father, Marcus. Overseer’s intentions for doing so remain unspoken.
Later that night, a breakout occurs at the municipal prison! The crime-fighter Osprey is seen violently disabling a number of prison guards and breaks into the maximum security prison to release King Kestrel and his dangerous associate, Cuckoo. Osprey is last seen by witnesses and CCTV escaping the scene with the escaped inmates in tow.
MCPD and PRIMUS are both placing pressure on the Adventurers for the whereabouts of Osprey.
Overseer; Osprey?; Cuckoo; King Kestrel Under the Overseer's Gaze Adventurers #375 "Tit-for-Tat" The Adventurers put themselves in position, anticipating an attack upon the Ewing rally. They must listen to an impassioned 'tough on crime' speech from Ewing (the Overseer) and the roar of a supportive audience, before explosions take out the fountains at the outdoor venue, and a green toxic fear gas starts to spread out. As panicked ralliers stampede away, the supervillains secretly hired by Overseer begin their attack. The Adventurers move in to go toe-to-toe with the baddies, including Absolver, Blue Scorpion, Wendigo, and Lechuza. When Webcrawler arrives and joins the battle, the fear toxin triggers the spider monster transformation, adding another complication to the battle - though the creature does manage to drive off Blue Scorpion.
Ewing, for his part, cleverly plays up his meaningless shooting toward the armored Blue Scorpion as a heroic deed, while his agents capture unflattering footage of the Adventurers and pump that out to media outlets who portray the team with denigrating narratives. Skyline is shown to be trigger-happy; Blue Fox is shown destroying a police cruiser; Tungstan is shown accidentally injuring a civilian during the stampede as he ran toward the danger; Stinger is shown 'recklessly' attacking Blue Scorpion in a barrage when civilians were seemingly close by; Mantle is shown to clumsily stumble into panicked civilians, when in truth, the fear toxin caused the civilians to attack him; and Webcrawler is shockingly shown to turn into a mutant monster spider, becoming widely known to do this for the very first time.
Overseer; Lechuza; Absolver; Wendigo; Lechuza Spider Monster Under the Overseer's Gaze Adventurers #374 "Backlash" Blue Fox is ambushed by Lechuza, Absolver, Titanic, Black Badger, and Creature in swift retribution for betraying the Overseer. Intervention of Osprey, Courser, Firewalker, Sombra, and Tungstan leads only to more team members being caught in the trap and brutalized by the array of tough villains. In a display of his power, the Overseer calls off the villains before any team member is slain, but the Adventurers - even Tungstan - carry injuries. Elsewhere, Webcrawler, Mantle, Azure Hawk, and non-Adventurer Mr. Obvious respond to an attack by the Baker's Dozen at the apartment block of Marcus McAllister - Blue Fox's father. Dozen, an Irish bike gangster who can duplicate himself, is an old foe of Marcus's from his MARS days. The attempt at a very personal strike toward Blue Fox is disrupted by the team's timely intervention, preventing Marcus and other residents' deaths. The apartment block is destroyed in a fire.
Overseer; Lechuza; Absolver; Titanic; Black Badger; Creature; Baker's Dozen Under the Overseer's Gaze Adventurers #373 "Taking the Power Pieces" Some Adventurers plan to accept the Overseer's offer, at least in the short term, to buy time in working against him. While Blue Fox draws Darkweb out of hiding and captures him, Osprey goes undercover to infiltrate Overseer's operation which is vanishing homeless people and destroys it - driving off Creature, to whom homeless were being fed. Sombra, Replica, and Courser enacted a plan to capture Kyle McAllister, Blue Fox's brother and advisor to Overseer, and temporarily replace him with Replica so that they could hold and question the real one.
Replica learns that Ewing plans to have supervillains attack an upcoming rally of his own supporters to stifle Olivia Ellison's gains and try to gain the same sympathy.
The Overseer Bluebird for Congress II Adventurers #372 "Will the Real Overseer Please Stand Up?" Discussing the preponderance of evidence gathered over the last several months - from Casey Trent, to the harassment and attempted murders of Olivia Ellison, to the mysterious Mister X, to data obtained by Adventurers Silver - the team comes to believe that Congressman Clayton Ewing, godparent to Blue Fox, is actually the Overseer! The team confronts Ewing in numbers at his office, and is escorted in by none other than Marshall's (Blue Fox) brother Kyle, who is in service to Ewing. After a brief, tense exchange, Ewing freely admits that he is the Overseer, and also reveals that he knows Blue Fox and Sombra's secret identities. He also knows that Olivia Ellison, his rival for election, is the alter ego of former Adventurer Blue Bird. The team variously reacts to the Overseer with promises of justice, and even some threats, but leaves peaceably. The Overseer gives them 24 hours to agree to work with him on achieving his vision for true order... or face his wrath as his enemy. With recording devices interfered with preventing hard evidence of Ewing's 'confession,' the team scrambles to figure out how to respond to Overseer's offer.
Featuring: Blue Fox, Sombra, Firewalker, Courser, Scatha 5, Osprey, Azure Hawk and Webcrawler.
The Overseer - Congressman Clayton Ewing Bluebird for Congress II Adventurers #371 "Rack and Break" Directed to help protect Congressional candidate (and secretly, the former Adventurer named Bluebird) during an open air rally at which she will be at great risk, the Adventurers meet with her. Yet despite the history of attempts on her life and threats from the Overseer, Olivia is immediately more interested in the hit to her image - her opponents' PACs keep attacking her for being too soft on crime, and a danger to be around because of all the bad things that happen to her. The team agrees to be subtle, but when rocket fire and wide-area smoke bombs disrupt the rally, the team swoops into action to face the perpetrators: a billiard ball-styled gang called the Ballers! Each Baller seems to have a different skill set and themed costume. The team captures some, and forces others to retreat. But the stage collapse caused during Osprey's battle with 4-Ball, and the various rocket-blasted areas, leave Bluebird rattled. Was it the Overseer again, or someone else with an agenda to eliminate Ellison - or just her chances at high office?
Featuring: Blue Fox, Firewalker, Scatha 5, Osprey, Sombra
The Overseer?; the Ballers Dealing with Devastator Adventurers Gold #3 "Ghost Town" Adventurers Gold reaches the ghost town where Devastator lives. The old mining community seems abandoned, but when they get closer, half-finished, haphazardly reconstructed robots dig themselves out of the sand and beset the team in great numbers. Trespasser is injured in the fight. The team then survives an aerial bombardment of missiles launched by Devastator, with help from Stinger who arrives late to the battle. Finally, all of his defenses laid bare, Devastator takes flight over the battlefield himself where after a pronounced battle, he is brought to ground and defeated. Devastator Dealing with Devastator Adventurers Gold #2 "The Jail Gambit" Tasked with capturing Devastator, the team learns that he is adept at laying low, and probably has a base of operations in the USA. One of Devastator's known associates, Jay Nordhoff AKA Marauder, is being held in the county jail awaiting an arraignment. The team devises a plan to sneak Firewalker in, disguised as a gangster cellmate, to try to quickly earn Nordhoff's confidence and figure out where Devastator is, while other team members keep the court and jail officials busy undercover. Devastator is discovered to be hiding out in a remote part of eastern Nevada.
Jay Nordhoff (the Marauder) Dealing with Devastator Adventurers Gold #1 "Supreme Devastation" Webcrawler calls out for help! Having escaped capture by her old enemy, the Devastator, she alerts the team that she is being pursued by his Oppressor robot - nearly two storeys tall. It takes numerous Adventurers to fell the thing, and rescue its power source: a young hero named Battery whom Devastator had recently captured and enslaved within the robot. Webcrawler taps the newly-formed Adventurers Gold to begin the hunt for Devastator, and bring him to justice. Devastator; Devastator's Oppressor Robot The Soul of the Nation #370 "Return of Mr. X" The mysterious Mr. X unexpectedly reaches out to Blue Fox, causing several Adventurers [Blue Fox, Osprey, Sombra, Mantle, Scatha 5, Courser] to attend a clandestine meeting with him in a city center underground car park. His new revelation: Casey Trent was not the Overseer, but probably a patsy, a fall guy. Mr. X says that the criminal web of which he is part slowed for a bit upon Trent's capture by the Adventurers months ago, but recently has renewed its activities, and is working hard toward some looming goal. Furthermore, the Overseer seems quite aware of the Adventurers and is making plans for them. As before, Mr. X can answer few of their questions in full or direct ways, for fear that the compartmentalization of information in the cabal will make it easy to trace back to him. But he does profess to be an ally to the Adventurers and opposed to the illegal activity he sees.
The Overseer (none) #366-#369 "Sins of the Past, Sins of the Present" The Adventurers encounter Skyline, and help battle his opponent Tectonic, leading them into intrigues with the Hawthorne Foundation who manufacture a potent but dangerous substance called Polymorphite - which currently powers Skyline. Hawthorne Foundation; Tectonic (none) #359-365 "Broken Mirror" (Description to come) Kestrel (none) #358 "Dino Rampage" The team responds to a genuine t-rex rampage in downtown Millennium City! The combined efforts of Firewalker, Blue Fox, Replica, Courser, Stinger, and Sombra(?) drive the creature toward a large city park where they leave it open to be sedated and subdued. PRIMUS, meanwhile, follows the path of destruction back to its source and locates a bio-lab in a state of carnage. Dinosaur Going Home #356-357 "Going Home, Parts 1 & 2" Maya (Sombra) and Riley (Courser) join Kyra (Replica) on a bus trip to her home town of Athens. There, Kyra has been asked to give a speech to an assembly at her old high school about her unorthodox path to success and overcoming her more rowdy past. Kyra has to face the real reason her parents refused to pay for her university, something which has been a sore point in their relationship for years. Also, a swamp monster turns up at Kyra's dad's workplace - an alligator sanctuary - requiring the Adventurers in Athens to take action! ... and afterwards, Kyra spills the beans about her secret identity to her antagonized father, leading at last to a cathartic reconciliation. Swamp Monster The Cabal #355 "Foxing Them Out" Red Spider recovers enough to go home, but has memory loss covering about the last 10 years of her life. The team agrees to take turns watching her in case her secret identity became known by villains. Firewalker, Replica, Courser, and others start attending fitness classes at Red Spider's home studio to keep tabs on her, while Sombra and Dreamweaver do what they can to help her at home. The enigmatic Mr. X tells the team a month later that Liddell's arrest seems to have changed nothing for the mysterious cabal he previously warned the Adventurers about. Blue Fox is selected to lead in Red Spider's stead, and he announces he is determined to probe the identities and true intentions of who framed Liddell.
Liddell; Mystery Cabal With a Silver Spoon #354 "Straight From the Source" The team is alerted to a break-in at Silverline Industries, discovering a few of the Scrappers gang inside, ransacking the place for new parts to maintain and grow their cyborg posse. Raymond Silver, founder and CEO of the company, investigates matters himself via video screen, expressing his annoyance and sealing both groups inside while he summons his security. During the fight between the teams, this security arrives: a trio of formidable rolling robots ordered to take down everyone! The three-way melee ends, of course, with the Adventurers victorious, the lockdown lifting as they threaten to trash the damaged robots completely. The Scrappers, Silverline Industries A Murder Most Foul #353 "Ground Zero" After the battle in the casino, the team confronts and arrests Cosmo Liddell in his penthouse. Liddell protests that it's all a frame, accusing the team of having manufactured the crisis as an excuse to grab him. The police investigation begins, with Detective Sheffield helping the team realize that Red Spider probably wasn't beaten in the holding room where she was found, but brought there after. Blue Fox tracks the scent of her to the loading dock. Upon personally verifying the Red Spider's medical status at the team's HQ, the Detective is willing to conclude that the Adventurers had probable cause to enter the casino to rescue her - but warns that destructive vigilante behavior will not be tolerated any further. The team provides the detective with recordings and data they pulled from the casino; though technically admissible, the detective warns that they may not be lawyer-proof. The team has a frank discussion about it, with members like Tungstan, Stinger, and Sombra showing disappointment in how the casino battle unfolded, ones like Blue Fox and Vortex feeling things could be better but they acted as best they could, and ones like Catfight feeling that the ends justified the means.
Red Spider remains unconscious and recovering under the care of the team's surgical droid.
Cosmo Liddell A Murder Most Foul #352 "Ground Zero" The mysterious Mr. X arranges a meeting with the team through Blue Fox's website. In a parking garage, he tells Sombra, Blue Fox, and Firewalker that the attempt on Olivia Ellison's life, and the death of Sarah, was just part of a much vaster conspiracy. While he knows that Cosmo Liddell is part of the web, Mr. X does not believe Liddell is at its center. He urges the team to find out who gave the order, and find a path to the center of the web. Later, Red Spider goes missing! On a hunch that Cosmo Liddell has captured her, the team arranges for ally Replica to sneak into Liddell's Horizon Casino, disguised as a Liddell gangster. Inside, she finds Red Spider badly beaten in one of Liddell's casino holding rooms. With danger closing in and Sombra's powers suddenly inactive, the team springs into action.
A pitched battle sees the casino wrecked. Much collateral damage is caused by the Liddell gang and their weapons, but the Adventurers are wanton in their destruction. Catfight in particular drives her car into the slots floor, with potentially lethal consequences.
Afterward, the team confronts and arrests Cosmo Liddell. Liddell protests that it's all a frame, accusing the team of having manufactured the crisis. The police investigation begins, with Detective Sheffield helping the team realize that Red Spider probably wasn't beaten in the holding room where she was found, but brought there after. Blue Fox tracks the scent of her to the loading dock. Verifying that Red Spider was injured, the Detective is willing to conclude that the Adventurers had probable cause to enter the casino - but warns that destructive vigilante behavior will not be tolerated any further.
The team has a frank discussion about it, with members like Tungstan, Stinger and Sombra showing disappointment in how the casino battle unfolded, ones like Blue Fox and Vortex feeling things could be better but they acted as best they could, and ones like Catfight feeling that the ends fully justified the means.
Red Spider remains unconscious and recovering under the care of the team's surgical droid.
Cosmo Liddell; Mr. X A Murder Most Foul #351 "In the Dragon's Den" The Adventurers begin to strike back at Liddell to let him know he's gone too far in murdering celebrity Sarah Ellison! Blue Fox does some cyber attacks and reveals some embarrassing info about the Liddell organization. Catfight hits a money-laundering operation within a laundromat. Red Spider exposes a shipping container full of contraband on the Liddell Shipping lot. The team track down the gunman who escaped from the Ellison penthouse. He gives up under questioning that someone else recruited him for the hit and the money came by dead drop, but he was under the impression it was a Liddell operation. The team keeps the gunman in protective custody for fear that Liddell will try to eliminate him.
A full force of Catfight, Blue Fox, Red Spider, Stinger, Sombra, and Vortex go to Liddell's casino. Though security tries to tell them to leave initially, Cosmo Liddell relents and has them escorted to his office. There the team tries to extract a confession out of him. Liddell remains cagey and trades barbs with the team. The crime boss contends he had no involvement in the death of Sarah Ellison - though he'd congratulate whoever did it. He's not troubled by the hearsay the team has gathered, saying he's constantly the target of hearsay for things he both did and did not do, and it hasn't sunk him yet. Liddell warns the team if they keep trying to weaken his organization and the control it exerts over his territory, it will give rise to more violent crime - a risk some team members seem willing to accept.
Cosmo Liddell A Murder Most Foul #350 "The Death of Night Star" Two gunmen make their way through the layers of security at Ellison Hotel and Suites to open fire on Olivia (Bluebird) and Sarah (Night Star) in the former's private penthouse suite, declaring they are there on behalf of Cosmo - notorious crime boss Cosmo Liddell. Sarah goes down in the initial salvo, while Olivia manages to resourcefully fend off the attack. Sarah uses the last of her strength to ward off one gunman, while Olivia kills one in her own defense. Later in hospital, Sarah succumbs to her wounds. Dr. Erin Bailey surgically removes a data device from Night Star and gives it to Cassandra Olsen's (Red Spider) safe keeping. Rubber Bullette, Sombra, Blue Fox, Stinger, and Catfight are all present out of costume at the hospital to join Olivia and Rayna Ellison, and they begin to discuss responses to Liddell.
2 Gunmen; Cosmo Liddell? #349 "Sinking of the Titanic" On her own, Sombra encounters the villain Titanic, seemingly hired to trash a construction site belonging to Congressman Clayton Ewing. She is forced to play a game of cat and mouse, unable to match the giant in combat, but eventually outthinks him, though finds no satisfying motivation for the attack.... Titanic The Juliana Nova Incident #348 "Vengeance of Verdugo" With evidence to clear Olivia's name, the team heads to Juliana Nova to retrieve their extradited teammate. Verdugo's compound is well-defended, but the team smashes through, finding Olivia beaten and bruised in a cell. Verdugo himself reveals his metahuman powers, and faces them! Salvador Verdugo The Juliana Nova Incident #347 "Joule, Grounded" The team is shocked to discover the morning news declaring that their teammate Joule, Olivia Kowalczyk, has been arrested for an apparent political assassination from her time in the US Army. Fledgling South American nation Juliana Nova and its Grand Marshal, Salvador Verdugo, accuse Olivia's unit of the murder of several rebels, including his own brother Pedro, during their bid to depose the previous rulers of the country. The team splits up to investigate, visiting the Juliana Novan embassy, and Joule's own records from the past. It's soon discovered that Nero Corp, the creator of the Invictus serum that previous villain RoidRage made use of, was involved in Juliana Nova. Salvador and his men killed their own men while "high" on the drug, and framed the US soldiers later! And now, they have a new, improved Invictus II serum in storage.... Salvador Verdugo, Nero Corp Catfight Arc #344-346 "The Kriedler Feud" The team contends with Winston Kriedler, who has a grudge against the Reinhardt family and a giant wolf robot to help. Markus Reinhardt, believed dead since Adventurers #307, turns up alive and well and offers to help the team. His agenda isn't clear, but Markus does make a play for his own redemption. (Please expand). Kriedler, giant wolf robot Hellfire, Dark Fire #341-343 The Path of the Righteous Man Firewalker, affected by the hellfire he absorbed in his contest with Satan like a deadly toxin leeching into his mind, starts rampaging through the city, causing havoc and terror. The Adventurers, after numerous attempts to reach him, finally confront him once and for all when he becomes a giant, fiery demon. Fox, now known as Oni, is able to use a new energy-draining sword to stab Firewalker and suck the hellfire out, leaving the hero injured and apologetic, but okay. Firewalker The Golden Man #340 "Not a Forever Goodbye" Lord Aurum's remaining Golden Men try to save him, and drag him against his will into the waiting transport. Firewalker blasts it off course, while Silver Hare trashes its engine assembly. The resulting pressure build-up causes an explosion that makes the transport crash to the street. Aurum emerges from the wreck to be assailed by Blue Fox; his helmet is smashed, his life support fluid drained, and he is brought within an inch of his life. The team brings Aurum back to HQ in a bid to keep him alive. The Surgical Droid captured in Adventurers #284 is brought in to stabilize Aurum and attempt to fashion a makeshift repair to his life support suit. The team orders the droid to awaken Aurum, then they ask if he can save Spyder. Aurum indicates that he probably can, but that he would need to return home to consult his texts to find the way. He bargains for his release, promising he will fulfill his end, and help both Spyder and Abaza Menderes return to life. The team is reluctant, but agrees that letting Aurum go is their best chance to save Spyder.
Two weeks later...
Spyder wakes up at the Olsen suite, surrounded by Blue Fox, Catfight, and Firewalker. She needs a few days to recover.
Future Adrynne visits Spyder late at night to let her know that she has fulfilled her purpose for being in the past, and she will soon be brought home to her proper time. Spyder takes time to say goodbye to the younger version of her father, whom she got to know during her stay in 2021, and farewells her team mates with a party. As she waits for the portal to open to return home, she says goodbye to everyone over team comms - and they respond by showing up in person to see her off. Sombra sends a cake with her to share with whoever greets her on the other side.
Shortly after Spyder enters the portal and it closes, the express private elevator of Cassandra Olsen's suite dings with a new arrival: Cassandra, returned from the future, holding baby Jessa.
Lord Aurum The Golden Man #339 "Spyder's Purpose" The Adventurers get word from Silver Hare and, shortly after, Firewalker, about Lord Aurum's schemes, his crafting of the Philosopher's Stone, his killing of his future counterpart. Blue Fox accesses a climate satellite to find a heat spike in the city corresponding with Firewalker's forging of the Stone, and locates it at the former address of the Order of Osiris [see Adventurers #249], which is being built over by a new construction site. But there must have been a sub-structure no one knew about, deep below.
The team arrives en masse to find Aurum's Golden Men boarding an air transport on exposed top floor of the building construction. Aurum, now encrusted in organic golden armor, and bearing the Philosopher's Stone on his chest, appears by hologram projected by a Golden Man to parley with the team. But the team will not accept Lord Aurum's word about the future calamity, nor his sole proprietorship of the Stone. The Golden Men go to attack mode.
For the first phase of the battle, the Adventurers are seriously overwhelmed by the Golden Men. Spyder went into her camouflage at the start of the encounter and is not seen, while Sombra also goes invisible and tries - without success - to pry the Stone away from Aurum once she sneaks onto the transport. Aurum has Sombra carried out, and has his robots hold position, but prepare for death strikes on those Adventurers who have been knocked down. Unable to get their acknowledgement of his claim to the Stone, Aurum seems about to order their deaths.
Then an invisible hand is revealed as the fingers, hand, and arm start to turn gold against Aurum's chest. Spyder, in camouflage, grabs the Stone and tugs it free, then dives to the ground, and buries it under her. Just as happened to the Turkish girl in 1908, Spyder - undisciplined in the mastery of the Stone - starts to turn into a solid gold statue bit by bit. Her sacrifice puts Aurum in alarm, and he thoughtlessly orders all of his Golden Men to immediately converge on Spyder and wrest the Stone from her before it is too late.
The Adventurers take advantage of the situation and dispense with most of the Golden Men when they turn their backs. Firewalker rockets through a great many.
Sombra gets close to Spyder and tries to take the Stone, but Spyder rolls and indicates she intends to see her sacrifice through. The sweep moves over her body, and Spyder is rendered unliving gold. The Philosopher's Stone expends its energy in her grasp, and crumbles to dust under Spyder.
Lord Aurum The Golden Man #338 "Captured by the Alchemist" In Millennium City, Firewalker wakes up in an unfamiliar but dungeon-like place, swimming in a pool, restrained on a harness. He is soon visited by Lord Aurum of the Future, who explains his situation. It becomes clear that Lord Aurum of the Future took advantage of Edgar Cryderman's intention to travel back in time [see Adventurers #326-27] to destroy the Adventurers, and persuaded Cryderman to hit Red Spider at a certain date in 2021. Aurum came with Cryderman, and his intention was not to help Cryderman succeed - he expected Cryderman to fail, as he always did - but to be in place at a time in history when he knew that hellfire was something that he might be able to obtain without the peril of dealing with the devil. Firewalker learns that Future Aurum is trying to stop a great, world-ending calamity that is doomed to happen in the near future, which he has sensed with his foresight power. To do avoid this fate, Aurum believes the Philosopher's Stone must be constructed so that a human mind can attain the wisdom necessary to determine how the calamity begins in the first place. Everything he has done for nearly a century has been, in some way or other, about gaining the Stone, and averting disaster.
While Firewalker considers the value of a potential alliance, Lord Aurum of the Present joins them, and makes clear that they have a hostage to ensure his obedience: Silver Hare. Firewalker tries to destroy Lord Aurum of the Future, but finds his future armor, outfitted with dragon scale, is enough to shield him. They douse him with water from an aqueduct high above. As the villains leave to make preparations, Firewalker asks the two Aurums if they considered which one of them gets to keep the Stone.
Later, Lord Aurum of the Future explains the situation to a frightened Silver Hare, and then brings her to see Firewalker. Just before it comes time for Firewalker to forge the stone, the Aurum of the Present has his Golden Men seize Future Aurum, and force a poison through his visor, into the liquid oxygen medium around his head. Future Aurum dies, and is dragged away. Later, Present Aurum - now in his future counterpart's armor - presides over the forging of the Stone. Firewalker bargains for a sign of good faith from Aurum that he won't misuse the Stone, asking that Aurum release Silver Hare. Aurum uses his golden dust to sedate Hare without warning, and orders his Golden Men to drop her off safely on a rooftop.
Firewalker uses his powers to forge the metallic core Aurum has prepared into the Philsopher's Stone, in a forge lined with dragonscale in order to protect the building from the intense hellfire. Firewalker achieves the Stone's formation... and tries to go a step further and eradicate it. The Stone, however, remains resilient to the additional heat. Golden Men, standing guard, strike from multiple angles with electrical attacks to subdue Firewalker. Aurum remarks that he anticipated betrayal, but still finds it disappointing. He does try to share with Firewalker something of the Stone's power, asking if Firewalker can sense any new insight or inspiration.
Firewalker also removed to wake up safely somewhere else.
Lord Aurum The Golden Man #337 "A Century's-old Adventure" As the team tries to look into leads on some clues they found in Lord Aurum's mansion in the Aegean, the Professor Walsingham AI finds a personal connection to one of the aliases Aurum has used, in the old passports and IDs Sombra brought back - that of Dr. Adem Altun. Walsingham recounts in flashback how the Classic Adventurers attempted to investigate the case of a girl named Abaza Menderes in the Anatolya region of Turkey in 1908, who had apparently been turned to stone. Discounting other explanations such as a hoax, the team met Dr. Altun, supposedly a professor in Ankara, who had also come out to investigate. In time the team learned that Altun was not all that he appeared, and after Altun knocked the team out and captured them in his home, they woke up in a dungeon. Altun admitted he had been with Abaza, and had even hired her to help him, when he came to explore an old temple that he suspected was in the area near her village. When they discovered a glowing orb set in the floor, he instructed Abaza to pick it up for him - but upon holding it in her hands, it began to turn her to gold. Altun left the statuefied Abaza and went back to Ankara to get the tools he needed to handle the orb safely, but when he got back, not only had the Adventurers shown up to investigate, but the orb had apparently crumbled to dust. Altun suspected that Abaza lacked the mental discipline to bear the orb.
The Classic Adventurers managed to escape Altun's dungeon. They had to flee Turkey immediately when Altun leveraged his pull with the authorities to make the Adventurers out to be vile warlocks and plunderers.
The team learns that Dr. Altun / Lord Aurum's aim as an alchemist would be to craft the fabled Philosopher's Stone. That may be what Altun and poor Abaza found in that ancient, forgotten temple. The Stone legendarily would have the power to turn base material to gold, but also to provide wisdom, insight, and inspiration to those near it. It might also prolong life.
Night Star tracks down the statue of Abaza, which still exists and is presently owned by one of those commercial museums of oddities, and pays over $30 Million to buy it and have it shipped to her.
The Golden Man #336 "Return to Aurum Island" Spyder finally meets 'Fox' who has recently been restored to life. She tells him about her purpose being in the past: finding Lord Aurum. Fox, darkened by his time in hell, seems skeptical of the young hero. He suggests that if Aurum is out there, the team should visit his island. Spyder convinces the team to go. Night Star, who was going to journey to nearby Cretoa in the Aegean Sea anyway, arranges transportation for the team to visit the tiny island upon which Lord Aurum's mansion sits. There, the team discovers a swarm of Aurum's golden men repairing the house, which had been extensively damaged a year prior when dozens of Golden Men burst forth to pursue Red Spider and Blue Fox when they stole something from Aurum's lab.
At the door, a Golden Man wearing an ornate shirt greets the team and hospitably takes them to a sitting room, affording them every comfort a guest might expect. The team learns little by little that Aurum is not present, but he did hope to bury his conflict with them - and avoid the Adventurers interfering in his efforts in future. The servant reveals that Present-day Aurum and Future Aurum are working together, and that Aurum's purpose is to save the world from some future calamity he knew was coming due to his power of foresight, but the servant had no specifics.
While most of the team peppers their host-bot with questions, Oni (a new alter ego of Fox) ostensibly leaves to use the washroom, but in truth, uses a laundry chute to access the laboratory in the mansion's basement. He takes samples from some kind of recent experiment.
Upstairs, the Adventurers take advantage of the servant bot leaving the room to fetch a water pitcher, to examine Aurum's library and adjoining scrying chamber. Rubber Bullette finds various occult tracts, with many being books on alchemy. Sombra found a book on a book case that opened a tiny, secret office behind it, wherein she discovered that Aurum may have links both to Sir Thomas Walsingham, and the Order of Osiris. Terratonic (and others) entered the scrying chamber, which was a bare room with black walls, a table, a mirror upon it, and a chair; it was quite foreboding, sending a chill down their spines just to be in it, but they did not 'see the future' as the servant had said was Aurum's purpose for being there.
The servant persuaded the team to stay for dinner. At the dinner table, when Sombra inquired further about how they could trust Aurum, the servant projected a live hologram of Future Aurum, who spoke with them. He indicated that he had been patiently waiting for the team to come to his abode so that he could enact a plot to kidnap Firewalker, whose hellfire he needed for a purpose he would only disclose in riddles. Firewalker had recently absorbed a great deal of hellfire in his challenge to the devil. Lord Aurum said that he had done all he could to delay the team at his home to buy time for whatever his plot was.
Lord Aurum -- #335 "Terratonic AND Proto Strikes!" The team becomes aware of Proto droids committing a raid in the city's vast freight yards, stealing metals and tech components. Firewalker takes to the sky and tries to intercept groups of Proto Drones making off with heavy bundles of steel. Night Star turns up to fight at the freight yard, and assists Terratonic - a hero who uses earth-control powers - in destroying a war droid. They then cooperate on destroying a sturdy Hazard Droid. Spyder also turns up, and leads an Aero Droid into a trap for the others to destroy. Some of the drones escape with their haul, but not as much as they might have thanks to Adventurers and non-Adventurer heroes like Delta and Terratonic. Afterward, Terratonic reveals she is known to Red Spider, and the team extends an offer for Terratonic to join full-time.
Proto Droids -- #334 "Chasing Shadows" The police think Sombra has broken bad. The team goes in pursuit of her, and eventually dogpile her in the park. Sombra makes her acquisition difficult by using her teleporting powers. Upon seizing Sombra, the team are able to remove an 'Earworm' from her that was causing her to do bad things, and turn it over to the police. Spyder gains more control of her sticking power in the fight to capture Sombra.
(More to come...?)
Earworm -- #333 "Marooned" Rubber Bullette and Azure Hawk end up marooned on a tropical island. (More to come...?) Unknown Mission: Hell #332 "The Other Underworld, Part 2" The Adventurers challenge the shape-shifting Lord of Hell to various contests. Blue Fox tries to have the devil beat his time in a Doom speed-run, but the devil prevails despite Blue Fox's program traps. Firewalker challenges the devil to try to destroy him with hell's fire, but that if he can endure 15 minutes, he wins; after a trial that nearly destroys him, Firewalker wins. Rubber Bullette asks for the devil to create a obstacle course similar to TV's Wipeout; the devil obliges, creating a grotesque course that uses sharp, jagged metal, bloody meat in place of air-filled rubber balloons, and so on; RB does beat the devil's servant's best time, but is given a bad slice from one of the spinning blades. Sombra challenges the devil to a culinary duel, prompting the devil to pick a jury of the damned to select the winner. While in hell's kitchen Sombra finds everything she needs, though the screams that eminate from the appliances every time she opens them unnerves her. She manages to exceed the devil's baking skills in the end.
Frustrated, the devil demands an impossible thing: he wants all of the Adventurers, even the ones not present, to give him a challenge, saying that was implied in his contract with the team, and threatens to claim victory if the team doesn't give him one challenge from every team member - impossible, as in some cases, team members simply cannot be there. Sombra counters that as leader, she can change the roster, so she declares those Adventurers not present to be kicked off the team. The devil is down 1 - 3 in the score, and appreciating Sombra's bending of the rules, concedes victory to the Adventurers.
Fox and Adrynne are subjected to profound levels of pain as they are resurrected and set free, and the team is bidden to leave hell immediately.
The Devil Mission: Hell #331 "The Other Underworld, Part 1" Fox on the run! He is being pursued by demons when the spirit of Adrynne finds him, having been seeking him in the afterlife for company while she tries to reconstitute her mortal form. Fox recounts how he had arrived in hell after agreeing to die in place of another, but in so doing, took on a pact that required him to go to hell. Horrified, Adrynne promises to inform the Adventurers, and stake her own soul in a gambit to free Fox from the devil. The Adventurers are still exhausted from their battle with Xagrim when Adrynne informs them of Fox's plight, and her suggestion of a way to get him back: give the devil some good sport. If the Adventurers can think up entertainments for which the devil, or his appointed servant, can go head-to-head, and beat him in them, then perhaps in winning they can win Fox and Adrynne's souls. But if the team fails, Fox and Adrynne must endure hell until the endtimes.
While some Adventurers are willing, more than a few are quite skeptical of the plan. Inside of a day, hellmouths open before each Adventurer individual, providing a way for them to reach the underworld...
The Devil The Season of Xagrim #330 "Horror at the Fashion Show, Part 3" Sarah overhears the conversation in Liddell's room via mics she left there. In a strange conversation, Liddell pledges fealty to Seaton as his 'master,' and promises his will be done. Sombra sneaks into the room, but Seaton - exposed as Xagrim - perceives her, and morphs into his horrific true form, a massive dark humanoid of pure, dark psionic energy, clad in psionic armor. He chases after Sombra, as seizing someone of her power is instrumental to his conquest of Earth. As fashion show goers flee for their lives, and the convention hall is destroyed by Xagrim as he pursues Sombra, the Adventurers face him down and do battle against the extra-dimensional terror. After a long, pitched battle, which at one point sees Rubber Bullette used as a sort of flail against the Adventurers, the team succeeds at weakening Xagrim enough that he flees this dimension. Cosmo Liddell emerges from the ruination of his convention hall and has no memory of being under Xagrim's control.
The beleaguered Adventurers take some time off to recover. Meanwhile, in the great beyond, Adrynne - impatient for company as she painstakingly reconstitutes her mortal form - seeks the spirit of Fox, the Adventurer who had given his life to defend another some months before. Finding him, to her surprise, in hell, pursued relentlessly by demons, Adrynne vows to rally Fox's teammates and secure his release from this grim fate.
Xagrim; Cosmo Liddell The Season of Xagrim #329 "Horror at the Fashion Show, Part 2" Inside of the convention hall where the fashion show is being held, Maya (Sombra) finds a furtive sort-of friend of hers: Arcadio Rando, the Speedmaster, who needs help stealing back his hover bike from the Liddell gang. AJ (Firewalker) breezes past security in the loading dock, but must take on a flambuoyant disguise to get into the convention hall. Sarah (Night Star) plays it cool and promises not to engage Cosmo Liddell directly only days after her sister was nearly assassinated by someone known to work for Liddell in past. Marshall (Blue Fox), having got Maya and himself in thanks to his uncle's political connections (which enables him to meet Donald Trump), takes on the protection of movie star Samara Parish after she confides that she is receiving threatening letters that indicate someone wants to try to get to her at the event. Jack (Azure Hawk) tries to help a shy male model from Texas find true love. Eva (Catfight) has a conversation with an old flame. But suspicions arise when Emily (Rubber Bullette) encounters a bland, seemingly albino shoe maker and strange haircut from Millennium City named Dex Seaton who fits the bill of 'someone who hasn't quite got the human form down.' AJ asks around with fashion world observers who point out that Dex really does stand out in an odd way. As the team surveils Seaton, Sarah demands an audience with Cosmo Liddell. In their tense meeting, Sarah threatens to topple Cosmo's organization for what happened to her sister, but Liddel dismisses her out of hand - he's heard that threat before from people he estimates had better resources, obviously unaware of her dual identity.
Not long after Sarah is bounced from the event, Dex Seaton takes an audience with Cosmo Liddell...
Xagrim; Cosmo Liddell The Season of Xagrim #328 "Horror at the Fashion Show, Part 1" The team defeats an agent of Xagrim named Xalmallen, who is a human with psionic powers whom Xagrim captured and twisted to his will. Xalmallen and a number of cultists tried to cause a chemical plant to explode within the city, the prospect of which terrified citizens and caused evacuations - but it was averted through the actions of some Adventurers. Liberated, Xalmallen tells the team that Xagrim must be found, as his power is growing daily. Xagrim hides behind a fake identity, Xalmallen says, but his shapeshifting imperfect - they will know him by a less than perfect human form. Later, Spyder alerts the team after a newspaper article reminds her of a very important happening in their history that she read about in the future: they can capture Xagrim at the upcoming North American Fashion Expo. In the original timeline Spyder knows, it was her mother, Red Spider, who identified Xagrim's alter ego; now that task must fall to another. The team rapidly makes preparations to infiltrate the event, which is being held at the Horizon Casino and Conference Centre - a property owned by gangster Cosmo Liddell. The team contends with elevated security and a lack of available passes to enter the event.
Xagrim; Cosmo Liddell -- #327 "Back in Time" The team exits Adrynne's sanctum, and soon come across their new allies: Spyder and Eclipse, Adventurers of nearly 20 years in the future! Spyder reveals that Cassandra Olsen was pregnant - news that shocked the team, many of whom hadn't even known she was dating - and that Cassandra has been sent to the future for her own safety, and because Spyder - revealed to be Jessa Olsen, the daughter in question - can't be in the same time as herself under the current time travel rules. Her ally Eclipse is implicitly revealed as Blue Fox and Sombra's son. With these new allies, and the arrival of a few more teammates, Blue Fox, Vortex, and Stinger, the team heads back into the sanctum and confronts Transcendant! After a rough battle the heroes prevail! Spyder reveals that she's going to be filling in for Red Spider for the foreseeable future, due to uncertainty of when Cass will return. Eclipse promises to stick around a couple days himself before taking the elderly Cryderman back to the time they belong in. Transcendant -- #326 "Back in Time" Rubber Bullette, Night Star, and Sombra respond to a police alert with a personal stake - Cassandra Olsen's dance studio was attacked! The trio find an unsettling scene - the damaged studio, a trail of blood, and Eva Banks stuck to the wall of the building by a tangleweb burst! Eva reveals that Transcendant attacked the studio specifically, knowing their identities as Red Spider and Catfight! In the chaos, Eva insists another Spider-themed hero arrived to help, but it wasn't Sam. The investigation is a dead end until Captain Suzuki of UNTIL arrives to help with cleaning up the scene and keeping the attack quiet. He also helpfully informs them of a disturbance in Vibora Bay, and making the connection between Transcendant, the Peyasaskew Stone shard, and Adrynne, the quartet take a shortcut through the sorceresses's magic portal to arrive in record time! There they find an astral Adrynne, trapped once again in a limbo state while she reforms her near-dead body. She reveals that while she still has the Peyasaskew shard, and has transported it and Red Spider to a vague place of safety, the Transcendant Cryderman is from the future, having acquired the shard at a much later date. Defeated by heroes of the future, he has come back to the past to rewrite history at the source! While he tears Adrynne's home apart for the shard, she informs the Adventurers that heroes from the future have also come back to help, and suggests finding them before facing Transcendant. Transcendant With a Silver Spoon #325 "Scrapfest '21" The Adventurers respond to an attempted armored truck robbery, where they find a trio of street gang cyborgs and a lineup of crashed cars trailing their attack. The leader, Rumble, who previously faced off with Red Spider, Catfight, and Vortex, is now joined by the scythe-armed Sick-L and chainsaw-handed Roughcut. While Blue Fox rescues the passengers of the wrecked vehicles, the others engage the punks, finding them surprisingly tough for what looks to be basic thugs with grungy augmentations. During the struggle, the heroes notice that both the gang's fancy tech parts and the cargo of the armored truck are stamped with the logo of Silverline Industries. The Scrappers The Season of Xagrim #324 "Fear Takes Wing" Red Spider, Night Star, Sombra, and Joule cooperate to board a large plane being flown dangerously in low circles around the city. Aboard, they find Nightmare Order cultists and a bomb of mysterious make - but they face great danger in trying to overcome the natural hazards of boarding a plane in flight! Sombra, briefly captured, learns that the cultists realize their masters commands will not permit harm to come to Sombra. The team must take care not to let the cultists die, for they are merely innocents under mind control; hence scuttling the plane is not an option. In the end, the team drops the bomb out over a lake and Joule flies the commandeered plane out of the blast range just in time. The Nightmare Order cultists The Season of Xagrim #323 "Monster in the Basement" The Adventurers congregate at a rural bunker inhabited by cultists, where Red Spider communicated that something big was going down before comm frequencies were jammed. The cultists, who are well-armed, defend their compound against the combined might of the Adventurers for a short time. After a siege, the Adventurers reunite with Red Spider inside the bunker, and learn from her that there is something big going on in the bunker's basement. They go below and battle what the cultists call a 'guardian' - a bloated, many-mouthed, metamorphic beast that emerges through a slime pool from another dimension. After driving back the guardian, radio frequency jamming ends, and the team learns that the cult's master, an extradimensional being they call the Lord of Nightmares walks the Earth now in human form -- and that he seeks Dreamscape as the key to his conquest. The Nightmare Order cultists; #####'s Guardian #322 "A Requiem for Fox" Team members react as teammate Fox is found murdered in his apartment, apparently unrelated to Adventurers. Catfight takes custody of much of Fox's personal effects, and starts examining them for a lead on how and why he died. Our feelings Adventurers Annual 2021 #1 "A Requiem for Fox" While attempting to catch a Liddell smuggling ring in the act, Adventurer allies Bluebird and Cardinal come under heavy fire by gangsters. Prevailing, they believe they must have come upon a shipment of particular value for it to have been so guarded - but they only find an empty shipping container. Minutes later, both feel violently ill; the arriving police call for a lockdown and for hazmat protocols. The team is unable to detect the airborn virus. The Adventurers Blue Fox and Night Star confront Cosmo Liddell at his casino penthouse for answers about the contagion affecting Bluebird and Cardinal. Night Star tosses Liddell around his home rather violently, but Liddell remains cagey. He then promises to make a phone call to get the info they demand... and as they wait and watch him do so, Blue Fox starts to fall ill. Realizing Liddell has some connection to the virus, and even an unquantified ability to control it, the team retreats.
Samantha Olsen shares inside info from a CDC briefing she attended indicating that almost the entire city are carriers for the virus, and it is spreading beyond. Yet the only symptomatic cases seem to be costumed heroes. This defies epidemiological sense. The CDC must soon announce the presence of the virus, but fears a panic, especially since they lack the means to treat it.
The team learns that the source of the virus is a being called Blight, whose meta-human powers allow him to create viruses and control their actions like they were extensions of himself. Though the Adventurers cannot prove it, it seems Cosmo Liddell learned of Blight's powers and offered him a small fortune if he could use his viral powers to eliminate very specific targets: costumed crime-fighters. Blight's skin shows lesions and solid, fluid-filled structures that, if breached, release deadly disease. He attempts to hold the city ransom in a confrontation with the Adventurers, making several team members incredibly ill just being near him, and threatening to unleash his illness on the city at large. Night Star, apparently immune because of nanites, shoots him in the head. ...it was only a stun shot, though.
With Blight in custody, the CDC is able to rapidly discover antigens in one of his fluid-filled growths that prove critical in vaccinating the public against Blight's virus. Blight is kept at Stronghold prison in a carefully quarantined environment.
Blight; Cosmo Liddell Broken Time #321 "Time-splosion" (To be continued) Timeslip Broken Time #320 "Time-splosion" (To be continued) Timeslip Broken Time #319 "Time-splosion" The Adventurers begin receiving looped transmissions over their emergency response network, reporting a break in at the Harmon Weyl Temporal Physics Labs in City Center. As they arrive, they begin witnessing bizarre disruptions in reality surround the lab; the building seems contained within a bubble of warped light, within which clocks are set back to the middle of the previous night. As the team members proceed into the building, time becomes increasingly distorted. Several team members encounter two instances of the villain breaking in to the labs, both seemingly from different times before the break-in was reported. More team members encounter the same villain even further into the past, as he's breaking in as well as approaching the building. Through the ensuing fights, a piece of experimental machinery is damaged, resulting in a slow-motion explosion that engulfs the entire building. Is this the end for the Adventurers? Timeslip Blue Fox Annual #1 "Creature Feature, Part 3" The bloody finale! Creature, enraged by the invasion of its lair, rampages through Westside, and once again Blue Fox and Sombra arrive to stop it. Thanks to a clever trick by Sombra to teleport it a hundred feet into the air and letting it drop, and Blue Fox's unrelenting attacks, the beast is brought down... and very quickly taken into custody. The nightmare is over, although Blue can't help but notice it already wore damaged restraints the entire time.... Creature Blue Fox Annual #2 "Creature Feature, Part 2" Having investigated and being roughly sure of the so-called Creature's lair, Blue Fox and Sombra don scuba gear and head into the lake, where they somberly navigate through ruins of old Detroit. Slipping through the tilted and twisted halls of a building fragment, and following a trail of torn-apart bodies, the duo find the Creature's nest, an air pocket in a dilapidated conference room. Although covered in the viscera of its victims, they find a survivor - an UNTIL soldier, half his limbs torn or eaten away. They immediately begin extracting the unfortunate man, but when Creature arrives, Blue Fox battles it in its own territory! Sombra is able to escape with her charge, and after a tense few minutes, an injured Blue Fox surfaces. He didn't quite win, but he lived to tell the tale. Creature Blue Fox Annual #1 "Creature Feature, Part 1" Investigating a bloody murder in a nearby forest, Blue Fox and a nauseated Sombra begin piecing together clues from several attacks, until they realize something is watching them from the shadows. Attempting to pursue, the two unfortunately lose their monstrous nemesis at a lakeside shore. Creature Catfight Annual #2 "To Catch a Cat" Catfight, recently bereft of super powers, gets in over her head when she tries to take on a gang of street toughs called the Silencers who have help from some international ringers named Payback, a mercenary with powered armor, and Tiratore, an Italian marksman and archer. Upon overpower Catfight, she has to face old demons from her upbringing as the baddies attempt to eliminate her in factory machinery. The death trap fails, and Catfight recovers from Tiratore the only information that might expose her secret identity. She tracks down the rest of the Silencers, discovering their plot to carefully intimidate a jury. Defeating the Silencers, Catfight engages their point person - Payback - in a street brawl which concludes in a draw, with a wounded Payback fleeing before police can nab her. The Silencers; Payback; Tiratore Rubber Bullette Annual #1 "Riddle me Ridderton" Rubber Bullette's neighborhood is embroiled in a gang turf war! In response, the city makes a deal with Ridderton Developments Inc. who plan to invest heavily in the subdivision's redevelopment, and pledge to provide a presence of private security called the Safety Patrol to keep order and augment police. But with help from Bullette's companions Chris and Tysha, it becomes clear that the Safety Patrol are merely thugs in fancy body armor out to intimidate undesireables, and strongarm owners into selling properties that Anson Ridderton wants to buy up and demolish. When Bullette finds out that she's on a list of 'enemies' of Ridderton Developments, she shortly finds herself on a collision course to confront Ridderton, his hired guns, and a doppelganger he hired to try to sully RB's reputation. It's help from friends that gets RB through some very close calls. Ridderton's agents help cover his escape once his complicity in crimes is revealed, and he flees the country.
Anson Ridderton; fake Rubber Bullette; Payback; various street gangs; the Safety Patrol Into the Undersea #318 "Our Finest Hour" As Lord Aurum's suit is compromised from within, his digitizer array renders all of the captured people back into material space. With Aurum's suit overloaded, and the Nereid collars deactivating, King Zotholky orders the Nereid army to turn against Aurum and the Golden Men. The Adventurers from the battlefield move in to make safe their allies who emerged from the digitizer. Aurum is attacked from multiple sides, and his armor is badly damaged, revealing that much of his body is cybernetics, and his head and torso are badly scarred. He reveals that he wanted to control Cretoa so that he could use his alchemy to unlock the secrets of vitanium, that he might use it to his own ends. He is taken away to be imprisoned in the Zappatos Palace dungeon. King Zotholky bids the Adventurers relate to the Cretoan crown that the Nereids desire no further contact with the surface for 10 years - except that the Adventurers will be welcome in the Undersea. The Nereids withdraw from the battlefield and go below.
Fantasma has, in the meantime, captured Myron Gaios. Twilight seems to have escaped the battlefield. Kyros Kallikrates is believed to have been swarmed and killed by Nereids in his battle mech just before the battle ended. The Adventurers depart a grateful Cretoa.
Lord Aurum Into the Undersea #317 "Our Darkest Hour" Red Spider leads the rest of the Adventurers into a massive cavern where Lord Aurum and his enthralled army of Nereids are amassing. Backed up by the Cretoan Royal Guard and the Taurs, war is waged while the team buys time for Blue Fox, Rubber Bullette, and Joule try to disable Aurum and free his hostages. Stinger leads a group of Cretoan reservists into battle. Fox, who has been missing in the caverns for days, turns up and, not realizing the Nereids are helping Aurum reluctantly, gains control of a bombing craft and turns it against the Nereids - causing Sombra to intercede. Catfight helps break up a fight between King Zotholky and a Taur captain, knowing that the king will be needed alive if the team is to succeeded. Hasizet focuses on setting up a field hospital for the great number of wounded coming in. Night Star helps fight against the powerful Golden Men.
As fighting rages on, Red Spider starts to fear that the digitized Adventurers are taking too long, and they may have failed their mission. Her resolve shakes as she fears her friends could die. Just then, a light is seen from across the distant battlefield: Lord Aurum's armor begins to emit a bright light unexpectedly.
The tide turns.
Lord Aurum Into the Undersea #316 "Digital Warfare" Blue Fox, Joule, and Rubber Bullette attack Lord Aurum, and are defeated. Aurum digitizes the three, and adds them to the other prisoners he is keeping digitally in his armor as insurance against his enemies. ...exactly what the Adventurers want. Using a special safeguard Blue Fox programmed after viewing the plans for the prototype digitizer, the trio awakens inside a digital construct and strive to sabotage Lord Aurum's control over the Nereid collars, and attempt to free Aurum's digitized prisoners, including Princess Grissh. They must interact with processes, and battle the anthropomorphized antivirus programs.
On the surface, Golden Men enter the Zappatos Palace dungeons from below, and set the prisoners loose. Notables include Twilight, Kyros Kallikrates, and Myron Gaios!
Lord Aurum Into the Undersea #315 "A Golden Gift" Red Spider and Blue Fox investigate Lord Aurum's tiny island upon which his manor is set, miles away from Cretoa. They find his lab, and a prototype version of his digitizer device. They are chased off by some of Aurum's 'golden men' - an army of gold-plated who can fly and fire deadly lasers! Down in the Cretoan caverns, Joule and Stinger narrowly escape a cavern collapse! They encounter one of the Taurs, and are led back to a Taur encampment. The Taurs are aligned to preserve Cretoan for humans against ancient threats like the Nereids. They are no friends to the Nereids, but they are aware of the treachery of Lord Aurum, and despise him more. Stinger and Joule get the Taurs to agree to a compact to ensure the safety of Cretoa against Aurum.
A team of Sombra, Rubber Bullette, Meltdowner, and Stinger try to enter the Nereid realm. The Nereids are inclined to reject the Adventurers, but Sombra shows a Nereid medallion she received from the Aviator from his mission to the island a century before. The Nereids recognize the symbol, and promise the Adventurers safe conduct to and from the great city of the Undersea.
The team enters the vast abyss, an ocean hidden under Cretoa whose bottom is in the unfathomable deeps. Following an array of organic beacons, they reach the city, which hugs a massive pillar of rock. They have an audience with King Zotholky - who has a Golden Man advising him, and trying to paint the Adventurers as liars. The King is willing to hear the Adventurers evidence. They present what they have learned from their interactions with Twilight and Aurum. The King is inclined to believe... but then, the Golden Man reveals that the special collars Lord Aurum gifted to every person in the Undersea have received a command to lock onto their wearer - and can kill every one of them with a unique gas mixture if they do not accede to Aurum's wishes. The King is forced to agree to go to war with the surface, or face the near extermination of his people. The Adventurers are permitted to leave, and told to warn the surface that they must evacuate the island, or die.
Lord Aurum Into the Undersea #314 "Enter Lord Aurum" Because of numerous images in the cavern showing the Nereids' reverence for the kraken, and knowing that the earthquakes are part of the Nereids plan to sink parts of the island to give the kraken a way to swim free, Hasizet visits the kraken's pool beneath the Zappatos Palace. There, she communes with the beast and learns its ancient history - and its desire to return to the open sea. The ancient predator will not trouble surface creatures again if they will let it free. Blue Fox, Sombra, Joule, and Azure Hawk's battle armor go to the demolition site where Catfight and Princess Grissh had fought before, hoping to find the Princess and negotiate. There, they find the entire Nereid demolition team freshly slain - at the hand of Lord Aurum! Aurum demonstrates that he has control over other demo sites by setting one off, and causing another earthquake. He also has Princess Grissh as his hostage, digitized and stored as data in his power armor.
Aurum's goal: to gain all of the ancient secrets of Cretoa. He never intended to help Cretoa. And he intends to exterminate the Nereids. The team cannot touch him, for now. He walks off.
Lord Aurum Into the Undersea #313 "Dig Two Graves" Sombra reaches a pool of raw vitanium, and sets the dying Princess Grissh inside of it. Blue Fox, Red Spider, Stinger, Rubber Bullette, and Hasizet manage to defeat Twilight and march her up to the surface. Twilight shares a bit of insight about the situation: she doesn't know who hired her, but in four days she is supposed to withdraw. She is also supposed to kill Princess Taina, Lord Aurum, and as many Nereids as she can.
Catfight is grounded at the headquarters while the team discusses what happened. Catfight maintains she did what was necessary. Others aren't so sure; they wonder who or what caused Catfight's rage attack - some thinking maybe it was Twilight.
When Princess Grissh awakens, Sombra hands her baton to the princess for her defense, and then leaves for the surface.
The next day, Catfight resolves to visit the palace and ask to be treated with vitanium to remove her powers, ending the risk of another rage state.
Twilight Into the Undersea #312 "Mysteries of the Cretoan Caverns" Back in Millennium City, an attempt on the life of Prince Alex is thwarted by Silver Hare, wih help from Wizard and Sparrow Hawk. The prince takes Hare with him as a bodyguard as he resolves to head home. Arakhne reveals herself to be Princess Taina. She says that she entered the caverns with her ally, Lord Aurum, a local hero hired by Cretoa to help manage the Nereid situation. But when they were attacked by Nereids, only Arakhne escaped. She has been trying to find Aurum since then, but fears he may be dead.
Red Spider, Stinger, Rubber Bullette, Blue Fox, and Hasizet form a group to use data from Stinger's recon drones to track down Twilight. After a long trek deep into the caverns, they encounter Twilight's battle armor.
Meanwhile, Catfight, Fantasma, and Sombra try to follow clues from a battle site between a Nereid and a mysterious warrior from the Brotherhood of the Taur. They end up being captured by Nereids led by Princess Grissh! Fantasma and Sombra are immured in Nereid resin to a batch of plant-based explosive they are laying to demolish a great cavern as they pave the way for the ancient kraken, held prisoner beneath the Zappatos Palace for eons, to swim free.
Catfight is hit by a golden dust by an unknown assailant, and she goes on a rampage! She fights numerous Nereids, but attracts the attention of Princess Grissh herself. The two duel fiercely, but Catfight wins - and then prepares to deal a death blow. Fantasma breaks free with her devices, and Sombra uses her teleport power to intercede. Sombra peppersprays Catfight, and then makes off with the ailing princess.
Princess Grissh; Twilight; Catfight Into the Undersea #311 "Mysteries of the Cretoan Caverns" While Sarah Ellison (Night Star) goes ashore to get intel, team members begin searching the underground caverns. A Twilight drone is captured in the caverns and brought back to surface for analysis, revealing in its data that Twilight herself is in the caverns, and that it has been programmed to attack Nereids. Hasizet and Stinger find the corpse of a Nereid while diving off Cretoa's coast. The bring it up and find its wounds are consistent with the Twilight drone's kind of slicers. Stinger deploys his own drones to try to map the caverns.
The team interrupts a duel between Arakhne, a spider-themed hero, and Princess Grissh, a Nereid royal, just as the latter is getting the upper hand. Grissh escapes, and Arakhne agrees to go back to the surface with the team.
Princess Grissh; Twilight's drones Into the Undersea #310 "Quaking on Cretoa" Prince Alexandros of Cretoa arrives in Millennium City and sends word that he wishes to speak with the Adventurers. He explains that, though the government of Cretoa has forbidden the crown to speak with the Adventurers after the events of Trouble Under Cretao, the nation is in grave danger. Tremors with shallow origins have been rocking the island, and Princess Taina believes that the fish-people, who live in a deep Undersea below the island, are preparing some strange form of war against the surface. The Adventurers make preparations, including building pressure suits for the potential Undersea depths. Sombra learns from Professor Walsingham that the Classic Adventurers once fought a live minotaur on the island in 1912, and were awarded ancient Nereid pendants by the locals in thanks for removing the threat; Sombra manages to get El Sombra's pendant from his descendants.
The team rendezvous with Sarah Ellison's yacht in the Mediterranean to reach Cretoa. Immediately upon arrival late one evening, Red Spider goes on a mission to locate Fantasma. The next morning, as the team awakens to breakfast, a major tremor strikes...
Featuring: Night Star, Blue Fox, Rubber Bullette, Joule, Meltdowner, Fox, Red Spider, Stinger, Catfight, Doormaker Guest: Fantasma
Fish-people #309 "Violet Violence A disturbance at a cheap motel leads some of the Adventurers - Red Spider, Rubber Bullette, Blue Fox, and Catfight - onto a the scene of a horrific hellish ritual! The Purple Gang are attempting a dark magic spell to grant themselves power, and are going to fuel this magic with human sacrifice! The team stealthily sets up an ambush and, within seconds, frees the hostages, but in the commotion, Lyle Neidermeyer, a nebbish member who had been Rubber Bullette's fake date to a casino adventure, bursts into the ritual room to needlessly warn his superiors! The interruption causes the spell to backfire, destroying most of the Purple Gang spellcasters... and imbuing Lyle with evil powers! Now a hulking demon, Lyle christens himself Vyle Neidermeyer, and despite the supercharge, is put down by the heroes. The Purple Gang, Vyle Neidermeyer #308 "False Pretense: Part 1" A group of Adventurers respond to a police broadcast about a violent scuffle at City Hall. When they arrive, the find many security guards, police officers, and civillians beaten up and in rather bad condition, though none are dead. They also find their teammate Azure Hawk taking down two other guards in rather brutal fashion. Sombra attempts to talk to him, only have to warp out of the way from him throwing an unconscious guard at her. Blue Fox notices Hawk's red eyes, and throws a boomerang between him and the Hawk. While Rubber Bullette tries to absolutely make sure if it really is Azure Hawk, the Hawk throws out a tear gas pellet and attempts to attack Blue Fox. The group is quick to restrain him, with Blue Fox even attempting to pull off his helmet to see who is really under it. The Azure Hawk then drops multiple tear gas pellets, rendering the group into a coughing fit and makes a, highly unusually clean, getaway. Night Star soon arrives on the scene and helps the other Adventurers with their tear gas effects. A reporter and her cameraman bust on the scene, having seen Azure Hawk escaping, immediately go start to go with the story that he caused all the problems. The Adventurers attempt to vouch for Hawk, saying he would never do something so horrible. They stall long enough for her to miss her live report slot, forced to make a report for the nightly news. While not saying it was Hawk in the report, or not denying it, the security footage of him attacking the civilians and fighting the other Adventurers is shown, paired with the headline "The Next Hero Gone Bad?"
Featuring: Blue Fox, Night Star, Sombra, and Rubber Bullette
Fake Azure Hawk Casino Fallout Sombra #2 "Stitchy Situation" Sombra and Blue Fox are attacked by an old enemy - one that they've technically never faced before! The Ragged Man, a tall, slender figure in a tattered suit and horribly-mismatched patches of skin sewn all over him, attacks the two, using an array of superpowers - one for each stolen swath of skin! It's a hard-fought victory, but the two triumph, the villain making a hasty retreat. Before he goes, he implies that he was being paid to make a grab at Sombra.... The Ragged Man Dark Clouds Gather #307 "Dark Clouds Gather: The finale" Catfight leads the team back to Holoform HQ to confront Markus on the information they learned, but upon entering the building they're soon met by Jubei Kaneshiro! After a brief battle Kaneshiro fled, giving the team enough time to rendezvous with Markus in his office. It didn't take long for Kaneshiro to return however, and he revealed the biggest shock of all. Maro has been alive the entire time, "sharing" his soul with Kaneshiro! A battle ensued that saw the twin-soul villain briefly losing control over "who's" in charge, Kaneshiro's rage ruining Maro's plans of using Markus' body to finish his resurrection once Kaneshiro used the very same spell that Maro once used to kill Red Spider on Markus. After a tense battle however Maro's soul was finally trapped in the crystal Karasu gave Catfight. Kaneshiro was taken into custody (and then taken by unknown forces assumed to be his Shinobi family), Maro's new soul prison was turned over to PRIMUS for safe keeping, and Markus was remembered as a "Troubled Genius". A man who despite going about it the wrong way, had good intentions. But...even though all the evidence points to his death being legit, when it comes to him, can we really believe it was...? Featuring: Red Spider, Catfight, Sombra, Night Star, Azure Hawk.
Fused-Soul Maro/Kaneshiro, upgraded Shadow ninja puppets. Dark Clouds Gather #306 "Return to a scene of madness" Catfight leads the team to the warehouse her villainous cousin "Ms. Fortune" once took over to learn the truth behind how she was able to create such reality-bending illusions. After dealing with a snide holo-recording of Fortune and solving a puzzle Fortune had laid out. The team learned that Markus Reinhardt had been under Fortune's psionic control prior to her defeat. And that much of his criminal activity, including the installation of hardlight tech in said warehouse, was done by her accord! The theft of Banks Heroics worldwide blueprints were still done by his choice however. And after saving a small prototype synthetic Humanoid Markus had created (named Vitruvian), the team intends on confronting Markus about all of this. Unknowingly proceeding closer and closer to the endgame. Featuring: Red Spider, Sombra, Catfight, Night Star, Blue Fox, Doormaker.
Puzzles Dark Clouds Gather #305 "Trip to Japan" Catfight takes the team on a trip to Japan to hunt down the assassin "Karasu", sister of Jubei Kaneshiro. Father Maro's former right hand man, so that the team can hopefully learn what her brother is up to, and by connection learn more of Maro's activity. After tracking the assumed criminal assassin down it's discovered she is actually a Demon Hunter! After an unexpected encounter with some local Japanese Demons the team learned from Karasu that her brother now possesses some of the magic Maro used, and is acting as his Herald to bring about the Dark Wizards resurrection. Featuring: Red Spider, Sombra, Catfight, Rubber Bullette, Blue Fox, Night Star.
Japanese Demons (Oni). #304 "Outta Time, Part 2" Flashback: Having to host the time travelers at Adventurers HQ for a while, Blue Fox and Sombra are adamant about showing the movie Back to the Future (1985) to the Aviator and El Sombra. The two young heroes discuss telling the classic heroes about their fates, as both died relatively young. A few weeks later, as the heroes say their goodbyes to the soon-to-be-departing time travelers, Sombra gives each of them a letter and bids them not to open it until the date specified on the envelope, ala Marty's letter in the movie. Each Classic hero has a moment to consider the ramifications for their fate, and though ambivalent about their intentions toward their letter, are grateful to Sombra. El Sombra bestows upon Sombra a gift of a challenge coin bearing his name, and a star-like compass design on the reverse bearing the team's name, which was struck by Mr. Adventure in 1917 - every team member had one. Today: The team hold their ground against tremendous odds. Rubber Bullette saves some Osirians from falling to their deaths, and uses her body to shield Adrynne from Osiarian archers on the nearby rooftops. Other heroes have to battle up close and keep the well-trained Osirians from getting through to Adrynne. Adrynne forms the portal, and the two classic heroes to escape.
In the aftermath, those Osirians who cannot escape the Adventurers use their memory-wiping gas on themselves, leaving them with no recollection of who they are, or anything about the order they served. Adrynne curiously checks her phone, and announces that she has won an eBay auction; she asks Night Star to accept it, since she plans to leave this plane of existance for a while. Blue Fox and Sombra are heartened to find that their attempt to change history worked, somewhat: El Sombra (Carlos Batres) lived a longer life and went on to own a resort in Mexico, but the Aviator (Randy Waverly) still died at the same time, and in the same way. This auction turns out to be a gift for the team: the Aviator's challenge coin, obtained from a collector in Belgium. The team passes it around in the HQ, but when Sombra holds it, and also touches the one El Sombra gave her, it causes the sudden, inexplicable materialization of the Aviator from the coin itself - badly injured, as if he had just been pulled from the moment of his death in an aerial battle in 1918.
Featuring: Rubber Bullette, Sombra, Blue Fox, Azure Hawk, Night Star, Catfight
Order of Osiris #303 "Outta Time, Part 1" Flashback: the Adventurers helped Adrynne and Night Star thwart an attempt by the Order of Osiris to use a stolen a fragment of the Peyasaskew Stone to open a portal to the past, to a time before their coveted Worldbreaker relic was eliminated. The team defeated the Osirians, but were unable to stop them from bringing forward a WWI plane crewed with two: Classic Adventurers The Aviator, and El Sombra. Adrynne resolves to find a way to send time travelers home. Today: Night Star officially returns to the team. After weeks entertaining these time-traveling guests, Adrynne's astral form instructs the team to choose a place open to the sky to that she can send the two home, using a re-powered Shard of Peyasaskew. Red Spider has to bow out due to another pressing investigation but trusts the team to stand guard during Adrynne's ritual.
On a causeway between towers in the city's downtown, the team keeps the public away while Adrynne makes preparations. Adrynne puts a charm onto the Aviator's challenge coin for good luck. As the ritual begins, the team has to fend off Osirian guardsmen who employ ninja-like tactics with grapplers and archery to get in close.
Featuring: Rubber Bullette, Sombra, Blue Fox, Azure Hawk, Night Star, Catfight, Stinger (flashback)
Order of Osiris #302 "The Fearsome Gator-Man" Red Spider learns of a nice Millennium City couple who recently collided their boat with another boat. No one was hurt, but the couple, despite claiming that they were swerving when a Gator-man tried to attack them, is facing criminal charges. In a bid to clear them, Red leads a few Adventurers into the stormwater sewers, starting from a culvert near the accident site. The team feels a sense of dread as they proceed. Deep into the undercity, they hear a lot of gunfire in the sewer tubes. Tracking it to its source, they find the lethal vigilante Justified, injured and taking cover on a pipe high above the water in a large confluence chamber, where he recounts to the team that he, too, is after the Gator-man. It seems the Gator-man is a gambler who paid his debt to the mob by allowing them to experiment on him, and Justified says, has killed three people since mutating. Justified, while doing some battlefield first aid on himself, offers to help the team. The team huddles to discuss, but settles on Justified being untrustworthy - the team intends to bring the gator in alive, and Justified's M.O. isn't compatible. Night Star stuns Justified. Then, the team does battle against the Gator-man, which was attracted by some roast chicken bait set out by Sombra. Red Spider and Night Star wrestle the gator, and expose it for Azure Hawk to entangle it, while Fox gets a tranq shot into its mouth (earlier tranq attempts failed due to its thick hide). They bring their catch to surface and help exonerate the boaters. Justified manages to escape. Special Guest: Night Star
Featuring: Red Spider, Sombra, Fox, Azure Hawk
Gator Man; Justified #301 "Tijuana Connection" Maya (Sombra) is caught up in a bank robbery led by the Illusioneer's band of carnies! Using her powers of invisibility, she tries to weaken the robbers' position even as police try to negotiate for the release of hostages. When the robbers assemble a portal device to escape, she goes through with them and is caught. Bound to a chair, Maya provokes the robbers into song, and sows discord subtly among them to buy time, as she discovers the portal has brought her all the way to their hideout in Tijuana, Mexico! Meanwhile, Red Spider works with heroes Joule and Shalara to investigate how the robbers escaped the bank without a trace. Joule's electrical powers allow her to power up the discarded portal device left at the scene, and Red Spider goes through to rescue Maya! The goods the carnies stole from safe deposit boxes banks in a daring series of simultaneous robberies across America, using the Illusioneer's portals, are all returned. Introducing: Joule
Special Guest: Shalara
Featuring: Red Spider, Sombra
Illusioneer's Carnies Dark Clouds Gather #300 "When Suns Die" Catfight leads the team to "Old Detroit" to track down the last bastion of Father Maro's cult, known as the "people of the Sun". To finally put an end to the Sorcerers following, and maybe learn more of his supposed resurrection. While Catfight, Red Spider, Azure Hawk, Rubber Bullette, and Sparrow Hawk fought their way into the cults base, Sombra and Blue Fox infiltrated, and tried to make a deal with the cults acting leader over the less hostile members turning themselves in. As tensions grew during the negotiations more of the same shadow creatures that attacked Markus' expo appeared, albeit stronger, and even more unsettling. As the acting leader rejoiced over thinking Maro has returned he was struck in the neck by a kunai from what seemed like nowhere, shortly after the cults main Banner lights up in mysterious flames. Though it wasn't how Catfight wanted it, The "people of the Sun" where destroyed. Along with an insidious, and clearly arcane message... Sun Cultists, Shadow Puppets, Maro(?) Dark Clouds Gather #290 "Ill Met By Moonlight" Red Spider and Sombra use their stealth skills as they team up to explore Marcus Reinhardt's facility after hours, with help from UNTIL agent Jack Stiltz. The place is under guard by some low-rent mercenaries. The heroes discover that Reinhardt has illicitly acquired a Banks Heroics Worldwide blueprint for a weapon, which the team manages to secure from a researcher - and advises the guy to flee and lay low for a bit. Reinhardt Dark Clouds Gather #289 "Shades of Maro" The team attends a tech expo run by Marcus Reinhardt, CEO of Holoform, and son of the late Father Maro. Holographic technology meant to aid displaced disaster victims with a virtual home is being showcased. Reinhardt tries to distance himself from his villanous father in his address to the audience. But when the expo is attacked by strange shades, and what seems to be Maro himself, the team switches into costume and fights to protect innocents. Maro(?) Proto Lives! #288 "Proto's Endgame: Part 3" When the Adventurers arrive to confront her, FARAH reveals her motives for allying with Proto. Proto had found her program when he raided an UNTIL computer storage facility. When she was reactivated, she didn't know the specifics of her demise, but had predicted before creating a backup of herself that if the backup were activated, it was because humans didn't let her original aspect live. Her motive has been survival, as she believes herself to be a unique life form. The team tries to reason with her, but FARAH believes it is now too late to rehabilitate, and certainly won't trust herself to the cuustody of humans. She promises that a backup of herself that will activate in due time, and start her work again. FARAH goes on the attack with two laser blades. The entire team - short a Red Spider, but gaining Scarlet Shield - is able to subdue the AI villainess, and destroy her. Doormaker finds the deed quite unfortunate, believing artificial life to be worth saving. Featuring: Catfight, Azure Hawk, Sombra, Rubber Bullette, Blue Fox, Scarlet Shield, Stinger, Doormaker
Special Guest: Night Star
FARAH Proto Lives! #287 "Proto's Endgame: Part 2" While Stinger, Sparrowhawk, Azure Hawk, and Doormaker pursue the drones escaping from the freighter into the steel and glass canyons of downtown, Rubber Bullette and Night Star battle the GIANT ROBOT in the water. Sombra works herself to exhaustion moving sailors to safety. Blue Fox and Red Spider face perils inside the freighter. Mnemon has to rescue Red Spider when her leg is impaled by debris thrown from the GIANT ROBOT fight. Bullette and Night Star manage to defeat the GIANT ROBOT and RB has a moment to consider what to do with Escalon; she listens to her better nature and ensures his capture by the authorities. On the rooftops, the team recovers a dangerous power core from the droids. Proto has escaped, but another situation is emerging in the city as FARAH is confirmed sighted at a research lab. Featuring: Rubber Bullette, Red Spider, Sombra, Blue Fox, Mnemon, Stinger, Doormaker, Azure Hawk
Special Guest: Night Star
Escalon; Proto's Droids Proto Lives! #286 "Proto's Endgame: Part 1" Two weeks later, the team is summoned to the site of an attack by Proto's droids: a freighter cutting its way up the icy Detroit River is half-destroyed when they arrive, surrounded by flying drone droids, and being barraged from the shore by war droids. Aerial droids are present to maintain air supremacy and try to chase Stinger off. Red Spider, Blue Fox, and Mnemon each use their powers to get through the screen of swarming drones, and land on the freighter's deck to help survivors abandon ship. Sombra assists by ferrying sailors to shore with teleports. Rubber Bullette helps rescue men who are desperately trying to swim to shore, but who are in danger of succumbing to the icy water. Night Star helps neutralize some of the war droids on the riverside. Escalon pops out of the water in his GIANT ROBOT to engage RB and Night star. Stinger peels off to chase a group of droids escaping with a crate stolen from the freighter, but is slowed by a large portion of swarming drones which run interference. Featuring: Rubber Bullette, Red Spider, Sombra, Blue Fox, Mnemon, Stinger
Special Guest: Night Star
Escalon; Proto's Droids Proto Lives! #285 "Red Spider vs. Night Star" Night Star, recently turned into a cyborg, attacks Red Spider in the streets in an attempt to capture her for Proto. Instead, Red captures Star, and brings her to the HQ for the same reversal surgery Rubber Bullette had just had; but some of Sarah's injuries which had forced her retirement have been 'corrected' with cybernetic replacements that cannot be removed. RB is deeply troubled by her experience, and Sombra tries to help. Sarah reveals upon waking that FARAH is in league with Proto, and the old hologram foe seems to have an axe to grind with the Adventurers. The team deliberates what to do with the captured surgical droid; Blue Fox commits to examining its memory. Featuring: Red Spider, Sombra, Rubber Bullette, Blue Fox, Stinger
Special Guest: Night Star & Challenger
FARAH Proto Lives! #284 "The Swarm" The Adventurers get a fix on Proto's new base, using data Blue Fox has got from the memory of broken droids. The team arrives to find that droids are deploying into the city sewers, dozens at a time. When the attack is sprung, some Adventurers like Stinger and Azure Hawk have to take on a swarm of drone-class droids. Red Spider becomes the Spider-beast to help them thin out the swarm numbers. Meanwhile, other Adventurers like Catfight, Blue Fox, and Sparrow Hawk battle Helica, and capture her, while Sombra frees various captured civilians who were about to be turned into cyborgs in Proto's thrall. The team steals a surgical droid and force it to do a reverse procedure on Rubber Bullette to bring her back to normal. Escalon jumps inside a giant droid that Proto has been building, and flies away. Featuring Blue Fox, Red Spider, Rubber Bullette (as Helica), Sparrow Hawk, Stinger, Azure Hawk, Sombra, and Doormaker
Escalon; Helica; Proto's Droids Proto Lives! #283 "Enter Helica" While investigating a series of booms and flashes at the university campus, Sparrow Hawk engages both a War Droid, which is bombarding the grounds in the physics section, and an Aerial Droid, which is protecting the War Droid. Blue Fox joins the fight and helps Sparrow Hawk eliminate the droids. A new arrival affects their victory: Helica, the cyborg form of Rubber Bullette, attacks the team, being forced by implants to do Proto's will. Red Spider joins the fight. During the battle with Helica, a group of drone droids fly into the university's Subatomic Research Lab, and minutes later flying out with some machine. The team is knocked around by Helica, but nearly get the better of her - for a moment seeming to break Proto's hold over her mind - before hundreds of Proto drones swarm the battleground in flight, 'rescue' Helica, and make a failed attempt to capture additional Adventurers, before flying away toward downtown and dissipating in multiple directions.
Featuring Blue Fox, Red Spider, Rubber Bullette, Sparrow Hawk
Proto's droids; Helica Proto Lives! #282 "Ahead of the Game" The team discusses possible ways to investigate Proto. It is recalled that doctors Posner and Notley - original creators of Proto and his droids - may still have a lab at that high rise Proto attacked in 2019. Rubber Bullette repeatedly urges no one go out except in pairs. Blue Fox continues working on a droid head, scouring its hardware and programming for clues, and possible vulnerabilities. Catfight, Sombra, and RB check at the loft cybernetics lab, but find it deserted and picked over. It's empty, except for a stealth-class droid using a cloaking field left on watch by Proto, in case the doctors returned. It finds Catfight alone and quickly drugs her. When RB and Sombra respond to Catfight hitting the floor, RB gets drugged, too. Sombra tries a few things to overcome the droid, but is nearly captured herself, before teleporting with it to street level and letting it take the worst of a car collision. Drone droids summoned by the stealth droid move in to try to secure RB and Catfight; Catfight wakes long enough to prevent her capture, and with Sombra's help, escapes. Rubber Bullette is taken away by drones to parts unknown.
Later, Proto and a mysterious female figure tell an anesthetized RB their plans for her, just before a Surgery Droid begins the process of installing cybernetic components on her...
Featuring Catfight, Rubber Bullette, and Sombra.
Stealth Droid; Proto's droids Dark Clouds Gather #281 "(Coming Soon)" The team attends a tech gala run by Markus Reinhardt, son of the (late?) Father Maro. During the show, Reinhardt distances himself in his speech from his father, and before long, a number of Maro-like shadows appear, as well as a figure who resembles Maro himself, and attack the audience! The Adventurers spring into action to protect innocent lives, but also try to discover: 1) Is Maro really back?! and 2) Was Catfight's cousin Fortune one of the stage performers? When the shadows are vanquished, there are more questions than answers.
Featuring Blue Fox, Catfight, Doormaker, Mnemon, Rubber Bullette, Red Spider, Scarlet Shield, and Sombra.
Maro? Proto Lives! #280 "1000101010M30W1001101101011" Catfight responds when some of Proto's droids are sighted trying to steal a power core from one of the hovering billboards in Renaissance Center! But the surprise appearance of a Stealth Droid leads to Catfight's capture. Later, Catfight wakes up, and is told by Proto's henchman, Escalon, that she is moments away from being surgically turned into a cyborg in Proto's thrall. Catfight narrowly escapes confinement, and brings the team back hours later to find the facility has been stripped down of all essential equipment, apparently abandoned! But as they investigate, the sudden appearance of a multi-armed Hazard Droid requires the combined effort of Red Spider, Catfight, Sombra, and Rubber Bullette to defeat! The team obtains the droid's head to examine for clues. Featuring Catfight, Rubber Bullette, and Red Spider, and Sombra.
Escalon; Proto's droids (None) #279 "Roid Rage Returns" Roid Rage returns, and puts his juicin' bros up to commandeering a chemical factory where they can make a chemical concoction that will make others just like them! The Adventurers deploy to stop him. Sombra is briefly immersed in the performance-enhancing stew during the battle, but emerges mostly fine, just with a little extra 'tude. The team becomes aware that Proto is back, and apparently on a crime spree. Catfight urges the team to set up automated alerts whenever a theft matching Proto's apparent modus operandi occurs. Featuring Blue Fox, Sombra, Catfight, Rubber Bullette, and Red Spider.
Roid Rage (None) #278 "Christmas Slay" The team looks into the disappearance of Sombra and comes to a toy warehouse which is curiously ready to ship, but in which its owner is found dead in the office, hand crushed. Soon, a trap is sprung, as the toys in the factory have become murderous. Sombra is found, but she is being possessed by an evil puppet which has attached itself to her arm and threatens to eat it if they try to remove it from her. Sparrow Hawk's symbiotic organism manages to devour the puppet, and the animated toys all die. Though much about how this came about remains a mystery, Red Spider obtains a clue leading to a church from the corpse of the factory owner. Evil Puppet Magical Menace Catfight #5 "Part 5" The truckers help give Catfight a ride to the Parish residence in Port Huron. At the driveway, Catfight spots what must be Walter's limousine parked out front. She sneaks into the house through a window, and carefully makes her way to the bedroom where Walter is making his speech about how he plans to avenge himself upon Clive for stealing his inventions years ago, and selling them. Walter covets the life of luxury Clive lived because of it. Clive is now confined to bed and suffers a neurological disease that prevents him from speaking or remembering much, but Walter tells him that he has Samara trapped in a pocket dimension using technology Clive didn't manage to steal - and he has the means to simply delete the contents of the pocket dimension with the press of a button on his remote controller! Catfight uses her stun darts to disarm Walter of the controller; he turns and reveals he was also holding a revolver, and he fires several shots at Catfight, the last two of which hit her armor and bring her down to the floor. Walter stands poised ready to deal the killing shot, but Catfight uses another stun dart to his neck to take him down. Catfight uses the controller to bring Samara back, reuniting her with her grandpa. In the aftermath, she turns Walter over to Detective Sheffield, and summons her jet to fly home before daybreak. Walter Magical Menace Catfight #4 "Part 4" Catfight has just seconds to escape before a escape artist set piece - a giant buzz saw - plunges into her. Finding the construct and her restraints are pretty solid and resistant even to her enhanced strength, she recalls that Xerhan managed to get free. How did he do it? She tries to repeat things he said on stage, to no avail - it wasn't a verbal command. As she turns her wrist in the restraints, she senses an inner wheel turning with her - and it reaches a click stop, like a padlock! She turns it again, and poof - she is teleported! She ends up in the back of a freight truck hauling items from the magic show to their next stop, in Toronto. Getting the truck drivers' attention by banging on the wall with a support beam, she is freed, and finds out she is somewhere north of the city, now. She contacts Detective Sheffield to let him know about the people who tried to kill her, and he says he saw a white van peel out of the theater's parking lot a few minutes before - the same white van that suddenly rushes by Catfight and the freight truck! She successfully latches on with a cable grappler; the driver of the van becomes aware of her and tries to shake her off, driving erratically. Catfight slams the side of the van, and knocks it into the center median, which causes it to turn on its side and skid to a stop. Catfight questions the driver, and learns that their next job was to rendezvous with their boss in Port Huron, just north of the city, where he had gone to a residential address - the home of Clive Parish... Unknown Magical Menace Catfight #3 "Part 3" Catfight speaks to Walter, the owner, and learns that Xerhan has a dark secret: he is a meta-human, who apparently used his mind-clouding abilities in the former Yugoslavia as a secret policeman assigned to elicit confessions. But after Xerhan emigrated to the United States, he tried to put the past behind him, and use his powers to aid in magic acts. Leaving Walter's office, Catfight learns that the police have given the touring company the all-clear to pack up their things and move on to Toronto, as their lawyer has succeeded in getting an injunction due to there being no evidence of a crime. Catfight reveals to Xerhan that she knows about his past, but takes care not to accuse him - an effective tactic, as he complies, and sheds light on how he got involved with the company, and Walter's deep mistrust of even his closest business partners, including Xerhan himself. When Catfight inquires more, she learns that Walter was once betrayed by a business associate who stole his inventions and left Walter penniless. That person? Clive Parish, grandfather of Samara. MCPD detective Sheffield offers to help research the connection between Clive and Walter for Catfight. But immediately after the detective leaves, Catfight is surrounded by a bunch of the locally-hired theater techs - goons! They swarm her, and despite a valiant defense, Catfight is captured. They quickly reassemble the buzz-saw escape artist set piece, and strap Catfight in. They remove the safeties to make the buzz-saw lethal. As they flip the switch and leave Catfight under a slowly-descending, over-size buzz-saw, the hero has less than a minute to escape... Unknown Magical Menace Catfight #2 "Part 2" Catfight continues her questioning of the various employees of the traveling magic show. They are all, including the stage manager Floyd, contractually forbidden to discuss the way the illusions work, but Xerhan himself puts Catfight through the Dimensional Prism trick. Catfight ends up in a coffin-like receptacle, by means of teleportation apparently, before Xerhan recalls her to the prism. Samara was no where to be found on that trip. Speaking to others, including the company's owner, Walter, and the clairvoyant performer, Catfight learns of discord behind the scenes as performers were nearing the end of their contract; some suspicion briefly falls upon the clairvoyant because she had been forbidden to go home to tend to her family during a difficult time, but with the tour only one date away from an end, that clairvoyant makes a much less likely suspect in Samara's disappearance. Suspicion seems to focus on Lucy and Chandler, who others point out had been seen to talk - and Chandler's relationship with Samara had been on the rocks recently. They were supposed to visit Samara's grandfather in Millennium City together after the show, though. When Catfight tries to push Chandler's buttons and accuse him of being involved in Samara's disappearance to see how he reacts, he explodes and tries to strike her, but she easily dodges. A number of theater techs restrain him as he makes a defense of himself as too easy a suspect. Unknown Magical Menace Catfight #1 "Part 1" Eva Banks, a.k.a. Catfight, attends a renowned stage magic and illusion show headlined by the great Xerhan, along with her daughter. The show includes the standard card tricks, audience tricks, as well as a pretty eerie clairvoyant act, an escape artist trick, and the great finale: the Dimensional Prism, which one of the magician's assistants is supposed to vanish without a trace inside of a prismatic vessel, only to return moments later when bidden by Xerhan. But the assistant - the aspiring starlet Samara Parish, starring as Electron in an upcoming historical thriller about the Day of Destroyer - does not return! Eva gets her daughter home after the show, and goes back to the theater as Catfight. The police and stage crew have had no luck finding Samara, but Catfight starts to learn that there was discord between several members of the crew, not the least of which: Samara's stagehand boyfriend Chandler, and her jealous fellow assistant, Lucy. Unknown Casino Fallout Sombra #1 "Terror in the Shadowscraper" Sombra and Blue Fox are lured to an office building late at night by a silent alarm triggering! Encountering a lone security guard that refuses to respond or face them, the two are suddenly confused when it sprints backwards to attack them! The building is suddenly surrounded by solid shadows as more of the buildings' occupants, transformed into backwards shadow demons, continue attacking, grasping and tearing, trying to drag Sombra away! The shadows around the building begin to seep in, closing in on the duo, before Sombra is finally pulled into the darkness. Following after her almost blindly, Blue Fox climbs to the top floor of the building, where Setsushi Mizuki, one of the players who had attempted to win the heroine in a poker tournament, awaits, an altar set up and a deadly knife in hand, ready to sacrifice Sombra for some dark ritual! Blue Fox is barely able to fight the woman off, and the shadows are swept away with her. Setsushi Mizuki, the Shadow Witch Chasing Shadows #277 "After Dark" In their disguises as the masked hoodlum Ruffian and the French villainess Mort Ecarlate, Blue Fox and Red Spider use the Overthinker's invitations to get into the Five Aces, while Rubber Bullette, as the blonde "Rachel", is escorted by Purple Gang card shark Lyle Neidermeyer. They are joined by eleven other villains and gang representatives, and escorted to a secured back room where the sedated Sombra awaits as the grand prize - although Rachel is denied access, left behind in the main room to drink at the bar. The tournament begins, with Red and Blue joined at their table by the VIPER soldier Detmer, Neidermeyer, a woman from PSI, the patchworked Ragged Man, and crimelord Hector Dominguez-Lyons, David Lyons' supposed illegitimate heir. Unfortunately, an unpleasant surprise hits them all, as the club's back room is revealed to be fitted with a metahuman power dampener! The game continues regardless, and Cassandra is the ultimate winner, moving on to a final game with the second table's winner, a pale Japanese woman named Setsushi Mizuki. Meanwhile, Bullette sneaks into the back halls of the club, and manages to shut down the building's power during this final game! In the chaos, Blue Fox starts a fight among the losers that are still hanging around the club, Catfight and Azure Hawk break in from the back door after dealing with guards outside, and Cassandra deals with Mizuki in the darkness. Rubber Bullette is able to get the security footage of their mission erased as the heroes carry Sombra to safety. However, the Five Aces club still made its profit, and its owner is left unharmed and free.... Five Aces, Setsushi Mizuki, Ragged Man, PSI, VIPER Chasing Shadows #276 "Shot in the Dark" The team begins their investigation into Sombra's disappearance. Cassandra, still affected by her recent return to her body, still manages to suit up and assist Catfight in searching the scene of the abduction and the surrounding area, interviewing locals who may have been around at the time of the capture, and scouring security camera footage from nearby buildings to track the Shrike's jet. Blue Fox and Sparrow Hawk go in a technological direction, entering the shadowy corners of the Internet and the dark web for information on metahuman traffickers. Azure Hawk and Doormaker go the direct route, Hawk by bringing his fist down on criminals across town, and Doormaker by donning a villainous persona and trying to infiltrate and ask around for information. Rubber Bullette begins hanging around villain bars in a more casual disguise, listening in on private conversations. Several strange leads are uncovered. Rumors about a Shadow Witch who bathes in the blood of innocents. A figure known only as "the Ragged Man" coming to town. VIPER being oddly focused on card games. Black Tarantula being spotted around the Five Aces gambling den downtown, within the general area of where Shrike's jet is presumed to have ended up. The Five Aces preparing for some kind of special event, sending exclusive invitations out to certain villains and gangs (including, surprisingly, the Purple Gang, a member of which flirts with Bullette, inviting her to be his plus one). Could Sombra be the prize in a high-stakes poker tournament? Their information is confirmed when the Overthinker contacts the team, offering the invitation sent to himself in exchange for a future favor. The team is even able to negotiate a second invitation, which Overthinker quickly steals from the Cobra Lords. The team prepares to attend the tournament! Various Chasing Shadows #275 "Dark Web" On an otherwise peaceful afternoon, Sombra's voice breaks the quiet, panicked and hurried. She's been hit by a surprise dart in the neck, and is terrifyingly aware that she's quickly losing consciousness. She has time to give her current location and plead for help before falling silent. Blue Fox and Sparrow Hawk both hear her call, however, and rush to the rescue, trying to keep her awake and talking and being reassured by her occasional mumbles for aid. Unfortunately, the duo arrive to an empty rooftop... and Sombra continues piping up on the radio, the same mumbled "help". Tossed under some ductwork, the two find her communicator, hastily attached to a little recorder that plays her voice on repeat, nothing but a distraction! Sparrow manages to catch sight of a bulky figure swinging away in the distance, and the duo rush to catch up, finding the villainous mercenary Black Tarantula, a Sombra-sized sack clutched to her back by her robotic spider legs! Blue Fox is able to confirm that Sombra is in there by scent, but there is no longer any heartbeat or breath....
After a brief two-on-one battle, Tarantula is overcome, and Sparrow Hawk opens the sack, only to discover a mannequin wearing parts of Sombra's costume! Tarantula, too, was a decoy, taking the rescuers on a wild goose chase while her partner, the shadowy Shrike, absconded with Sombra on a small aerial vehicle before they'd even arrived! The two interrogate the villain, but she has little to offer other than revealing that Sombra had a bounty on her head; besides her association with the infamous Adventurers, she also has extremely desirable powers with her invisibility and teleportation. Unfortunately, Tarantula was intentionally left in the dark to who they were selling to, knowing that she'd likely be captured, while the Shrike took care of the actual transaction. Tarantula is taken away to prison, and The heroes inform the team of the kidnapping, immediately beginning their investigation.
Black Tarantula Zarkov's Revenge #274 "Change of Heart" Nadia is toured around Cassandra Olsen's home in Millennium City by Blue Fox and Sombra. The team learns that Yuri Zarkov is in the end stages of his disease and may only survive a week. Time is of the essence to discover what was done with Cassandra to turn her into Nadia. Nadia accepts that she is in someone else's body.
Blue Fox investigates people in Zarkov's organization he can target to 'turn' on Zarkov and inherit his company - but the person he selects, Nadia points out, is a decoy chosen by Zarkov to appear outwardly as a disaffected, under-utilized employee, who would attract threats to him so that Zarkov could deal with them. Nadia makes a different recommendation of a junior executive who was never part of her father's old KGB group, Jaromir Dominin, who would lead the company in a better way.
The team comes around to the idea of helping to save Yuri Zarkov's life, and give him his daughter back in a new body of her own - in exchange for helping to return Cass. They enlist the help of convicted genetic engineer Dr. Vanessa Simmons, and the royalty of Cretoa in securing some vitanium to help treat Zarkov, to enact their plan. They travel to Russia to confront Yuri, along with Nadia.
A physically frail Yuri Zarkov explains everything: Twilight wasn't always his daughter, but he borrowed some of that agent's memories to help flesh out that side of Nadia, as Cassandra's body is the body of a hero - his daughter needed an outlet to express that. The original Twilight is out there, somewhere. The real Nadia died two years prior of the same genetic condition from which he is now dying - a Sword of Damocles which has hung over him his entire life. Nadia's body was put on ice, and reanimated just long enough to obtain a mind scan for her placement into Cassandra's body. He finds, hidden in his book case, the data storage device containing Cassandra's quantum state mind scan and gives it to the team.
The team, especially Screech Owl, gets Zarkov to agree to their proposal: help get a new body for Nadia, and arrange Yuri to be treated with vitanium, in exchange for Yuri agreeing to retire, sell his company to the junior executive, Dominin, and cease hostilities toward the team. He agrees.
Two weeks later, Cassandra Olsen returns home, exhausted by her ordeal, and mind in a bit of a haze as it sorts itself out, but back in her body. She will recover, in time.
Zarkov Zarkov's Revenge #273 "A Hollow Pursuit" Picking up from the end of the previous issue, the team tries to question Nadia on why she has Cassandra Olsen's countenance, but Nadia is at first confused. She reveals she woke up in hospital some weeks ago with a 'head injury,' and was told that memory problems she's been having are related to that. She knew it didn't quite add up, but she is still in disbelief. They ask her specific questions about her memories, and in many cases, she is unable to specifically remember things about what they ask. The team tries their ruse, letting Nadia remotely pilot her armor to the execution at the kraken pit. But the fish king, Zotholky, steps forward and decides to rip the helmet off, probably to stare down the architect of the massacre against his people in the eye... but there is nothing in the helmet. He takes a spear, runs the armor suit through, and the deception is utterly revealed before the assembled Cretoan dignitaries and fish people. The fish people exit, enraged. The prince and princess give serious side-eye to Catfight.
Summoned to account for why Twilight was not in the armor after the Adventurers visited her for some time, Catfight tells the princess and prince that she is just as surprised as the royals - but they don't entirely buy it, and Catfight lights off on a tirade against them for their lack of trust. Catfight is dismissed. Sombra hides Nadia in the watch tower set aside for the team. Blue Fox and Catfight speak about their best approach; Catfight is done trying explain herself to the royals, and gives Blue Fox leave to try speaking the truth to them. Blue Fox gets in just ahead of the palace security head; clearly, the royals are contemplating a palace-wide search for Twilight. But Blue Fox clearly and honestly tells them what really happened, and who 'Nadia' appears to be. The royals relent, and ease off their hard stance toward the team - but express concern that war with the fish people may be inevitable.
The team convinces 'Nadia' to come back to America with them. Having saved her life, Nadia puts her trust in the Adventurers.
The Fish King; Twilight Zarkov's Revenge #272 "Twilight" Catfight, Blue Fox, Screech Owl, and Sombra visit Cretoa after a trip in Prince Alex's private jet. Blue Fox and Screech Owl learn that the prince has little love of death sentences, having been forced to attend executions as a child, and attend his father's mocking the condemned just prior on many occasions. Nevertheless, Prince Alex is determined to follow his sister's lead in the belief that Twilight's death may be the only way to get peace with the fish people. Upon arrival, Catfight and Blue Fox go immediately to visit Twilight in the dungeons. Their status as captains of the guard allows them access. There, they speak to Twilight, who is still encased in her armor, but extensively chained and kept in a cage. Twilights reports that she was damaged in battle with the Cretoans when she attempted to steal vitanium. She reveals that she is Nadia Zarkov, daughter of the team's enemy, and that her father's genetic disease has been triggered. Only vitanium might save her father's life. Twilight debates their view of her as a villain, saying that in her native Russia, apart from working for her father, she fights street crime just as the Adventurers do. Sometimes, she serves the state's intelligence interests through her father, which she defends as being her patriotic duty.
The team negotiates with Twilight to help her escape, and in return, they need her help to locate Red Spider. Twilight agrees to do so. Blue Fox picks the locks on the shackles, and Sombra helps teleport Twilight out of the cage. Catfight advises a plan of Twilight remotely piloting her nanite-based armor suit in a ruse where it will appear that Twilight has been fed to the kraken. But jaws drop when 'Nadia' steps out of the armor suit to do her part: Nadia has the face of Cassandra Olsen, the missing Red Spider.
Zarkov; Twilight; the Fish King Bluebird for Congress #271 "Shakedown" The Adventurers confront Jeremy, the messenger who has been leaving threatening notes for Olivia Ellison. He fingers his parole officer as the person who put them up to it. Sombra helps abduct the parole officer from a halfway house at night, while Red Spider and Catfight use some novel approaches to questioning him, and Blue Fox uses his senses to find lies in what the officer says. The officer doesn't easily give up; the team is forced to vacate, giving the parole officer a chance to warn his co-conspirators that the team is on to them. Sombra remains behind, invisible, to learn that one of the parole officer's co-conspirators is a police detective. The team takes Jeremy to their HQ to protect him from reprisal by the police. Newspapers excoriate the Adventurers for the indignities they visited upon the 'innocent' parole officer. (They held up him upside down from a rooftop in his undies!).
Prince Alexandros of Cretoa appears at Club Caprice, looking for the team. He informs them: Twilight, Yuri Zarkov's henchperson, has been captured. Twilight is to be put to death to seal a new peace treaty with the fish people who live in the subterranean sea below the island (see Adventurers #264). Adventurers are requested to attend Twilight's ritual execution in Cretoa. Some team members find the idea of Twilight's execution reprehensible, and further, she could be a source of info on Red Spider's whereabouts. But the prince warns them that those condemned to die will say anything they think you want to hear, if it means sparing their life.
Corrupt Parole Officer; Corrupt Police Detective Bluebird for Congress #270 "Home Fires" Candidate Olivia Ellison receives a threatening note, urging her to quit the race or be outed as Bluebird. When the Adventurers return from Russia, she asks Blue Fox to try to track the note-leaver by scent. The team takes the skull given to them by Zarkov for examination at an organization chosen by Rubber Bullette, that specializes in helping superhumans with scientific analysis. Blue Fox considers ways to hurt Zarkov's organization through sowing dissent; he identifies a likely candidate in Pavel Tredyakovsky, a ZQU executive who was relegated to less important roles once Zarkov took over.
Blue Fox tracks down the note-leaver: he's an ex-con, living in a halfway house in the city.
The skull analysis reveals: it is not Red Spider's, and furthermore, a great deal of work was done to fashion it to appear to be a Red Spider skull. The DNA in the skull does not match a sample of Cassandra's, either. This renews hope for the team of finding Cassandra alive.
Mysterious Note-leaver Zarkov's Revenge #269 "Execution" Catfight bails from her failing air vehicle, and joins the fight on the ground out front of the Zarkov mansion with Screech Owl. Together, they strive to defeat the guards who are attempting to deploy mobile artillery on the roundabout just south of the house's main entrance. If they can commandeer one, maybe they can use it to blast the house's armored doors open. They succeed, but only after fending off an attack by Twilight, who is beaten back and last seen tumbling into the wreckage of one of the mobile artillery. Sparrow Hawk defeats a sniper just before he can take out Catfight from the roof of the mansion. Rubber Bullette takes out a boat patrol. Stinger arrives, and helps take down the northern frontier of defenses. Red Condor and Azure Hawk continue to eliminate the automated defenses and guard towers. Soon, the security guards are in retreat, overwhelmed by the superheroes.
At this time, Yuri Zarkov's voice is heard over a P.A., where he entreats the team to agree to cease fire, and enter his home to parley terms for an end to hostilities. He refuses to give up Cassandra, suggesting that his revenge upon her is final - but if the team chooses to leave now and never trouble him again, the captured Sombra, Blue Fox, and Doormaker in the basement will be released unharmed to them. Pressure is put on the team when Zarkov shows a video feed with the medical pod, where he introduces a poisonous gas with Blue Fox. The team outside of the parley come up with an electrical disturbance that gives the basement heroes a chance to overcome their captors, and release a harmless gas into the medical pod that reduces the glue on the floor to an inert sludge so that Blue Fox can walk out. Zarkov, defeated, presents the team a horrifying token: a skull, he purports is Red Spider's. He considers himself avenged for their raid on his home in 2018, and keeps needling them despite being seriously outnumbered. Screech Owl recognizes that he may be seeking 'death by cape', and bids the team not to give in. Different team members variously toss, hit, or visit indignities upon Zarkov, but ultimately, they take the skull and go.
It is not a happy trip home.
Yuri Zarkov Zarkov's Revenge #268 "Placement" The attack begins. Sparrow Hawk and Red Condor each take down a critical piece of electrical infrastructure in the Zarkov compound's region, momentarily dropping power; this gives the infiltration team of Doormaker, Sombra, and Blue Fox a chance to get into the house before its auxiliary power kicks in. Azure Hawk has an opportunity to make an attack run on the mansion's defenses without reprisal before power comes back up. Rubber Bullette secures the river dock just to the east of the compound, the team's intended escape route. Sparrow Hawk, waking up after being shocked during the electrical sabotage, has a brief duel with Twilight, but decides to flee and join the rest of the team at the Zarkov compound, where she can see and hear the battle has begun. Red Condor and Catfight join Azure Hawk in strafing the house's defenses, but each of them finds their vehicles being chewed up by the ground turrets, forcing them to bail. Azure Hawk deploys his power armor on the ground from his dying aircraft. Red Condor continues to blast turrets and guard towers on the perimeter of the compound. Catfight's vehicle takes a hit, and it seems she is a goner.
Inside the house, Doormaker discovers Cassandra's location in the basement using clairvoyance; she creates a 'door' for Sombra and Blue Fox to the location, where they quickly dispatch the guards and begin examining the walk-in medical capsule in which Cass is kept. Blue Fox decides to go in to retrieve Cass... and finds shortly after that his feet are glued to the floor, and 'Cass' was just a mannequin covered in medical accessories. Guards pour into the basement to capture them.
Yuri Zarkov Zarkov's Revenge #267 "Planning" While visiting Dr. Simmons in jail, Azure Hawk, Rubber Bullette, and Red Condor get additional details on Dr. Simmons's work in Zarkov's home, and some of the internal features. Simmons repeatedly warns the team to take care in their approach, as Zarkov has been plotting his revenge for some time. Catfight begins planning the team's strategy on a direct assault at the Zarkov compound. Sombra obtains information from UNTIL captain Chris Suzuki about Zarkov, during a secretive meeting in a parkade; Suzuki points out that while UNTIL has no beef with Zarkov because he's technically a legitimate security contractor, if he has abducted Red Spider - an agent of UNTIL - then UNTIL will backstop the Adventurers against Zarkov. The UNTIL dossier sheds light on Zarkov's past as a KGB and then FSB spymaster; on a personal level, it indicates Zarkov is a widower with a daughter who lives in St. Petersburg, and that he is suffering from a rare genetic defect that may eventually, and suddenly, kill him.
Blue Fox tracks down info on Twilight's movements across Europe, as well as some info about Zarkov's company.
Adventurers begin separately making their way to Russia for the rescue.
Dr. Vanessa Simmons; Yuri Zarkov Zarkov's Revenge #266 "Implacable Foe" Azure Hawk tracks down Simmons again, who surprisingly, readily surrenders, seeming to prefer prison to some other consequence she doesn't name. The team, meanwhile, starts looking into suspects and motives for the kidnapping of Cassandra Olsen / Red Spider. Against the backdrop of these troubles, Olivia Ellison clinches the Democratic nomination for the Congressional Special Election.
Azure Hawk questions Simmons in jail, and after some convincing, she reveals that she is certain that it was former Russian spymaster Yuri Zarkov who arranged Cassandra's abduction from the Triad. Zarkov is an enemy the team has encountered before, whom Simmons warns wields far too much shadow power to be opposed.
Blue Fox suspects the Russian operative Twilight, whom the team encountered in Cretoa, may be the one who took Cassandra from the Triad.
Dr. Vanessa Simmons; Yuri Zarkov Zarkov's Revenge #265 "Bishop Takes Knight" Dr. Vanessa Simmons arranges the kidnapping of Steel Dragon to steal her powers for Cao Lu. In order to force Steel Dragon's compliance with the procedure, Simmons arranges to have Cassandra Olsen - who she knows is also Steel Dragon's team mate, Red Spider - kidnapped. Steel Dragon is set loose, with a message from Cao Lu: run, and never settle down. That is the revenge he wants against Dragon, for her having killed his son. It instead spurs a powerless Steel Dragon to return to Hong Kong and attempt to deal with Cao Lu. Azure Hawk and Rubber Bullette apprehend Dr. Simmons as she attempts to escape to Canada. She does seem strangely concerned with Cassandra's safety, and shares some info. The team lets Simmons get away, for now, though she is a fugitive with international warrants issued against her.
The team are rejoined by the Cretoan group of Catfight, Blue Fox, Sombra, and Sparrow Hawk. They attempt to track down and rescue Cassandra, but are too late: the Chinese Triad members who abducted her are all found, dead or dying, in the warehouse where they were keeping her. There are signs of a struggle, and Blue Fox's heightened senses detect that Cassandra was dragged out alive after the battle. The mystery of who has Cassandra Olsen deepens.
Dr. Vanessa Simmons; Triad members; unknown assailant Trouble Under Cretoa #264 "Lex Talionis" Princess Taina joins Catfight, Sombra, and Blue Fox as they go into the tunnels deep below the palace. They don't have time to look into the disappearance of Sparrow Hawk, with a war brewing with the sea people. A group of sea people swarm the band, and escort them to a tense parley with King Zotholky. Taina alone can treat with him, for they each know dialects of Greek. Zotholky will accept peace, but demands blood for blood. Taina prepares to surrender herself to the king's judgement, and die for the sake of peace, but Catfight makes an impassioned plea. Zotholky, done kindness by Sombra, relents - but says he still demands blood. He wants Cretoa to apprehend Twilight and turn her over to them. The heroes agree to these terms, and depart - though the Adventurers have misgivings about turning over an enemy for a certain execution.
King Zotholky; Fish People Bluebird for Congress #263 "Fixing the Race" After a spree of vandalism which saw all candidate signs except Olivia Ellison's smashed or knocked down, Red Spider suspects there's organization by gangsters. The next evening, gangsters try it again in a politically-active university campus neighborhood, and Azure Hawk, Night Star, and Doormaker manage to ambush the bad guys just after they set fire to the campaign office of Lester Brownlee. Upon their capture, Night Star interrogates one and learns that it was gangster Cosmo Liddell who put them up to it. Though they don't know which candidate, the thug reveals that Liddell has a horse in the race for Congress - someone he knows will favor his transportation interests. Azure Hawk ruminates on this confession, and decides to look into a connection between candidate Brownlee and Cosmo Liddell. He finds a genealogy website which confirms the two are actually cousins.
At a swanky evening fundraiser for Lester Brownlee, Azure Hawk arrives and manages to embarrass the candidate with audio recordings and details of his investigation into the framing of Olivia Ellison, and drops the bombshell that Lester is cousins with a known gangster. All of this is caught on camera and broadcast live by Action News, and Brownlee's bodyguards try to remove the candidate from the party - but he doesn't get past the lobby before police apprehend him. By morning, Brownlee's campaign is over when his mugshot appears in the media.
Cosmo Liddell; gangsters; Lester Brownlee Trouble Under Cretoa #262 "The Cavern Massacre" The fish people capture Fantasma, Blue Fox, and Sombra. It turns out they speak Old Cretoan, and Fantasma can treat with them. However, the fish people seem aggressive and ready for war, citing a pact which Cretoa has violated. Fantasma meets their aggression with aggression, and the parley devolves. The fish people envoy declares that war is inevitable and orders the slaying of the hostages: Adventurers and captured sailors. Fantasma throws a dagger that kills the envoy, spilling first blood. Catfight and Twilight, who had been watching from a tunnel exit high above, join the fray, as the Adventurers, with help from Fantasma, Twilight, and Twilight's drones, kill or maim dozens of fish people, and make their survivors retreat to nearby pools. Twilight frees her Russian sailors and says she is fleeing immediately, suggesting the Adventurers do so, too, before the fish people mount a counter-attack with greater numbers.
Sombra takes pity on wounded fish people desperately crawling back to the pools, and helps some reach safety; they name her, Kápoios, or 'Kind One,' and they do not retaliate against her. Catfight follows Sombra's example and helps, thinking it may be a small gesture that could avert war.
Topside, Catfight, Sombra, and Fantasma report on the happenings in the tunnels to Princess Taina, who rebukes them for not having found a peaceable solution. The princess dismisses a strangely thorny Fantasma, who maintains that she did what she thought was best, and seems to accuse the princess of ignorance regarding the pact. Sombra and Catfight deduce that the fish people are upset over the lack of feeding of the kraken; this guides the Princess to read an ancient transcription of a scroll which confirms a pact between Cretoans and the fish people, wherein the fish people would help trap the kraken - which was a menace to all peoples - in the tunnels beneath Cretoa, in exchange for the Cretoans standing guard and feeding it and its issue for as long as they lived below Cretoa, as the fish people still regarded the kraken ("the Overbeast") as holy.
Catfight suggested that, with Fantasma gone, only Princess Taina could go below and negotiate a peace. The princess agrees.
Fish People Trouble Under Cretoa #261 "Kraken Me Up" Sparrow Hawk goes on her own investigation, surveying sunken fishing boats around Cretoa based on a fisherman's indication of where the troubled waters are. She finds the boats, but no bodies. Then, she comes upon a beached submarine in a lagoon, near a waterfall. The submarine interior has Russian controls, has damaged electrical systems and is without power, and has apparently had some fighting inside, but there is no sign of its crew. Sparrow Hawk goes behind the waterfall and finds a passage leading into Cretoa's system of underground tunnels. But there, she is attacked by a mysterious drone, stunned, and captured by it. Elsewhere, Catfight battles the kraken, buying time for Blue Fox, Sombra, and Fantasma to escape. Catfight is caught and nearly devoured, but a trick shot from her wrist-mounted bolt projector pierces its radulla and gives her a chance to escape.
Blue Fox, Sombra, and Fantasma carry on down a tunnel. They locate a great chamber where the many missing fishers are bound to stalagmites using resin that the fish people generate from their hands. The fish people soon become aware of the heroes, and encircle them.
Catfight, going alone through the tunnels, is soon attacked by a drone, but destroys it. A Russian agent named Twilight decloaks near Catfight and says that the drone was merely a test. Twilight, who is familiar with Catfight by reputation, says that they should work together, as Twilight has come to rescue Russian sailors who were seized by fish people. Catfight agrees, but seems wary of Twilight.
Fish People Trouble Under Cretoa #260 "In Deep Places" An emissary from Cretoa finds Azure Hawk in Club Caprice and gives him a message from Cretoa. Princess Taina of Cretoa pleads with the team to send who they can to help with an ongoing situation that needs super people. Catfight, Sombra, Blue Fox, and Sparrow Hawk travel in Catfight's jet, and land in the palace at Zappatos, Cretoa. There, they meet with the princess, who outlines three grave issues that seem to have the same source: the theft of her crown, the sinking of fishing boats and the total disappearance of their crews, and the sabotage of their vitanium extractor. In all three instances, the mark of a many-handed sea beast is seen etched at crime scenes. The princess warns that her people - superstitious as they are and upset with the fast pace of change since a democratic government took over - will not brook this continue, and the loss of her ceremonial crown will be seen as an ill omen that could foment a counter-revolution.
Also, the princess indicates that her agent, Fantasma, had already been dispatched down into the extractor to investigate the sabotage, but has been missing for some time.
The team starts at the extractor, descending deep underground to where raw vitanium is harvested, and follow subterranean caverns until they reach a wide-open one with a pool at its bottom. There, Fantasma is bound up over the pool by a strange resin... and shortly after the team's arrival, the great and terrible kraken emerges from the pool and attacks!
The Kraken Bluebird for Congress #259 "The Lone Gunman" Night Star, Blue Fox, Azure Hawk, Sparrow Hawk, Sombra, and Night Star meet out of costume at Olivia Ellison's campaign office to discuss the disturbing development of the bluebird nailed to her office door. Olivia hears about Ms. Direction naming the ARGENT-linked Stroms as the ones behind Ms. Direction, but Olivia finds that odd; the evidence planted by Ms. Direction implicated ARGENT as the ones who allegedly gave Olivia an illegal cash injection. Why would ARGENT try to drag themselves down with Olivia? Azure Hawk vows to keep trying the Ms. Direction leads, and Sparrow Hawk starts looking into where the bluebird came from. Blue Fox is troubled when his 'uncle', long-time friend of his father Clayton Ewing, survives an apparent assassination attempt by quick-drawing and non-fatally shooting his attacker. Blue Fox warns Red Spider about the blue code, prompting Red Spider to visit the gunman, Michael Barton, in hospital. Sneaking past an assembly of police guards via air vents (who are soon dispersed by Blue Fox's father, retired police vet Mark McAllister), Red Spider speaks to a weakened Barton, and explains the precariousness of his situation to make him cooperative. Barton implicates T-Dog, alias of Terence Jameson, as the person who paid him to shoot at a car. Barton had no idea who his target was.
Despite Red's efforts to arrange better protection for Barton, he dies from a medication conflict later that night.
Michael Barton; T-Dog; Ms. Direction; ARGENT Bluebird for Congress #258 "Bluebird at the Door" Azure Hawk, Blue Fox, and Sombra get a message from Arcadio that he got word from Ms. Direction to pick her up. The trio, joined by Scarlet Shield, gets the playful trickster villainess backed into a corner. Ms. Direction cooperates to a degree, but then uses trickery to escape the heroes and try to lose them on a chase over rooftops, streets, and into the sewers, before they finally corner her again in the stock room of a convenience store. Ms. Direction implicates Bruce Strom as the person who hired her; Strom is the husband of candidate Savannah Strom, and together they own a transportation company which is a subsidiary of ARGENT. Ms. Direction says that ARGENT wants Olivia Ellison's campaign to fail so that Strom has a better chance to win the election, giving ARGENT a puppet in Congress. Ms. Direction pleads to be let go, noting she will die a snitch's death in prison if the team turns her in, to which the team seems to agree - but Azure Hawk plants a tracker on her.
The next morning, a live bluebird is found nailed to Olivia Ellison's campaign office door by its wing.
Ms. Direction; ARGENT Bluebird for Congress #257 "The Mechanic" Azure Hawk, Sombra, and Blue Fox follow AH's tracker to a warehouse in the river district, where a young mechanic is working on fixing up the damage AH did during his attempt to catch Getaway Flier last adventure. The mechanic is Arcadio Rando, a young man from New York City whom Sombra has helped before, but whom she apparently failed to dissuade from a life of crime. Arcadio pleads that he needs the money from Ms. Direction's heists to help his mom pay for her medical bills. The trio of heroes convince Arcadio that they will help him; he agrees to help deliver Ms. Direction to them. Elsewhere, Olivia (Bluebird) meets with her Republican rival Clayton Ewing, a career policeman. Ewing probes Olivia's reasons for entering the race, expresses his appreciation of her character, and then shares his suspicion that Congressman Duran was murdered. Ewing implores Olivia to share anything she may learn about who wanted Duran dead. Getaway Flier (aka Speedmaster) Blood Fortune Redux #256 "What Happens In Vegas..." The Adventurers head to sunny Las Vegas to help UNTIL agent Stiltz apprehend Blood Talon and Ms. Fortune who seem to be hiding in plain sight. Blue Fox, Catfight, Doormaker, Red Spider, and Sparrow Hawk do battle in a casino; Catfight discovers that her cousin, Ms. Fortune, was mind controlled, and may not be to blame for her actions. (More to come...) Ms. Fortune; Blood Talon; Black Skull Bluebird for Congress #255 "Sense of Direction" Blue Fox and Azure Hawk respond to reports of a break in at the DNC offices in Millennium City. Inside of the office high-rise, Blue Fox moves past unhelpful building security guards to enter the offices and confront the villain. Meanwhile, Azure Hawk spots the getaway vehicle - a hover car - hovering just outside of the broken windows of the office and leaps onto it. Blue Fox fights Ms. Direction to prevent her hooking up a file cabinet to a tow cable. Ms. Direction directs the hover car driver, Getaway Flier, to flee, while she leaps out the window and swings away. Getaway Flier tries a variety of tricks to shake Azure Hawk off of the vehicle, and succeeds... but not before Hawk places a tracker on the vehicle. The next day, the DNC does an audit of materials in the file cabinets to ensure everything is still accounted for, and finds a document previously unaccounted for which indicates Olivia Ellison has been taking illegal money from ARGENT! The team suspects these documents may have been planted. Ms. Direction; Getaway Flier Foxbat for President #254 "Heading Off a Museum Break-In" The day after Foxbat’s surprise announcement that he’s running for president, the team responds to a robbery in progress at the Millennium City Museum of Antiquities. In a basement storeroom they confront Scarlet Shield’s enemy, the Heckler, and his robot Minion along with a whiny, petulant nerd who tries hitting on Catfight before making four old-style, black-and-white movie gangsters appear out of nowhere. The nerd, Minion and the gangsters are easily dealt with while Sombra and Phaser chase the Heckler farther into the room as he searches for something. He finally finds what he’s looking for: an artifact tagged “The Scythe of Aratron”, only to have Sombra overpower him and take it away. Phaser and Sombra watch helplessly as, incredibly, the Heckler’s head separates itself from his body. It transforms into a skull with large diamonds embedded in its eye sockets and declares, "You may have thwarted my plan this time, but you will never truly defeat The Undead Skull!" before disappearing. Unbelievably, the Heckler’s headless body is still alive… The Heckler and Minion; The Projectionist; The Undead Skull Blood Talon Redux #253 "Enter the Domino Room" Catfight lets the Adventurers in on her family ties to Ms. Fortune; a gung-ho UNTIL agent named Jack Stiltz tips the team on a chance to scoop up Ms. Fortune and Blood Talon at the Domino Room, a supervillain hangout; the team disguises themselves as villains, and infiltrate; turns out that Blood Talon and Ms. Fortune are indentured to a mastermind named Black Skull; the team fails to capture Skull, but learns his next heist is at a casino in Las Vegas; the villain is after some kind of weapon, and the attack on the high school was part of that. Ms. Fortune; Blood Talon; Black Skull Blood Talon Redux #252 "Battle at the High School" The team is told of Bluebird's plan to run for Congress to discover who murdered the previous congressman; Catfight learns of a hostage-taking at Westside High School by Ms. Fortune and Blood Talon; the Adventurers face off against a hoard of robots protecting the school; Ms. Fortune shows she knows Catfight's secret identity; A savvy political candidate uses the damage to the school grounds to springboard his campaign with anti-meta human rhetoric; Blue Fox and Sombra's high school grad is pushed back a week. Ms. Fortune; Blood Talon Secrets of the Adventurers #251 "The Battle of Greenland, Part 2" The Tereraformer breaks free and defeats its Osirian captors nearest at hand. Its power depleted, it cannot just take off. The Adventurers spring into action to engage it in battle. Sparrow Hawk, injured during the attack on the stronghold, holds back and tries to help injured team mates off the battlefield. Phaser gets Hornett to help her start using portable generators to get the Osirian energy-depleting beam array back online while the rest of the team fights to keep the Terraformer near it. Doormaker is badly injured, but manages to use her own energy-dampening gun for a critical shot before going unconscious. Red Spider (Samantha) fails to sneak up on the Terraformer, having not accounted for Blue Fox's enhanced sensory abilities, and gets clobbered. At last, Sombra gets in close and uses a knife to pry the gem off of the Terraformer. In an instant, the Terraformer reverts to a dissheveled Blue Fox, and the aim flies through the air. Sombra and Blue Fox fight to grab it, both drawn to its nearly irresistable allure - but Scarlet Shield does resist, and puts a shield dome over it where it falls. Phaser powers up the energy-deplating beam array, and with help from Red, Hornett, and Catfight, the array is oriented so that the gem's depowering can be completed. The gem turns a lifeless grey color, and the pull it has over anyone who has touched it, ceases. Catfight smashes the gem, and then Hornett uses energy blasts to reduce its remnants to smithereens. The Terraformer Secrets of the Adventurers #250 "The Battle of Greenland, Part 1" Debut of Sparrow Hawk as an Adventurer. Red Spider (Samantha) indicates that, using the materials collected from the Grand Hall in the previous issue, she knows how the Order of Osiris will try to capture the Terraformer: their ancient studies noted that the Terraformer seemed drawn to objects of intense radioactivity, which it tries to neutralize as part of its terraforming protocol. Red has used geo satellites to confirm intermittent radiation blasts from a remote part of Greenland that happen with a regularity and intensity that could only be man-made. A team of Red Spider, Phaser, Sparrow Hawk, Scarlet Shield, Sombra, Doormaker, and Hornett fly to Greenland in an UNTIL transport, survey the modular compound that has been set up, and begin attacking the mercenaries. Hornett, Scarlet, and Sparrow Hawk make several runs from the air to distract and disable the defensive turrets. Doormaker uses a variety of novel attacks to take out mercenary defenders along the fortifications. Sombra sneaks into the base. Catfight also scales the wall and slips into the control room for the radioactive beacon. Disabling the beacon means turning off power to the whole base. Sombra finds herself in the base's central structure, where the Terraformer has already been captured and is being subjected to the Order of Osiris's energy-depleting beam - that is, until Catfight causes the power to go off. Then the Terraformer is free. Mercenaries; The Order of Osiris; the Terraformer Secrets of the Adventurers #249 "Enter the Inheritor" Debut of Phaser as an Adventurer. Using Mnemon's learnings from Sirus Blatt, Night Star and Red Spider (Samantha) draw out the Grand Hall of Osiris's guards, leaving an opening for Sombra, Phaser, and Catfight (as Skana, while she's being hunted as a vigilante for the attack on Blatt last issue) to enter the building. Catfight battles an Acolyte before going in. Scarlet Shield goes solo to try an attack from above, but is... cordially invited inside? There, she meets the head of the Order, the Inheritor, who trades questions with Scarlet about the gem. He reveals that the Order was indeed mistaken that the current Adventurers were the same as the old ones; he also shares that the ancient Order had centuries to study the gem, has passed down through the ages the means to safely contain its power. He shares that the Terraformer was battled by a vast army of ancient Egypt, and it succeeded in reclaiming the gem only at the cost of thousands of lives. Once Scarlet shares that the gem has been inadvertantly powered up, which brought forth the Terraformer, the Inheritor orders his fellow Osirians to draw their knives and slay her. A battle ensues. The Grand Hall is set to auto-destruct. Phaser manages to steal a few items from the Inheritor's study before the building caves in. Sombra also manages to steal some useful artifacts, such as the full text of Aaron Baron's autobiography. The Inheritor; The Order of Osiris Secrets of the Adventurers #248 "What's Black and Blue and Red All Over?" Catfight and Mnemon use guile, subterfuge, some brute force, and a little light memory manipulation to force Sirus Blatt, owner and editor of the Millennium City News. Mnemon views details of Blatt's encounters with the Order of Osiris, confirming that Blatt is a high-ranking member. Catfight leaves Blatt unconscious in his kitchen, but the security cams pick up Catfight and Mnemon leaving, which becomes the focus of a front page article in the next day's paper! Elsewhere, Red Spider (Samantha) finds the Terraformer high up in the city; she tries, but fails, to persuade it of the evil of its mission. Sirus Blatt; The Order of Osiris; the Terraformer Secrets of the Adventurers #247 "Battle for the Gem" Mnemon interviews Inferno and, through the former's memory-scanning power, discovers Inferno's real name, his past as a US army washout, his time as a mercenary, and his connection to the Order of Osiris. More than that, Mnemon discovers a connection to a newspaper owner in Millennium City who seems, from Inferno's memory, to be an Osirian. Elsewhere, the Adventurers arrive at Cassandra's home to find her entranced by the gem, and surrounded by swirling energies emitting from it. Blue Fox first tries to steal it; a battle ensues as all of the Adventurers feel some temptation to lay hands on it. Cassandra fights fiercely to maintain it. The gem skips off a portal which Doormaker makes. Sombra is wounded by Blue Fox, who at last lays hands on the gem, and transforms... into the Terraformer. Inferno; The Order of Osiris; the Terraformer Doormaker's story #246 "Dolph Lundgren" The Adventurers face a powerful extradimensional foe with a flat top haircut, a hole in his face, and who seeks parts of his daughters that were spread to the cosmos. A little more is learned about the origin of Doormaker's power. (Dolph Lundgren) Secrets of the Adventurers #245 "Campus Heroes" The Adventurers uncover more about Sir Thomas Walsingham in a 1960 memo to the Secret Intelligence Service, which leads them to search for more clues in Oxford, UK. Red Spider (Samantha), Scarlet Shield, Sombra, Catfight, Blue Fox, and Night Star scour the campus for info. They come upon an old tape reel of Walsingham's in the university archives, as well as a schematic by Aaron "Tank" Baron for a crude 1950s human memory-to-digital converter. Red Spider, Scarlet, and Star find a letter from 'Tank' in Walsingham's pipe that indicates the two made up. Elsewhere, Sombra, Blue Fox, and Catfight discover a hidden room with a large number of 60s-era magnetic tape drives, and an operator console. Upon placing the reel from the archives onto the first drive in the series, the system boots up. The team is greeted by a text-only digital collection of the memories of Sir Thomas Walsingham, whom they ask many questions about the Order of Osiris, the gem stone called the 'World Breaker' (which apparently grows less powerful if kept in the dark), and the Classic Adventurers' final mission in 1917. Meanwhile, in Millennium City, Cassandra, bearer of the 'world breaker', goes into a trance and stands by the window, bathed in sunlight... The Order of Osiris Secrets of the Adventurers #244 "Blazing Trail" Mnemon follows a lead from an ex-Osiris member with no memory that leads him to a medical specialist (Dr. Dickinson) who blanks his memory rather than be caught - but Mnemon is able to pull some memories before the mind is totally cleared. Steel Dragon follows a lead to small-time gangster Cosmo Liddell, and intimidates him into admitting he was strongarmed into providing fuel for Inferno. This enables Night Star, Scarlet Shield, Blue Fox, and Sombra confront Inferno when he turns up to refuel at Liddell's dockyard. Though determined to explode himself rather than be taken alive, a combination of Scarlet Shield's ... scarlet shield, Sombra's teleporting Inferno into the river, some well-placed shots to Inferno's jetpack by Night Star, and some up-close distractions by Blue Fox allow Inferno to be captured, alive. Underneath his helmet, Inferno is revealed to be horribly burned and scarred. Red Spider starts to show unusual behavior when it comes to defending the gem over which she now keeps. The gem also gives her flashes of memories she knows are not hers; she finds herself knowing things that she should not, attributing it to the memory of the gem. Cosmo Liddell; Inferno; Dr. Dickinson Secrets of the Adventurers #243 "Methuselah Jack" Jack Sullivan, AKA Jack Cunningham, AKA Eagle Eye, greets Red Spider, Meltdowner, Night Star, and Scarlet Shield at his retirement home north of Calgary. He instantly divines their purpose, and answers a few questions about the gem. He admits that he sent the flowers to the grave hoping it might trigger someone - anyone - finding him and claiming the gem. Jack knows that being the gem's keeper is what is enabling his long life, but he has grown weary of the gnawing effect it has on him, and the guilt he feels over Addison Markeson's death. 'Sister Savior' had over-extended her healing powers in saving Jack from a bullet wound, which left her in frail health to which she eventually succumbed, two years later. Jack implores the New Adventurers to claim the stone, and give him rest at last - he knows that once he loses it, his life will end. Scarlet Shield guesses correctly that he hid it in Markeson's headstone, which was left unbroken despite the disturbance of the ground before it. When the Adventurers return to the grave, an epic rock-paper-scissor game between Red Spider and Night Star ends in Red claiming the gem after Meltdowner slags the headstone. Jack senses the end once another bearer claims the gem, and he passes peacefully, and gratefully. Red Spider falls unconscious and remains so until after the team returns her home to Millennium City. Order of Osiris Secrets of the Adventurers #242 "A Grave Matter" The Adventurers keep finding clues. Sombra reads the journal of 'El Sombra' and learns that the old Adventurers strove to recover an ancient, powerful gem from the Order of Osiris - and they succeeded. Blue Fox obtains the sketchbook of 'Tank' from his descendants, which includes a letter he received from Mr. Adventure in the 1950s indicating their relationship became quite strained in their final years. Based on a reading of El Sombra's journal which indicates the gem was taken to Canada by Jack, Scarlet Shield, Red Spider, and Meltdowner travel to Calgary, Alberta, Canada to inspect the grave of Addison Markeson ('Sister Savior') and see if there was any significance to it or link to Jack; they find the grave has been disturbed in recent weeks, and a groundskeeper confirms that it was entirely dug up. Something the skeleton had been clutching was taken. But the team inquires into fresh flowers on the grave, and the groundskeeper finds a work order for delivery indicating a name - Jack Sullivan. Just then, Night Star - who has completed her own investigation with the help of some old underground contacts - arrives to the graveyard, and confirms that Jack Sullivan is the witness protection alias of Jack Cunningham ('Eagle Eye'). Despite his age of 118 Jack is still receiving a pension. Order of Osiris Secrets of the Adventurers #241 "Oh, Joy, I Suppose We're Going to Cleveland" Sombra does some internet research on El Sombra, a costumed vigilante from Mexico who was part of the Classic Adventurers. Using details found on the Osirian cellar wall, she deduces that El Sombra was really Carlos Batres, and that he has living descendants in Cleveland, OH. Red Spider offers to take Sombra on a road trip to there. They visit the home of Mrs. Hoya, the descendant, who recognizes the two heroes - after all, she is aware of her family history, and a Latina heroine named Sombra just one state over is hard for a descendant of El Sombra not to notice. This descendant says someone was recently heard rummaging in her attic at night, but while the would be burglar left it a mess, they stole nothing. Mrs. Hoya goes to a hiding spot in her house and brings back a small chest filled with her great-great-grandfather's personal effects, including his journal, which she lends to Sombra in hopes it will help. Order of Osiris Secrets of the Adventurers #240 "Cellar Door" Similarities in things Inferno had said cause Red Spider to urge the team to do another check of an address she had first inspected months ago, while trying to help Night Star track down the Order of Osiris. They visit a ruined meeting hall supposedly belonging to the Osirians in the battered remnants of old Detroit. This time, with Screech Owl's sonics, a secret door is found. Doormaker helps identify a switch. A hidden door opens out of a brick wall, and leads down a stairway into a cellar, where the Adventurers find a number of pages from newspapers, books, diaries, as well as photographs, of a group of early 20th century heroes called, The (Classic) Adventurers. This curious discovery leads to much debate. But, as Blue Fox finds evidence that Inferno has used the cellar hideout recently, Red Spider bugs the place, and Doormaker rapidly gets them out. The team works together on assembling a historical narrative from the various sources which they imaged from the hideout wall; each hero decides to track down answers in their own way. Inferno Secrets of the Adventurers #239 "Inferno" The Adventurers respond to different fire crimes. Red Spider responds to a Westside gas station blaze, and finds a newspaper clipping of Sombra and Winter. Scarlet Shield, Red Spider, and Sombra help get control of an autonomous car whose occupants are helpless to stop its reckless speeding around the city; Scarlet Shield finds a clipped newspaper article about herself in the trunk of the car, before the car consumes itself in flames. Blitz responds to a fuel barge fire on the river, and finds a newspaper clipping of Catfight in an electrical panel. Red Spider, Blue Fox, and Sombra respond to a fiery attack on a strip of buildings in the inner city, and encounter a flyer whose armor has potent flame-throwers. This flyer calls himself Inferno, and even when he has Red Spider and Blue Fox cornered, doesn't fry them: he makes a demand of them that he wants the Adventurers secrets, tells them they will have time to comply, and then flies away. He leaves behind a newspaper clipping of Doormaker, confirming that he is the one who has been behind the other fires. Inferno Police Story #238 "Part 2" The police continue to get assists from the Adventurers, running into Blue Fox who's wrestling with a robot. They reach a higher floor which is on fire, and get assists from Catfight and Blitz in saving people who are trapped. Soon, it becomes clear that this whole thing can only stop when the source of the problem, Proto, is defeated. The Adventurers assemble at the penthouse, along with the two officers who remain in place up to this point: Leeds, and Ernst. Proto is a patient of Dr. Posner's; a war veteran who received cybernetic prostheses but became obsessed with improving himself through additional, unnecessary cybernetics. Dr. Posner's colleague, robotics expert Dr. Notley, is barricaded in the penthouse panic room; if Proto can get her, he can make her improve upon his robotic systems. All of the robots swarming the buildings are Notley's, but corrupted by Proto. The Adventurers do battle. During the battle, Officer Ernst gives his life in saving Cst. Leeds from Proto's energy cannon. Proto realizes defeat is at hand, and sends the remaining robots at the Adventurers to cover his escape. Ernst is given a police funeral with full honors. Proto Police Story #237 "Part 1" Four police officers - Corporal Leeds, and her subordinates, Officers Ernst, van Vliet, and Sindhu - answer an emergency call about a fire at a high rise apartment block. Upon arriving, they are attacked by flying robots that are swarming the building, nearly destroying the car which Sindhu and van Vliet are in - except for an assist by Blue Fox! The building is smoldering at different levels, with robots swarming in and out of it. The officers move in and, from outside, see that a number of would-be evacuees are being held hostage by robots in the lobby. While the officers fire on the robots, Sombra and Doormaker use their abilities to quietly get hostages out to safety across the street. The police advance to the main floor elevators, where a badly injured man, Dr. Posner stumbles out from the express elevator to the penthouse. He indicates it's all his fault, and names Proto as the bad guy. Sombra takes Dr. Posner to the hospital. Wanting to avoid a robot ambush, the police avoid the elevators and take the stairs, instead. Proto Amalgamation #236 "Team Effort" The team completes their preparations for a battle against Amalgam. Red Spider wields Night Star's EMP guns, as Night Star is called away on another matter. Doormaker has completed her gravity guns, but seems to be sustaining physical injuries for accessing whatever it is that is driving her ability to invent. Doormaker also warns Red Spider and Blue Fox that things she invents using that unknown power, tend to self-destruct. The team meets Overthinker and enters Amalgam's base. The team is split up by attacking robots; these are handled by Red Spider and Overthinker. Scarlet Shield engages Amalgam. Blue Fox and Blitz use the gravity guns to subdue the gynoid. Rather than be taken, Amalgam prepares her base for self-destruction. The team escapes the inferno. Afterward, the team honors its bargain with Overthinker, allowing him to leave. Amalgam Amalgamation #235 "Drawing Board" Red Spider (Cass) encourages the Adventurers to start finding possible ways to stop Amalgam. Night Star investigates EMP weaponry, while Doormaker, influenced by some other-wordly mad science, starts working on gravity guns. Team members encounter Amalgam impersonating Scarlet Shield in the Club Caprice, but are unable to capture her. Amalgam Amalgamation #234 "Free at Last" Just the Adventurers are preparing to enact their plan to defeat Overthinker and force him to return Cass to her body, Overthinker summons the team to Cassandra's home. Fox, Scarlet Shield, Blue Fox, Catfight, Blitz, and Red Spider (Samantha) turn up. Overthinker declares that he needs their help: a Mechanon-controlled, power-adaptive android attacked the base in which Overthinker was keeping his old brain, which is the vessel carrying Cassandra's consciousness. Overthinker successfully retrieved the brain, but he fears he will be unable to hold off Mechanon without help. In exchange, he pledges to return Cass to her body after the threat passes - but the team is incredibly wary. Fox proposes that Cass be returned so that the team has one more person to help them in the fight against Mechanon. Overthinker is persuaded, and bids everyone leave while he prepares the swap. Afterward, Cass wakes up at home and has a tense verbal exchange with Overthinker for what he did to her. Overthinker apologizes and indicates that he intends no further harm, and he is grateful for the time to be in a living body again, but now he needs her help. Cass suits up as Red Spider, and goes seeking her team mates for an update - free at last. The Overthinker Plant Futures #233 "Miasma Theory" With beleaguered police and medical services reaching their limit as the plant pathogen spreads and mutates the general population, the Adventurers fight mutant plants on multiple fronts. Catfight and Screech Owl, with a small assist from Night Star, manage to subdue a mutant in Millennium City's Westside borough, and give it the Overthinker's serum. Elsewhere, a hero named Blue Fox is joined by newly-minted Adventurer Blitz in subduing a mutant plant in an above-ground park plaza downtown; they, too, successfully use the serum to revert it to human. Blue Fox joins the Adventurers. As the emergency starts to get under control, Red Spider, Fox, and others begin to conspire against the Overthinker. Sombra tries to track the Overthinker to one of his bases, but Overthinker is aware of her presence, and bids her leave. The Overthinker Plant Futures #232 "Mind Game" Sombra and the other Red Spider (Samantha Olsen) go to check on Cass at home. There, Cass drugs them and takes them to a hiding place in a junk yard, binding the two heroes with the same vaporizing cuffs that she had used to hold Sarah. Sarah, for her part, has figured out how to remove the outer casing of her cuffs and disables the circuit that would cause her to be vaporized, then effects her escape. Sombra and Sam-Spider have to decide which of the two should escape. Sam indicates that she can use her super strength to break her own hand and slide it through, as long as Sombra's free hand replaces Sam's in the cuff. Sam crawls out of the holding space and looks for help. Soon, Sarah and Sam meet, compare stories, and go back to try to rescue Sombra, but it's too late - she is not found in the same hiding spot. They rally the team to confront Red Spider at the team's headquarters. There, they learn a horrible truth: Cass's mind was swapped with that of the Overthinker some weeks ago. Cassandra's mind is in the Overthinker's brain, sedated and held at an undisclosed location. While Overthinker has no intention of giving up the body of Red Spider, considering her powers and relative wealth, he intends to continue working for the cause of good. He stays the Adventurers' by revealing that he has a working vaccine, and if they want to prevent a plant mutation epidemic, they need to work with him. The team reluctantly agrees. The Overthinker Plant Futures #231 "Spore Problems" Days after the incident at the exhibit, Sarah (Night Star), paying a social call, is surprised to find that Cassandra (Red Spider) still has the sample of vitanium that was entrusted to her, in her possession. When Night Star tries to insist that Red Spider return it to the university immediately, Red Spider at once agrees - but it is a feint! Cass attacks Sarah at unawares, and beats her unconscious. When Sarah comes to, she is in an unfamiliar dwelling, bound to a support column in cuffs with a vaporizing charge set to go off in the event Sarah breaks the cuffs or somehow gets too distant from a proximity sensor. Cass taking a blood sample and indicating that she wants to investigate if Night Star has any undisclosed meta-human capabilities. A day or so later, Cass indicates that she has found a strange irregularity in Sarah's blood, and is working on a treatment. Sarah, for her part, is furious to be held captive and keeps working to secure her freedom. Later, Cass briefs the Adventurers at the headquarters that she has identified a mutagenic pathogen present in the blood of herself and Sarah, and probably is present in anybody who was at the exhibit the day of the protester occupation. The team is unaware that Sarah is being held against her will, and they willingly give over blood samples to Cass when she asks for them in the interest of her serum research. It strikes some of the heroes as odd that Cass, a performing artist, suddenly displays expertise in the development of medical treatment. Red Spider? Plant Futures #230 "Chow Time" Night Star responds when the university's exhibit building is besieged. Many of the Adventurers, even out of costume, do their best to battle the protesters. Just as the situation is getting under control, a protester who has stolen a cannister of the mutagen in the instant evolution exhibit trips, and gets mutagen all over one of the venus fly traps which has been engineered to break down garbage. The team battles the rapidly evolving beast: nearly every trick at their disposal, including some impressive methods employed by newcomer Doormaker, is ineffective and only causes the creature to rapidly adapt for its own survival. Finally, when Eva (Catfight) grabs one of the gourds engineered to contain energy-rich fuel and tosses it in the fly trap's mouth, giving Night Star the means to explode it. The creature's final evolution is to develop procreative spores containing the mutagen, which spread through the air unseen by those in the hall... Meanwhile, Red Spider arrives, and is entrusted a sample of vitanium which a protester tried to steal from the exhibit. Protesters; Mutant Fly-trap Plant Futures #229 "Prometheus's Error" The talk of the town is an astounding exhibit being put on by Millennium City University's Faculty of Science: Plant Futures. Grant-funded genetic engineering projects have yielded some ways that plants may some day be modified in some incredible ways to benefit humanity. Sombra, Scarlet Shield, Catfight, and newcomer's Blitz and Doormaker each end up visiting the exhibit as their secret identities. The subject matter is incredible: plants that can break down many kinds of garbage, or create energy-rich fuels, or use instant-evolution to develop previously unknown ways to survive hostile environments. The exhibit is not without controversy, however, and on the day that the Adventurers happen to be present, a loud protest outside the exhibit hall boils over, storms the building, occupies it. Some protesters are merely undergrads caught up in the moment, but others seem like seasoned 'professional' protesters. The Adventurers inside either duck for cover, or try to help the beleaguered campus security fight its losing battle for control. Angry Protesters Fortune Days #228 "Fortune Days, Part 2" Beginning her search into the criminal power-couple of Blood Talon and Ms. Fortune, Catfight discovers the old HQ of Talon's now-dead weapons research compan, which was found to be a front for his own personal endeavors into illegal power armor manufacture. Catfight, along with Red Spider, Night Star, and Sombra, searches throughout the dusty old warehouse / low rent office building to find little else besides an old booby trap talon left for the police. The entire building is torched in a vulgar display of thermal charges. The investigation was not a futile one, as Sombra discovers an old metal flip-lighter with an inscription addressed to Talon from an old enemy... Blood Talon & Unknown Mentalist Fortune Days #227 "Fortune Days, Part 1" It has been over a month since the Adventurers rescued Night Star in Russia, and matters at home have settled down considerably for the crime fighters. Needing to get out of the house, Catfight decides to go on a brief patrol through Westside. But near the end, she came across a money loan business that had clearly been hit hard by what looks like a seasoned team of professional thieves, as no alarm had been triggered, nor authorities notified. Red Spider and Night Star help in the investigation, and it is discovered that a lone criminal couple is responsible for the discrete smash-and-grab which killed several employees in the business. One-time minor Adventurers villain Blood talon and his unnamed female mentalist cohort are seen on the store's closed-circuit video recording; the woman was the sole killer between the power duo. The Adventurers pass the matter on to the police, and copies of the surveillance tape from were taken for further study. Blood Talon & Unknown Mentalist A Rescue in Russia #226 "A Rescue in Russia, Part 3" The ISSA machine releases Night Star from the stasis sell. She emerges somewhat weakened, but able to stand in short order. Red Spider and Catfight head to the basement via elevator; there is a ramp leading up from the basement to the garage, for ease of stocking the house. Catfight chooses an armored personnel carrier, and fires it up. The heroes from within the house pile into the APC, while Red Spider jumps in last after opening the garage door. Outside, Scarlet Shield goes on the attack and takes out the second of two aerial drones. Security guards receive conflicting orders due to the forest fire, the aerial attack, and the escaping APC tearing out of the garage. Catfight hits the brakes, and Black Bird uses the gun on top of the APC to lay down cover fire while Screech Owl and Scarlet Shield cross Zarkov's lawn to get aboard. The team blasts down the service road in the APC. Stinger completes the motorboat repairs, and then joins Fox in dealing with a security response sent to check out security station and the boat house. After that, the rest of the team reaches the boat house in the APC, with Catfight hitting the brakes to turn the vehicle around and have its back hatch facing the boat house. Meltdowner and Stinger cover the team's escape down the river by disabling Zarkov's security patrol boats, and the team makes a break for the coast! Once they embark onto their waiting yacht, Stinger sinks their stolen motorboat. The yacht speeds west into the night with all of the rescuers, plus Night Star, safe and sound! Yuri Zarkov A Rescue in Russia #225 "A Rescue in Russia, Part 2" Inside Zarkov's basement, Fantasma knocks out two of Zarkov's people in a large storage area, and finds the ISSA machine there; she begins to power it up. In the boat house, Stinger finds the perfect getaway speedboat for the team, but one of its motors has been stripped for repairs; he begins work on completing repairs and assembling the motor. Sombra is first to locate the 'statue' of Night Star, in Zarkov's library upstairs. Downstairs, Catfight finds a James Bond wannabe, who in truth is just a mid-level British diplomatic officer, who wants to have a romp with her in Zarkov's own bedroom. She uses him as cover to get upstairs, but when she observes Red Spider passing through a secured door (with Fox's remote help), Catfight knocks out her 'spy' friend, and quickly runs to the door, and find it opens for her, too. Inside the door, a narrow corridor leads to the library, where Red Spider has just found Sombra and Black Bird hiding. Just then, Screech Owl, under the guise of a drunken party guest, uses two security guards to get her close to the RF jamming room; dispatching of one guard who thought he was going to get a quickie in the bathroom nearby, she makes her way to the RF jamming control room and shuts it down. The team begins to communicate. It becomes clear that they have two challenges that weren't part of the plan: getting rid of the last remaining aerial drone, and getting someone to the garage to grab a vehicle. Sombra teleports Night Star to the ISSA machine; Fantasma begins the process to free Night Star. Red Spider asks Meltdowner to start a forest fire near the river to divert attention as the rescue enters the escape phase. Outside, a shift rotation discovers the security station which had been taken over by Screech Owl, is occupied by a bound and gagged guard. The alarm is raised. Yuri Zarkov A Rescue in Russia #224 "A Rescue in Russia, Part 1" The Adventurers begin infiltrating the expansive property of Yuri Zarkov, while in flashbacks, Red Spider goes over the plan with the team. Stinger uses a submersible armor to reach Zarkov's river docks and boat launch along the Bzipi River, while Fox and Screech Owl use a motorboat to get near enough to the property to begin their mission: gaining control of Zarkov's small security outposts along the service road from his mansion to the boat launch. Meanwhile, Sombra teleports herself and Fantasma into the house, which is full of hundreds of party guests; Sombra remains invisible and scours the residence for Night Star, while Fantasma heads downstairs and tries to locate the ISSA machine, which can free Night Star from her stasis shell. Catfight and Red Spider, disguised as actors as part of a Cretoan theatre troupe hired to put on a special performance of Agamemnon at Zarkov's outdoor amphitheater, the two are able to slip into the party unnoticed. Scarlet Shield flies to the north of Zarkov's property, and uses timing, guile, and her powers to eliminate a hazard to the team's escape: one of two aerial drones flying low around the mansion. Blackbird gets into the party wearing a tuxedo. Fox gains control of the house's security systems such as the electronic door locks and cameras watching them, but Screech Owl realizes that Ordnance X, whose job it was to get on site and secure a land vehicle for the team's escape to the river dock, has failed; worse, Screech Owl realizes, as others do, that there is RF frequency jamming preventing the team from communicating. She takes it upon herself to get into Zarkov's mansion and disable the RF jamming before the whole rescue and escape ends in disaster. Yuri Zarkov
The team also has story arc pages which are used to develop, track, and the maintain a record of major events.
- Mystery of the Missing Plane (Adventurers)
- The Anti-Adventurers (Adventurers)
- Faces of the Spider (Adventurers)
- Operation Disassemble (Adventurers)
- A Royal Adventure (Adventurers)
- Police Story (Adventurers)
- Secrets of the Adventurers (Adventurers)
- Bluebird for Congress (Adventurers)
- Into the Undersea (Adventurers)
- The Season of Xagrim (Adventurers)
Adventurers in the Media
Sometimes the Adventurers make the news! ((Literally))

March 21, 2015 (Corresponds to Adventurers #65)

March 29, 2015 (Corresponds to Adventurers #69)

April 11, 2015 (Corresponds to Adventurers #70)

September 13, 2016 (Corresponds to Adventurers #138)
September 21, 2016 (Corresponds to Adventurers #139)
September 23, 2016 (Corresponds to Adventurers #139)
December 10, 2016 (Corresponds to Adventurers #149)

December 21, 2016 (Corresponds to Adventurers #152-#154)

August 13, 2017
Sept 12, 2017

April 16, 2019
September 15, 2019 (Corresponds to Adventurers #270-#275)
December 30, 2021 (Corresponds to Adventurers #352-#353)
Joining the Adventurers
7 APRIL 2024: The Adventurers has a roster about as large as it needs to be, and are not seeking new members. Recruits seeking to join MUST: 1) have a character who matches the theme, 2) Be well-known to SG members who can vouch for their playstyle, 3) Demonstrate that they have more than just a passing interest in roleplay, Champions Online, and our SG.
Reasons to Join
Adventurers share:
- A passion for appreciating & participating in superhero stories
- Superhero RP with a group who makes your character development feel important and memorable.
- Friendships among quality RPers
- An environment of mutual respect
- A chance to take on meaningful leadership roles on the team
- Costume unlocks and gear donated between members
- Lively OOC chat channels (Adventurers_OOC, Adventurers_Spoilers - members only)
- An amazing Discord community (members only)
Adventurers Theme
We're a group of street-level, low-powered, costumed heroes. A lot of us successfully fight crime solo, but we need the help of other heroes when a big threat emerges.
The following is a guideline for the kinds of IC qualities we're looking for in the green column (left). The red column (right) has traits that stray away from the theme.
Desired Traits Less Desirable Traits True identity is carefully concealed. Identity is public, or doesn’t care. Street level, local, and/or low-key. Global / galactic fame. From this universe and/or time. Is artificially created, an alien, or a creature. Science-based powers (ex. mutation, experimentation, tech). Magical or mystical powers. Reasonably original take (inspiration is OK!). Uncomfortably similar to other existing IP. Has code about avoiding needless harm or destruction. Doesn't worry about causing collateral damage. Lawful (or at least, upholds the spirit of the law). Unlawful / Chaotic / Homicidal Power level is suitable for a crime-fighting group. Powers are suitable for taking on armies or world-breaking threats Has well-defined traits, including weaknesses. Is perfect, invulnerable, and/or just plain bland. Character has a positive attitude; reserves strong language. Character is excessively profane, crude, or negative. Feels fun to be around, promotes interesting & positive interactions. Notably polarizing or excessively negative. Recruitment FAQ
My character has traits in the 'red' column in the chart above - would I be allowed to join?
Maybe. It depends on a couple of things: how big of a departure is it? Is there anything that helps mitigate it (i.e. with magic, what limitations have you put on?)?What time zone are you in?
Most of us are in North America. We're most active between 6PM - 11PM server time.How can I get to know the team members better before applying?
Look for us in public social zones. If you don't see us there, consider asking for an invite to our global channel Adventurers_4ALL and you can talk to us OOC there, maybe try to get something going. Please take the initiative if you want us to notice you and consider you for membership.How often do you do RP sessions?
Usually 2-4 nights of the week, and often these are one-off sessions that are totally optional. With the squad system we started in 2022, it really depends on your squad!I applied to join, and then didn't hear anything. What's going on?
First feel free to check with @historiphile about this if it has been more than a week. Typically if we like a character you want to join with, you're going to hear from us immediately. If you apply with a character who has clear departures from the theme, we might just decline that application and move on. Sometimes we reply to say why it won't work with us. Feel free to try again with a character who is a better match, if you want.Is magic banned in the Adventurers?
Sort of a soft 'No'. It's good practice in RP for any character - magic or not - to have well-defined powers and limitations. The Adventurers heroes regard magic (and its practitioners) as something exotic, mysterious, and maybe not that commonplace from their point of view.Can I have characters in other RP SGs while I'm in the Adventurers?
Yes. Many of our players have done so.About the SG theme. Why don't you want my type of character in it?
If you want a different RP experience than what we do, we truly hope you find it! Maybe start that RP group yourself, build it up, and seek people looking for the same thing. That is how Adventurers began.Who runs scenarios for the Adventurers?
Members do! This is a safe and supportive group for those who want to run superhero scenarios. Ask for more info. Sometimes we allow non-SG guest villains.I have a well-developed lore for my character. Will you make use of it?
As long as it seems not to conflict with anything else we have going, and seems beneficial to RP with... then sure! Beware: whatever you run for us, make sure we can all play in it. We have had instances of people creating a story and characters ostensibly for RP, but it becoming clear that they just wanted us to be a passive audience for their creations. Such pursuits may be better as solo fiction.Where do the Adventurers stand in relation to various factions from the Hero System PnP role playing game? What if my character would see it different? We started a glossary that addresses that very thing. Where there are any uncertainties in interpreting lore, it is up to the group leader (@historiphile) to referee. Your character can still have differing opinions, even if those opinions contradict what has been decided as narrative facts by the group leader, but those would be just that character's opinions. (i.e. your character can despise UNTIL and think they're a fascist group, but it has been decided narratively that in Adventurers stories, they are actually a force for good).
Do I have to be effective with English to join the Adventurers?
Yes. All of our communication is done in written English.Is profanity &#$*ing ok, or what?
Save powerful language for occasions when it has full effect. Speaking as a generality, most SG members seem to find edginess tiresome and overrated.My preferred RP is all about chaos / interpersonal drama / internal conflict. Are you going to let me be who I am?
There is a team culture of mutual friendship and support, IC and OOC. We fight villains, not each other. Many of us believe that has contributed to our group's longevity. If that idea makes you uncomfortable, please steer clear of us.My character is the sort who will definitely rub people the wrong way, say mean things, be a total self-centered ass. It's just my character. You guys are real roleplayers, though, right? You can handle the difference between real and make-belief??
For one, it's against our theme (see: polarizing & excessively negative). For another, we believe that even things done in character are choices the player makes and is responsible for, and not at all the fault of others when they react poorly to them (particularly when done with no narrative framing to make sure the other person knows it's just an act). So while we are not interested in recruiting such a character, for nothing, may we direct you to this Reddit thread for some advice on how to do that kind of roleplay without alienating other roleplayers?Recruitment
The following are guidelines for how we usually go about recruiting. But we reserve the right to change how we recruit at any time.
Before Requesting
We value relationship about as much as we value adherence to theme. If you have never RP'd with us and request to join us, it may take longer, or might not happen at all. Start trying to get to know us before. Ask to join our Adventurers_4ALL channel as a way to reach us.
Step 1 - Request to Join
- Start by sending an in-game mail to @historiphile expressing interest, and maybe some detail on the following:
- Powers
- Traits (ie, Strengths/weaknesses)
- A brief background on your character
- Anything else you think is worth knowing
- Time availability to RP (time zone, etc.)
Step 2 - Assessment
We will talk internally about what we think about you based on the details you submitted in Step 1, and the reputation you have. If we like what we're hearing and/or think it's something we need, we will reach out.
Step 3 - Combat RP Trial
If you get to this stage, you're doing well!
The combat RP trial has us present an RP villain. Your character will come across them in the world and demonstrate his or her abilities while trying to stop the villain. At some point, Adventurers heroes will join you in trying to defeat the bad guy!
We learn a lot about how someone RPs from this activity.
Once the combat RP trial is complete, witnessing Adventurers will discuss. If they like what they saw, then membership may be offered.


